Customizing Brushes
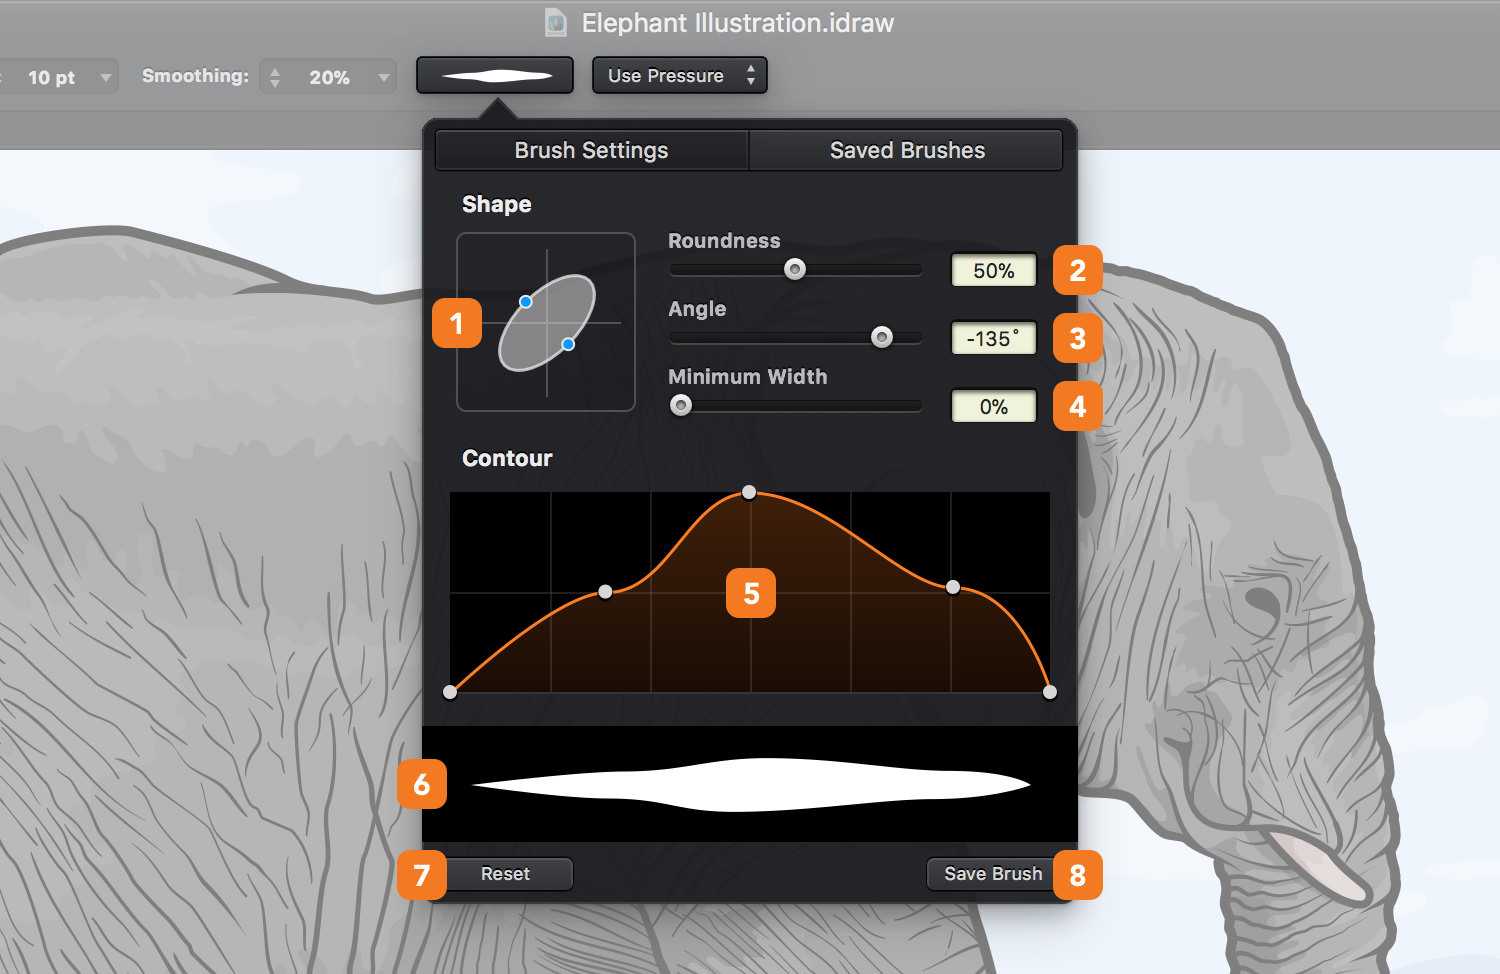
Clicking the brush preview button from the Tool Options bar will open the Brush Settings pane. The drop-down menu next to the brush preview button gives you the possibility to enable or disable the Pressure Sensitive feature.
-
Brush Editor - you can use the Brush Editor to edit and customize brushes. Edit a brush manually by dragging the blue circular handles to change its angle and roundness, or edit the brush numerically by inputting values into the brush parameter fields.
-
Roundness - this setting determines the roundness of the brush. Higher values create a rounder brush, while lower values create a flatter brush.
-
Angle - the brush angle refers to the angle of rotation of the brush. 0˚ will create a horizontal brush, 90˚ will create a vertical brush.
-
Minimum Width - the minimum width refers to the minimum width of the brush according to the brush width. A Minimum Width set to 50% will make sure that the brush size for your path will not go below 50% of the pre-set brush width. The brush width on an existing path can be easily edited using the Stroke pane from the Appearance panel.
-
Contour - Using the white draggable handles that make up the orange path you can create complex brushes that simulate pressure sensitivity.
Simply double-click the orange path to add new draggable handles or double-click existing draggable handles to easily remove them.
Placing a handle to the top of the frame brings the brush width to 100% while placing it at the bottom of the frame lowers the width to the Minimum Width percentage.
-
Brush Preview - a simple preview of your new brush based on the introduced properties.
-
Reset - Resets the brush properties from the Contour frame.
- Save Brush - quickly save the existing brush in the top of the Saved Brushes pane.
Brush pane
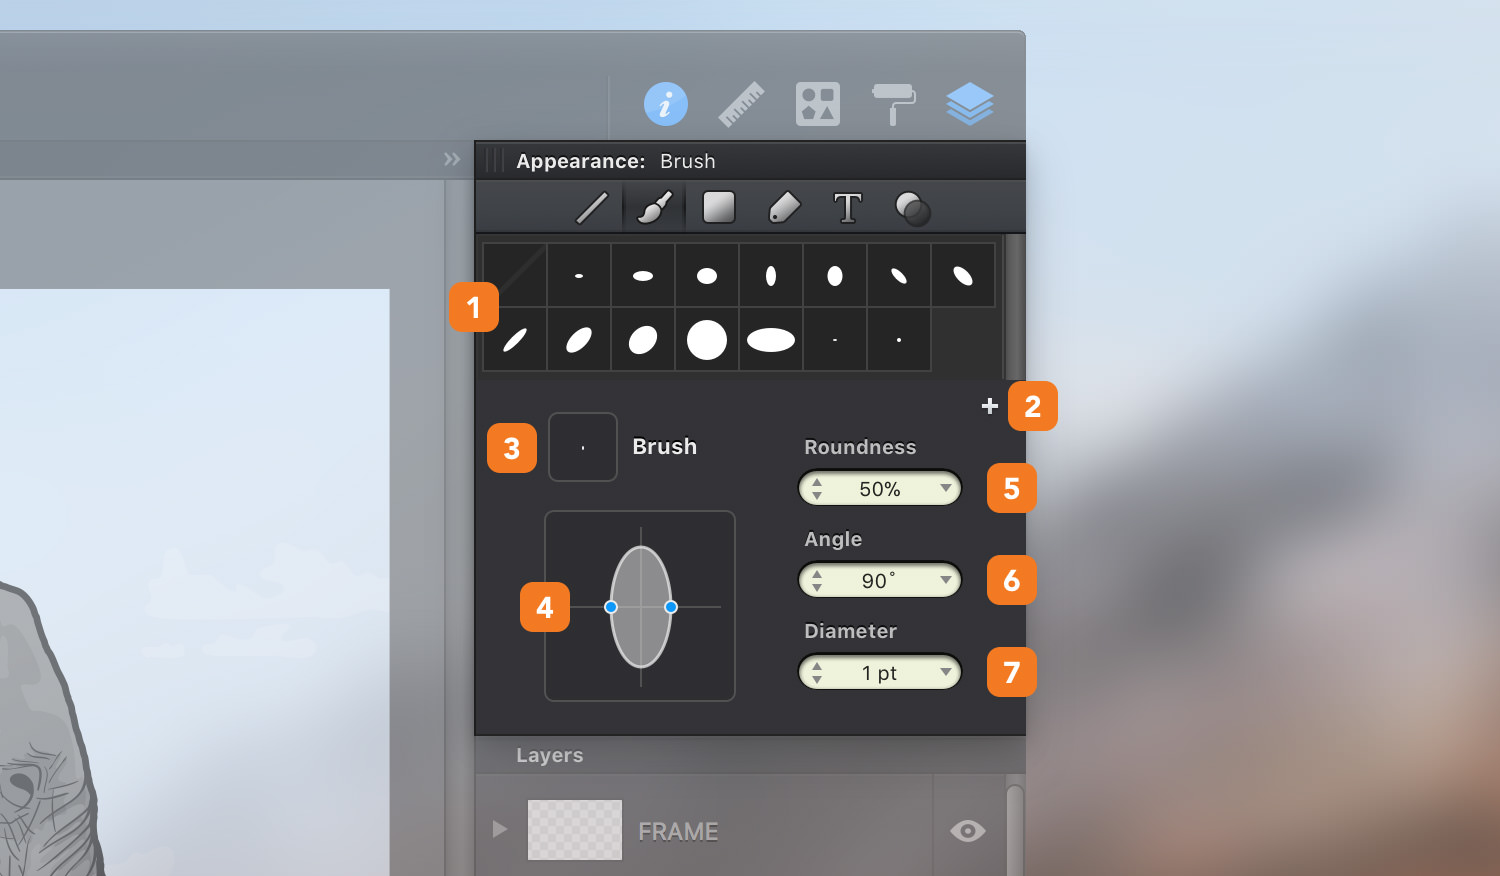
For more elementary brushes you can use the Brush pane from the Appearance panel. It comes with the same customization options from the Brush Settings pane, excluding the pressure sensitivity settings.
You can create or choose the brush to use when drawing with the Brush tool, or you can apply a calligraphic brush to any object.
-
Saved Brushes - Select one of the saved brushes by simply clicking on it. If objects are selected, the chosen brush will be applied to those object’s strokes.
-
Add Customized Brush - Click the add button to add a customized brush to the Saved Brushes list. To remove a brush from the list, right-click on it and choose Remove Brush from the context menu.
-
Brush Preview - Small preview of the currently chosen brush.
-
Brush Editor - You can use the Brush Editor to edit and customize brushes. Edit a brush manually by dragging the blue circular handles to change its angle and roundness, or edit the brush numerically by inputting values into the brush parameter fields.
-
Roundness - This setting determines the roundness of the brush. Higher values create a rounder brush, while lower values create a flatter brush.
-
Angle - The brush angle refers to the angle of rotation of the brush. 0˚ will create a horizontal brush, 90˚ will create a vertical brush.
- Diameter - The elliptical diameter of the brush. The thickness of a stroke will be determined by the stroke’s line weight and the brush diameter.
Next: Managing Brushes >