Create a Slime Effect with Brushes
In the following tutorial you will learn how to create a slime text effect using Graphic's tools and effects, particularly the Brush Tool and pressure-sensitive brush strokes.
Graphic can be used together with any Mac-compatible drawing tablet to draw beautiful pressure-sensitive brush strokes. If no graphic tablet is available, Graphic can also take advantage of Apple’s pressure-sensitive trackpads.
Step 1
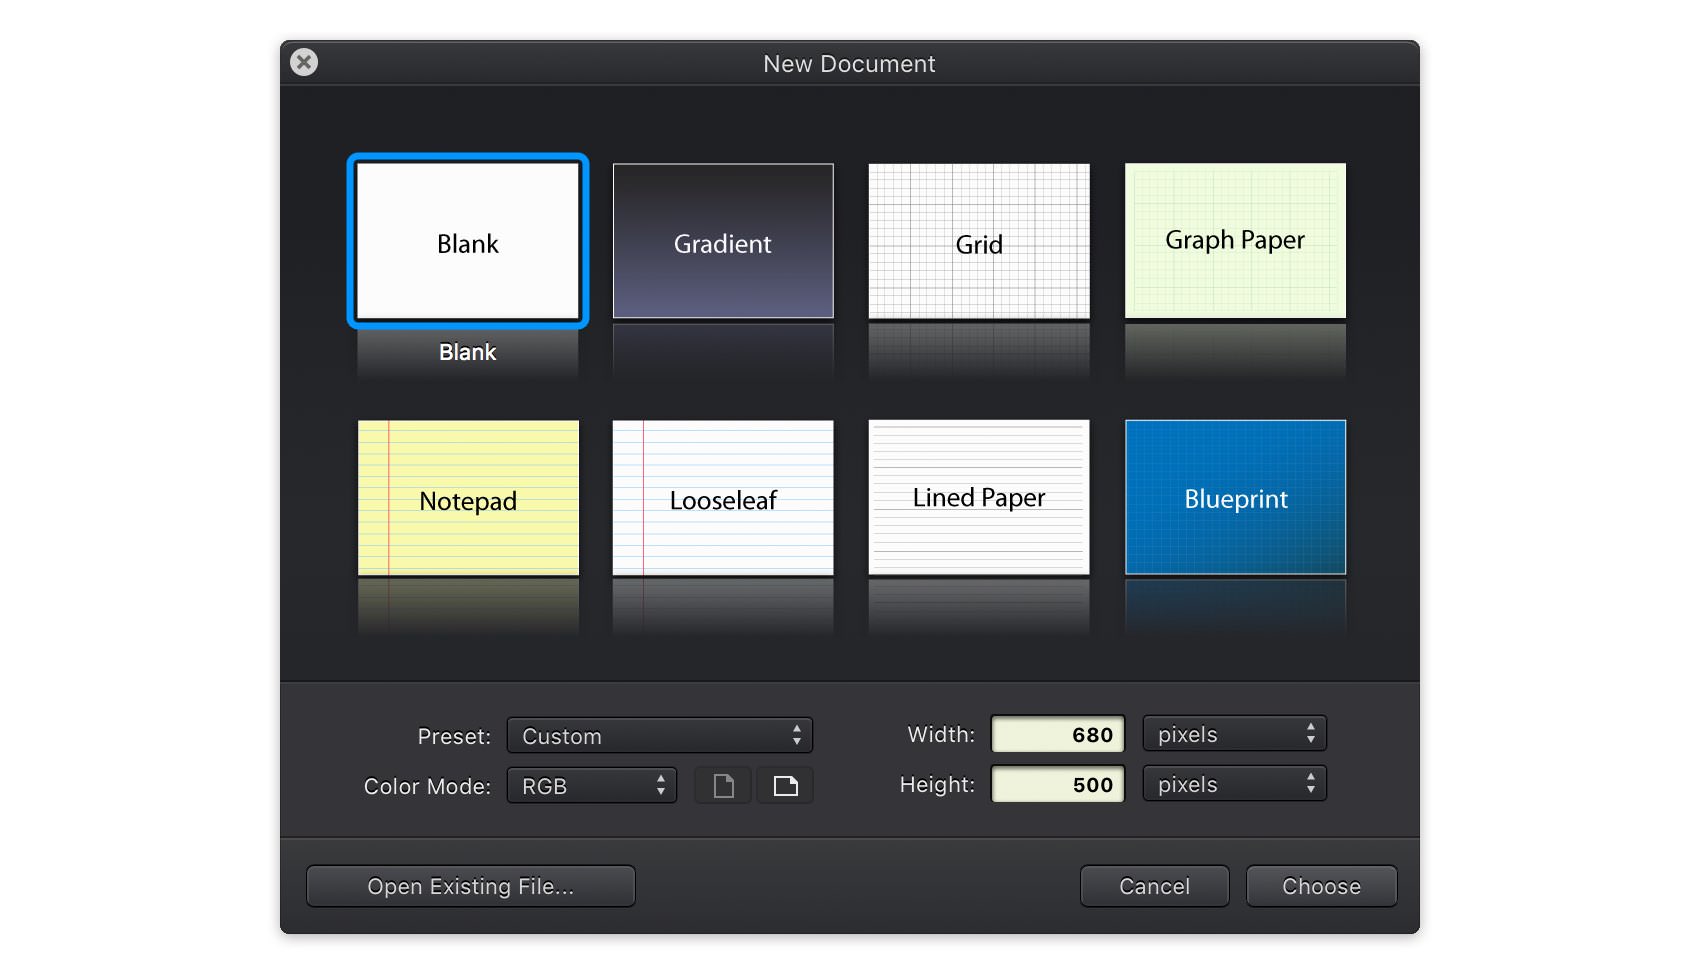
For this tutorial we'll create a new 680 x 500 px document. Choose File > New (Command + N) to bring up the New Document window. Select the Blank document style, set the document units to pixels, and set the document dimensions to 680 pixels wide by 500 pixels high.
Step 2
Pick the Text Tool (T) , click on you canvas and then focus on the Text section from the Appearance pane. click that round, info icon located above the Layers pane whenever you wish to open/close the Appearance pane. Select the BlackFat font, set the size to 170 pt and then add your "Slime" piece of text and set its color to R=119 G=193 B=56. Move to the Layers pane, double click on the existing layer and rename it "green".

Step 3
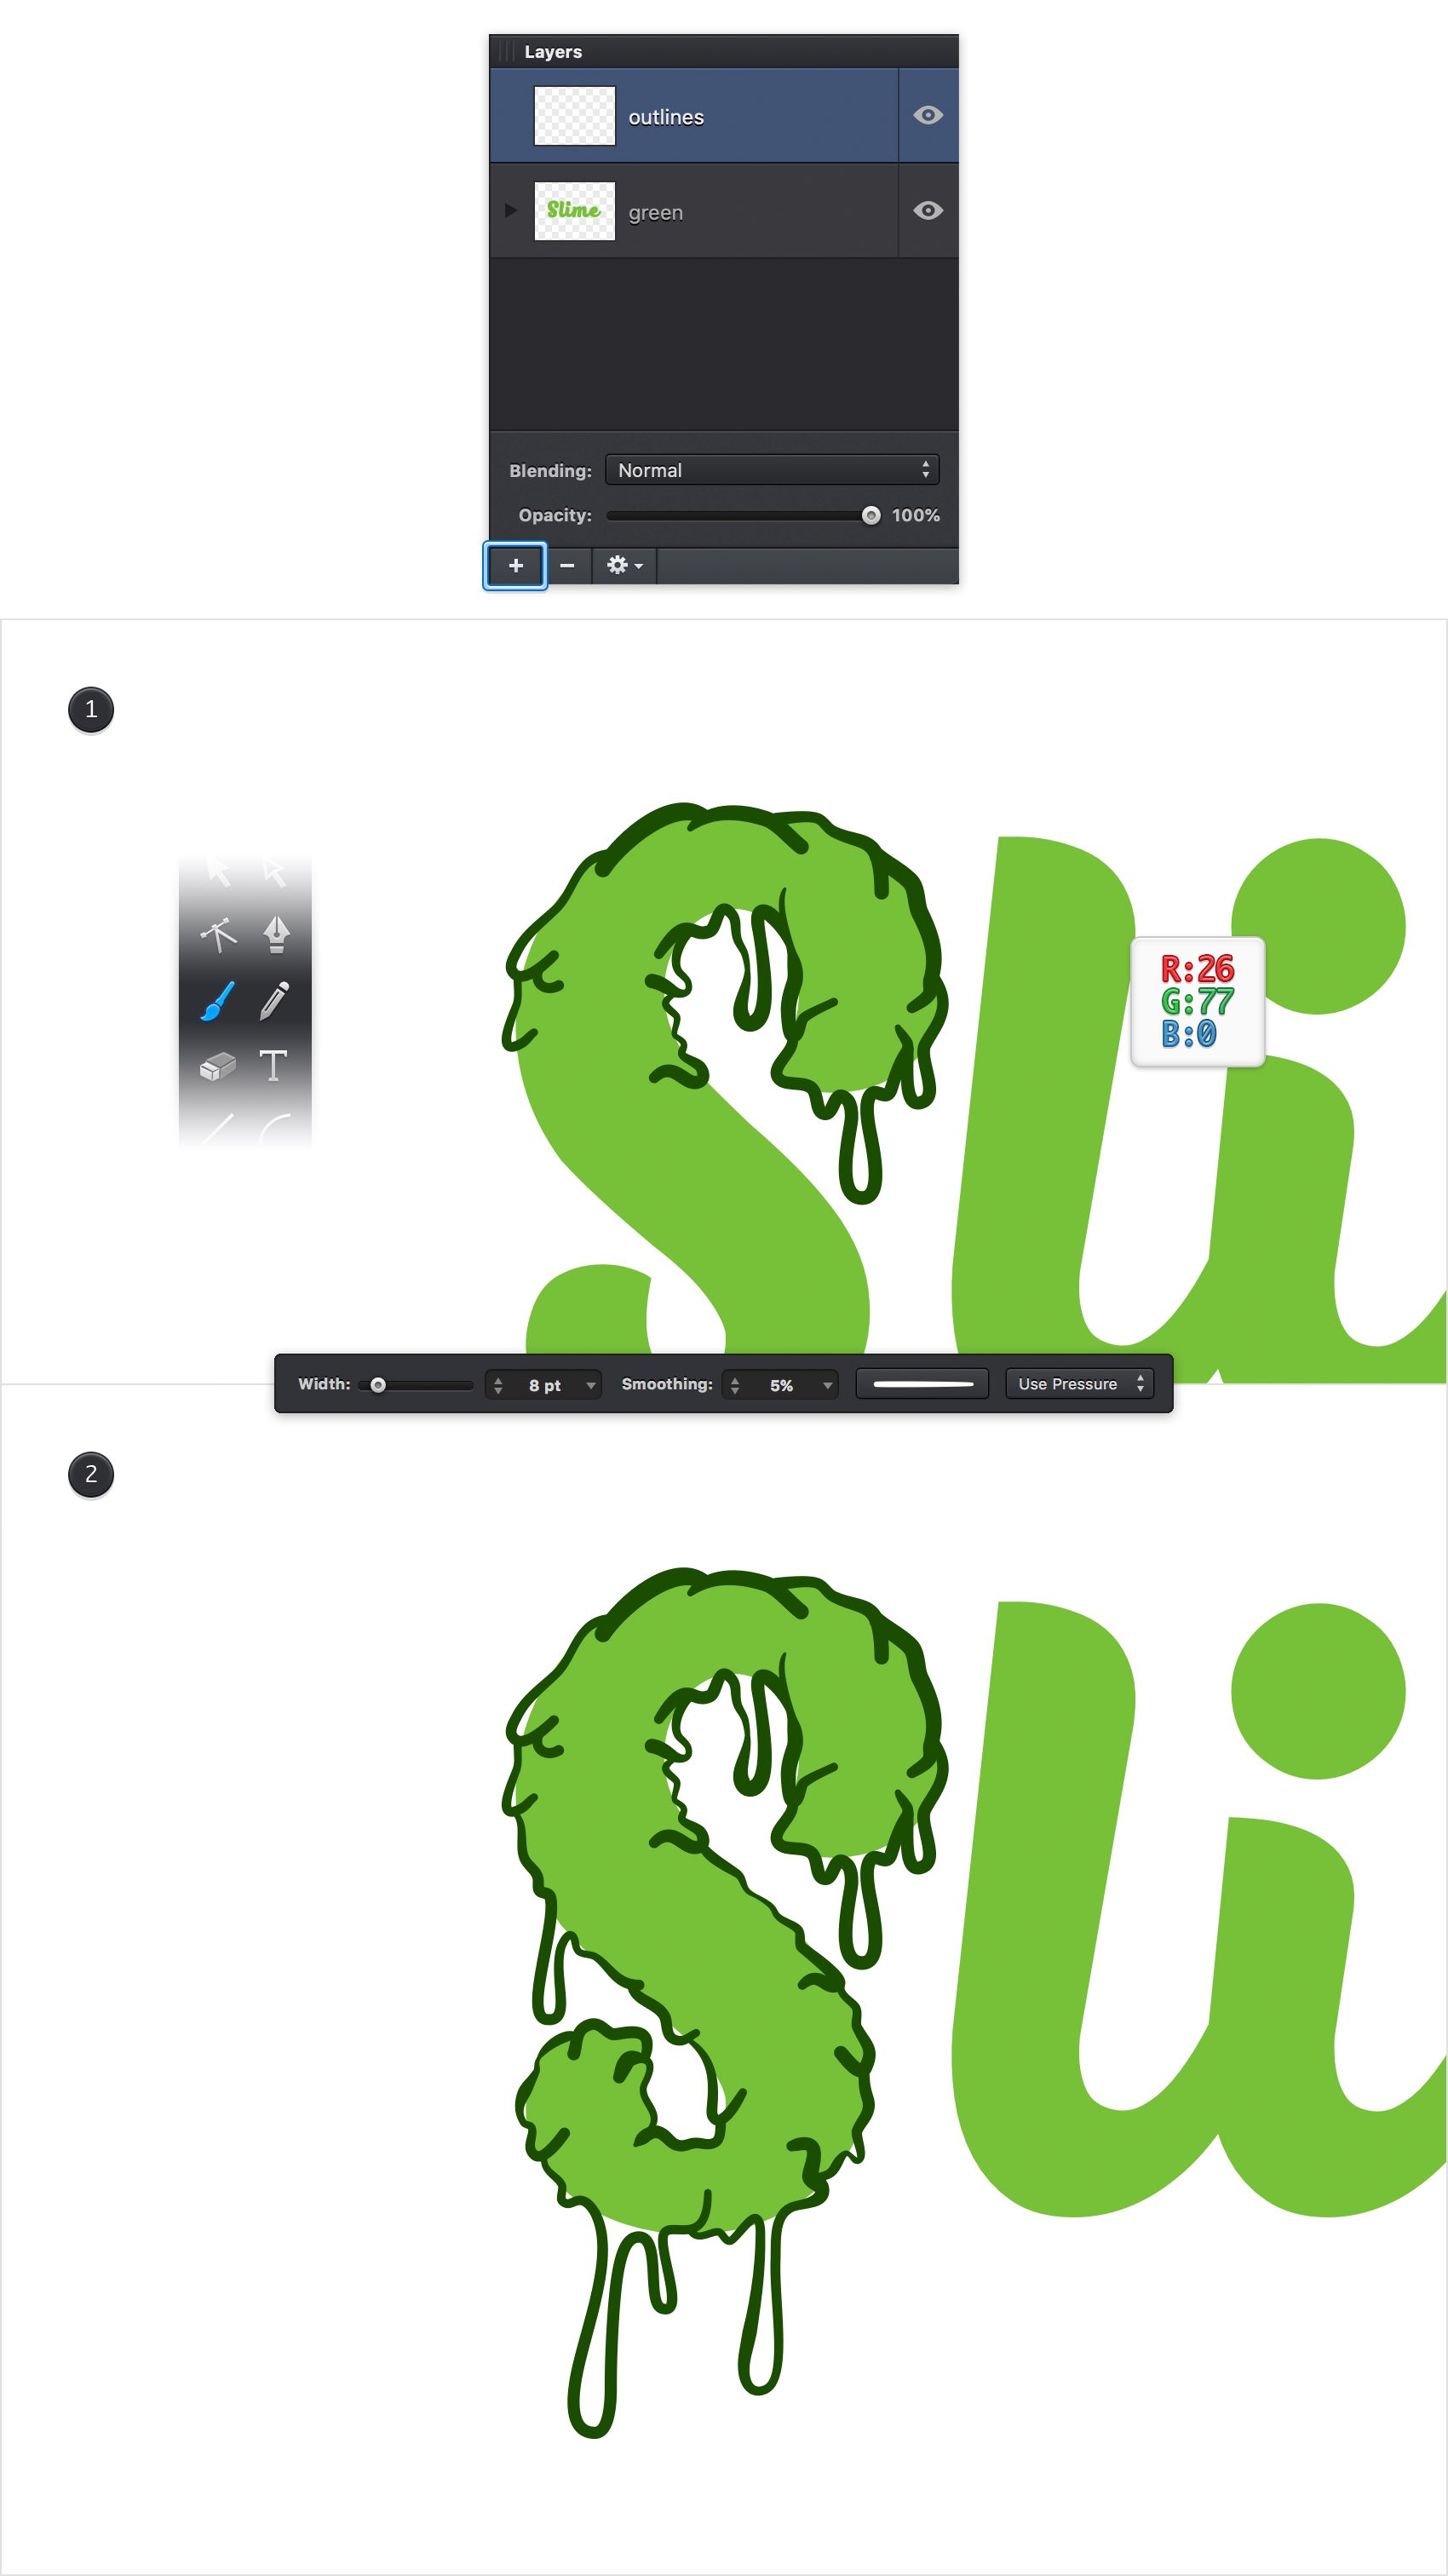
Keep focusing on the Layers pane and add a second layer using the plus button located in the bottom, left corner of this pane. Make sure that this new layer stays selected and rename it "outlines".
Now, pick the Brush Tool (B) and focus on the tool options bar. Drag the Width slider to 8 pt, lower the Smoothing to 5% and select Use Pressure from that second drop-down menu. Keep in mind that the Use Pressure feature can only be used along with a graphics tablet and it allows your pen to tell the system the amount of pressure that is applied to the tablet.
Move to your toolbar and replace the existing stroke color with R=26 G=77 B=0. Focus on the first letter from your text and draw smooth paths along its edges roughly as shown in the following image. Try to vary the pressure on your pen, use multiple brush strokes in your trace and make sure that you're not leaving parts of that green text on the outer side of your final trace.
Step 4
Move to the rest of the text and use the same brush and techniques mentioned in the previous step.
Step 5
Add some dripping paths over your text roughly as shown in the following image.
Step 6
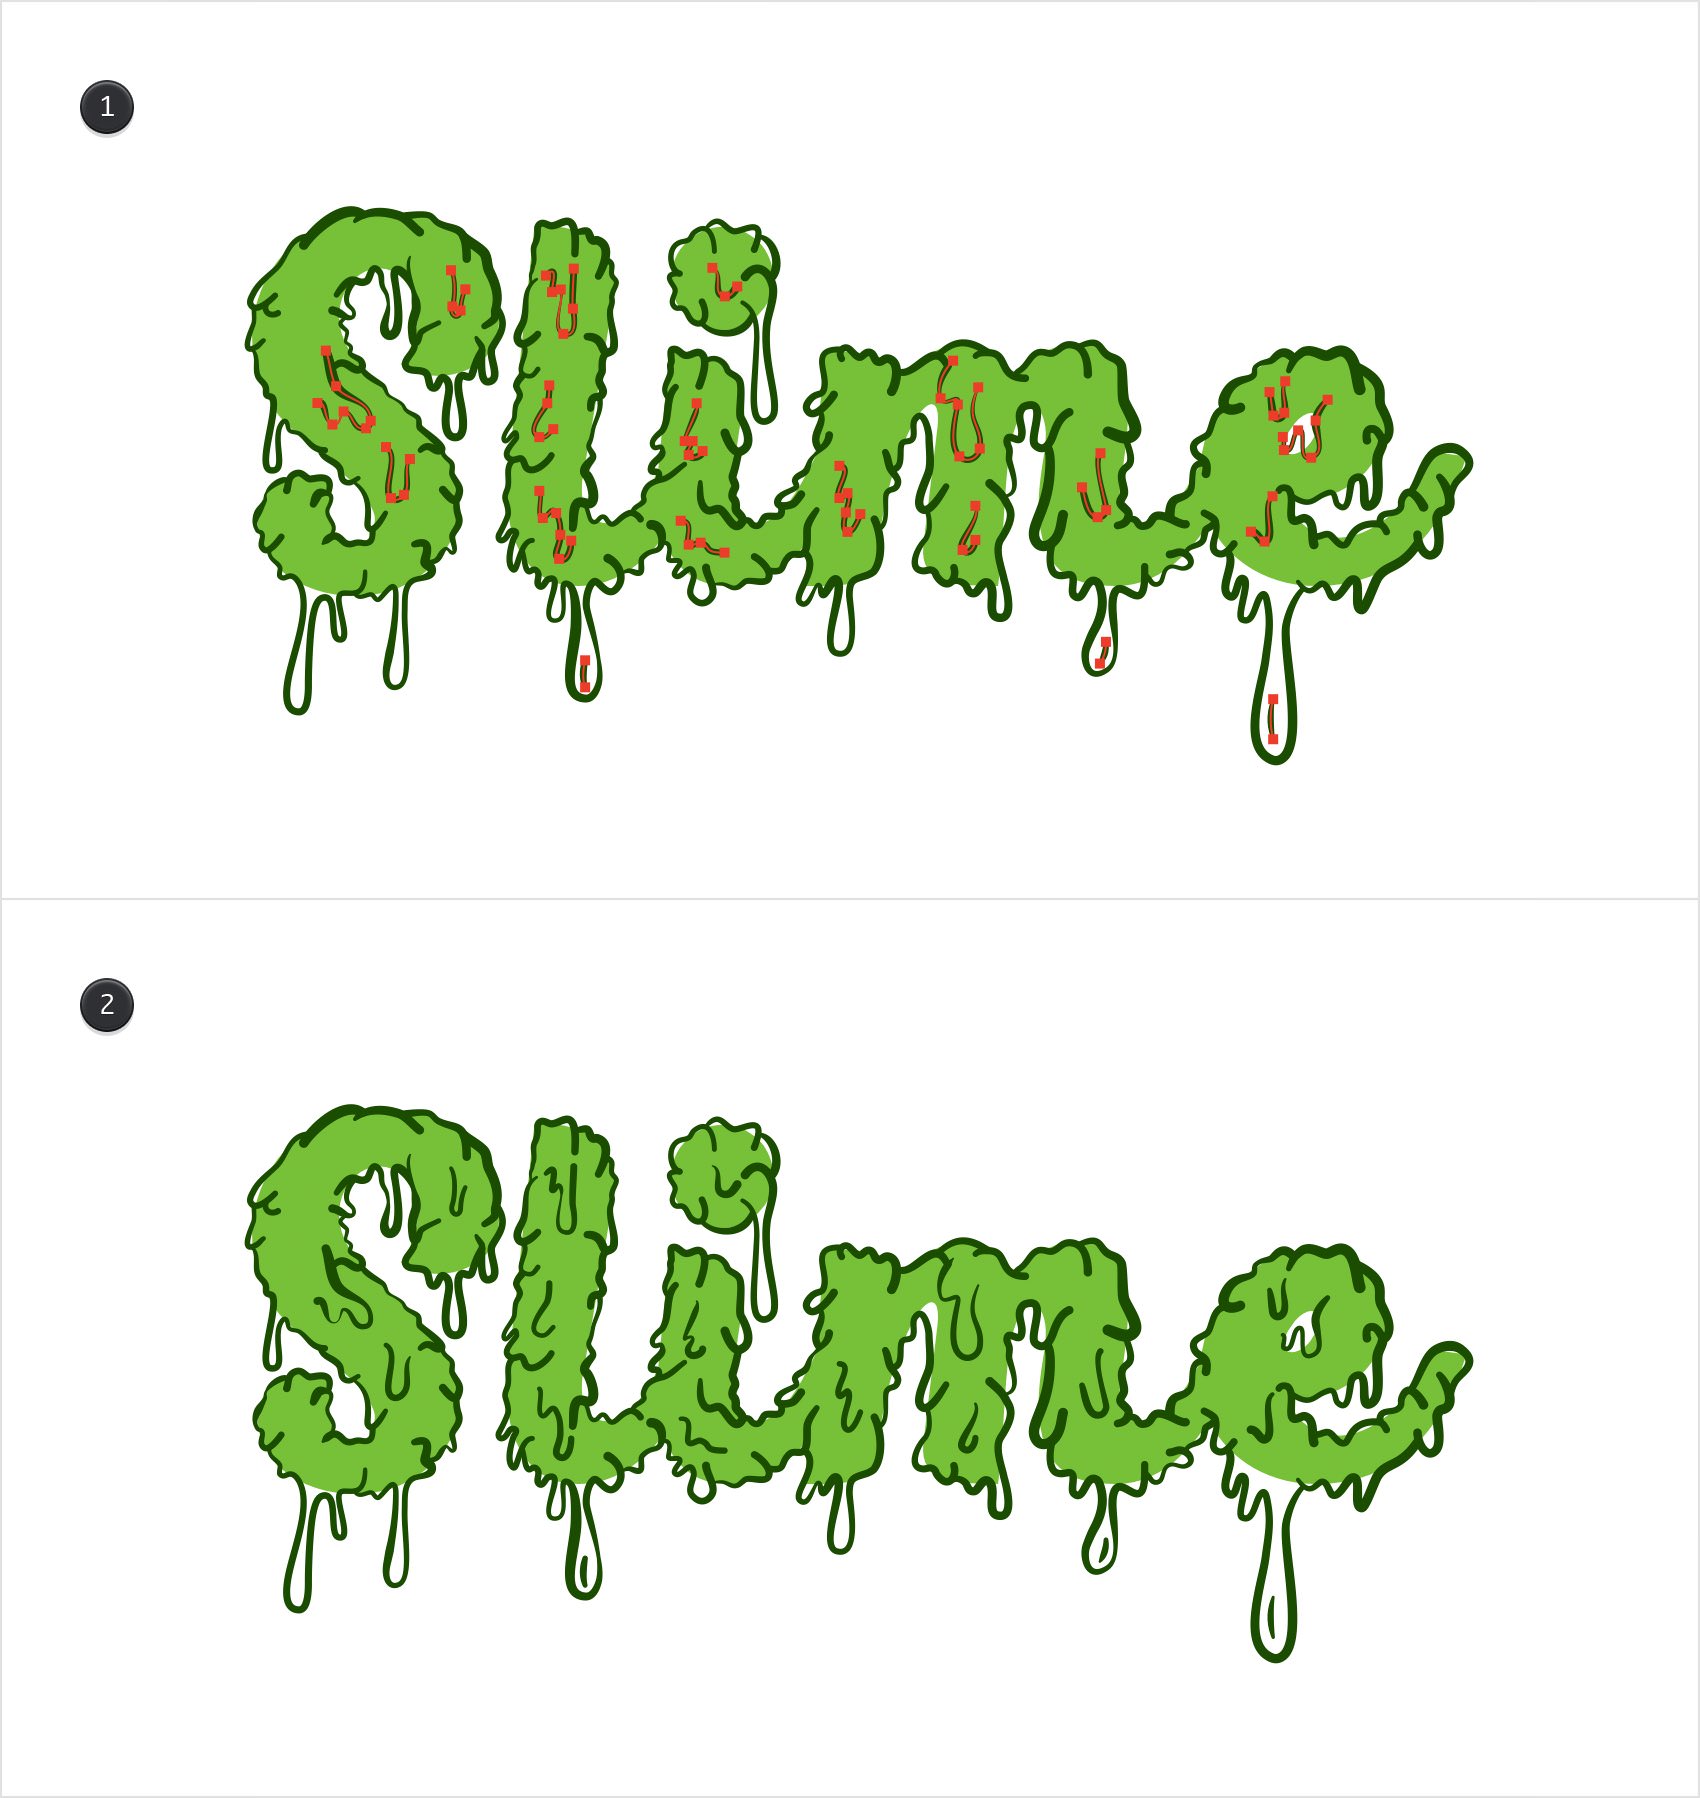
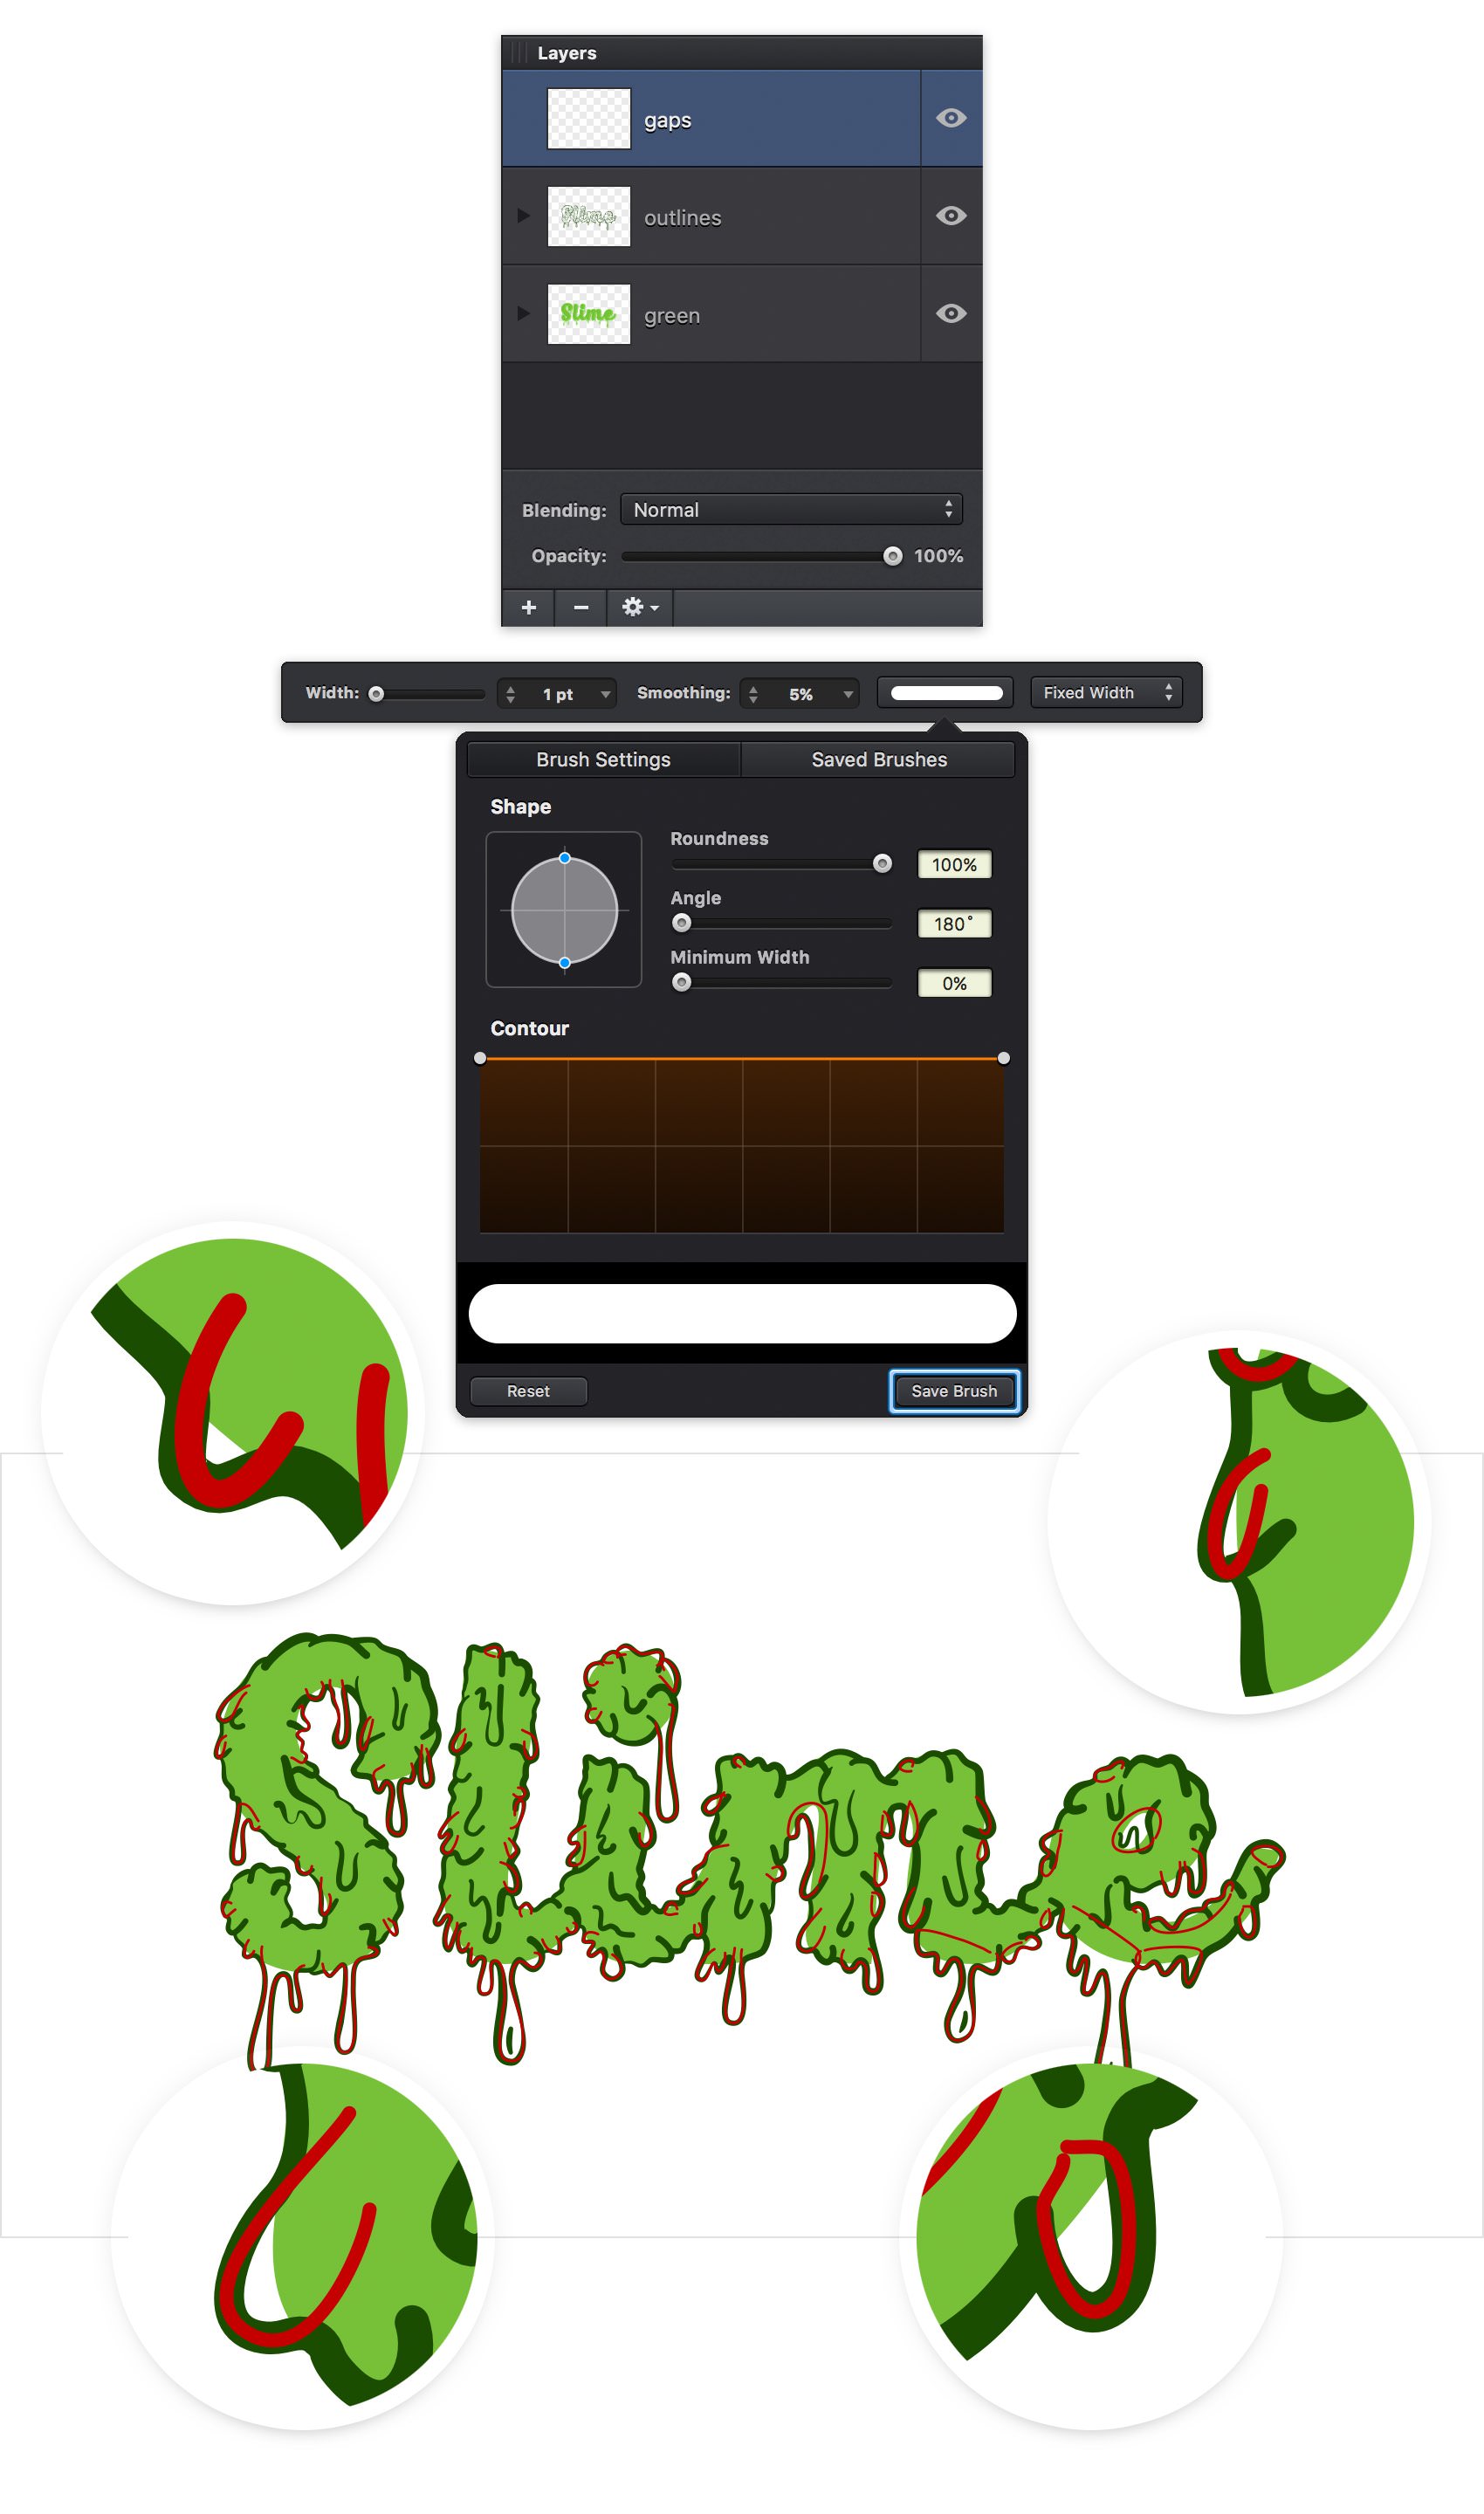
Return to your Layers pane, add a third layer, drag it in the top of the pane and rename it "gaps". Make sure that it stays selected, pick the Brush Tool (B) and focus on the tool options bar.
Drag the Width slider to 1 pt, keep the Smoothing at 5%, select Fixed Width from the second drop-down menu and then open the Brush Settings fly-out window. Drag the Roundness slider to 100%, ignore the other two sliders and then move to the Contour section. Select the left end of that orange path and drag it in the top, left corner and then select the other end and drag it in the top, right corner. These points set the level of thickness that your brush should have in the starting point and in the ending point, but you can easily add such points along the path thus creating more complex brushes. double click on that orange path whenever you wish to add more points for your brush. You'll need again this brush, so save it using the Save Brush.
Now, pick a random red for the stroke color, move to your canvas and draw a bunch of paths around the white areas left inside your tracings. Don't bother to close these paths or to make them perfect. Just make sure that the the start and end points lie above your green piece of text and that the paths don't go over the edge of those traces.
Step 7
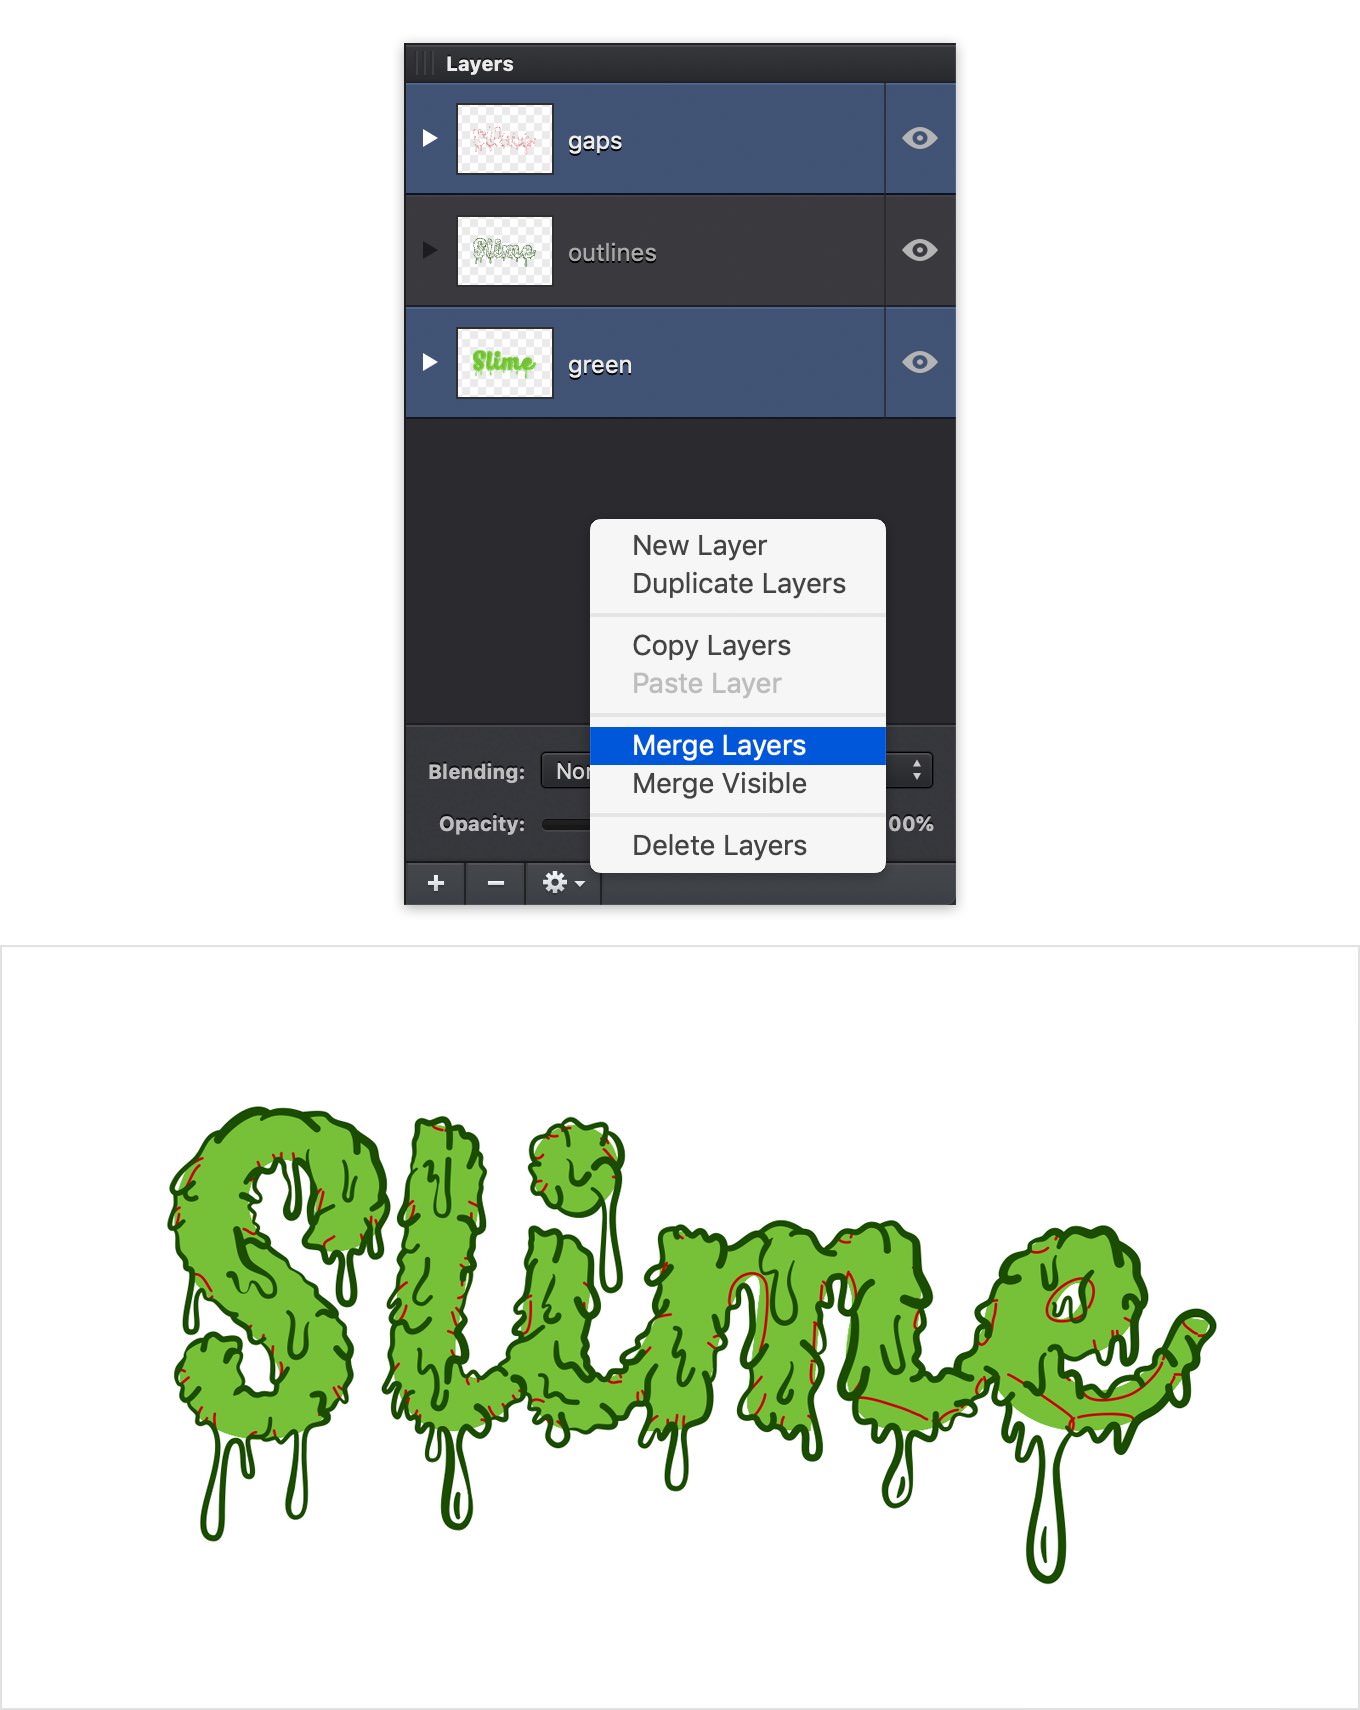
Focus on the Layers pane and select the "gaps" and the "green" layers. Right click on one of these two layers and go to Merge Layers.
Step 8
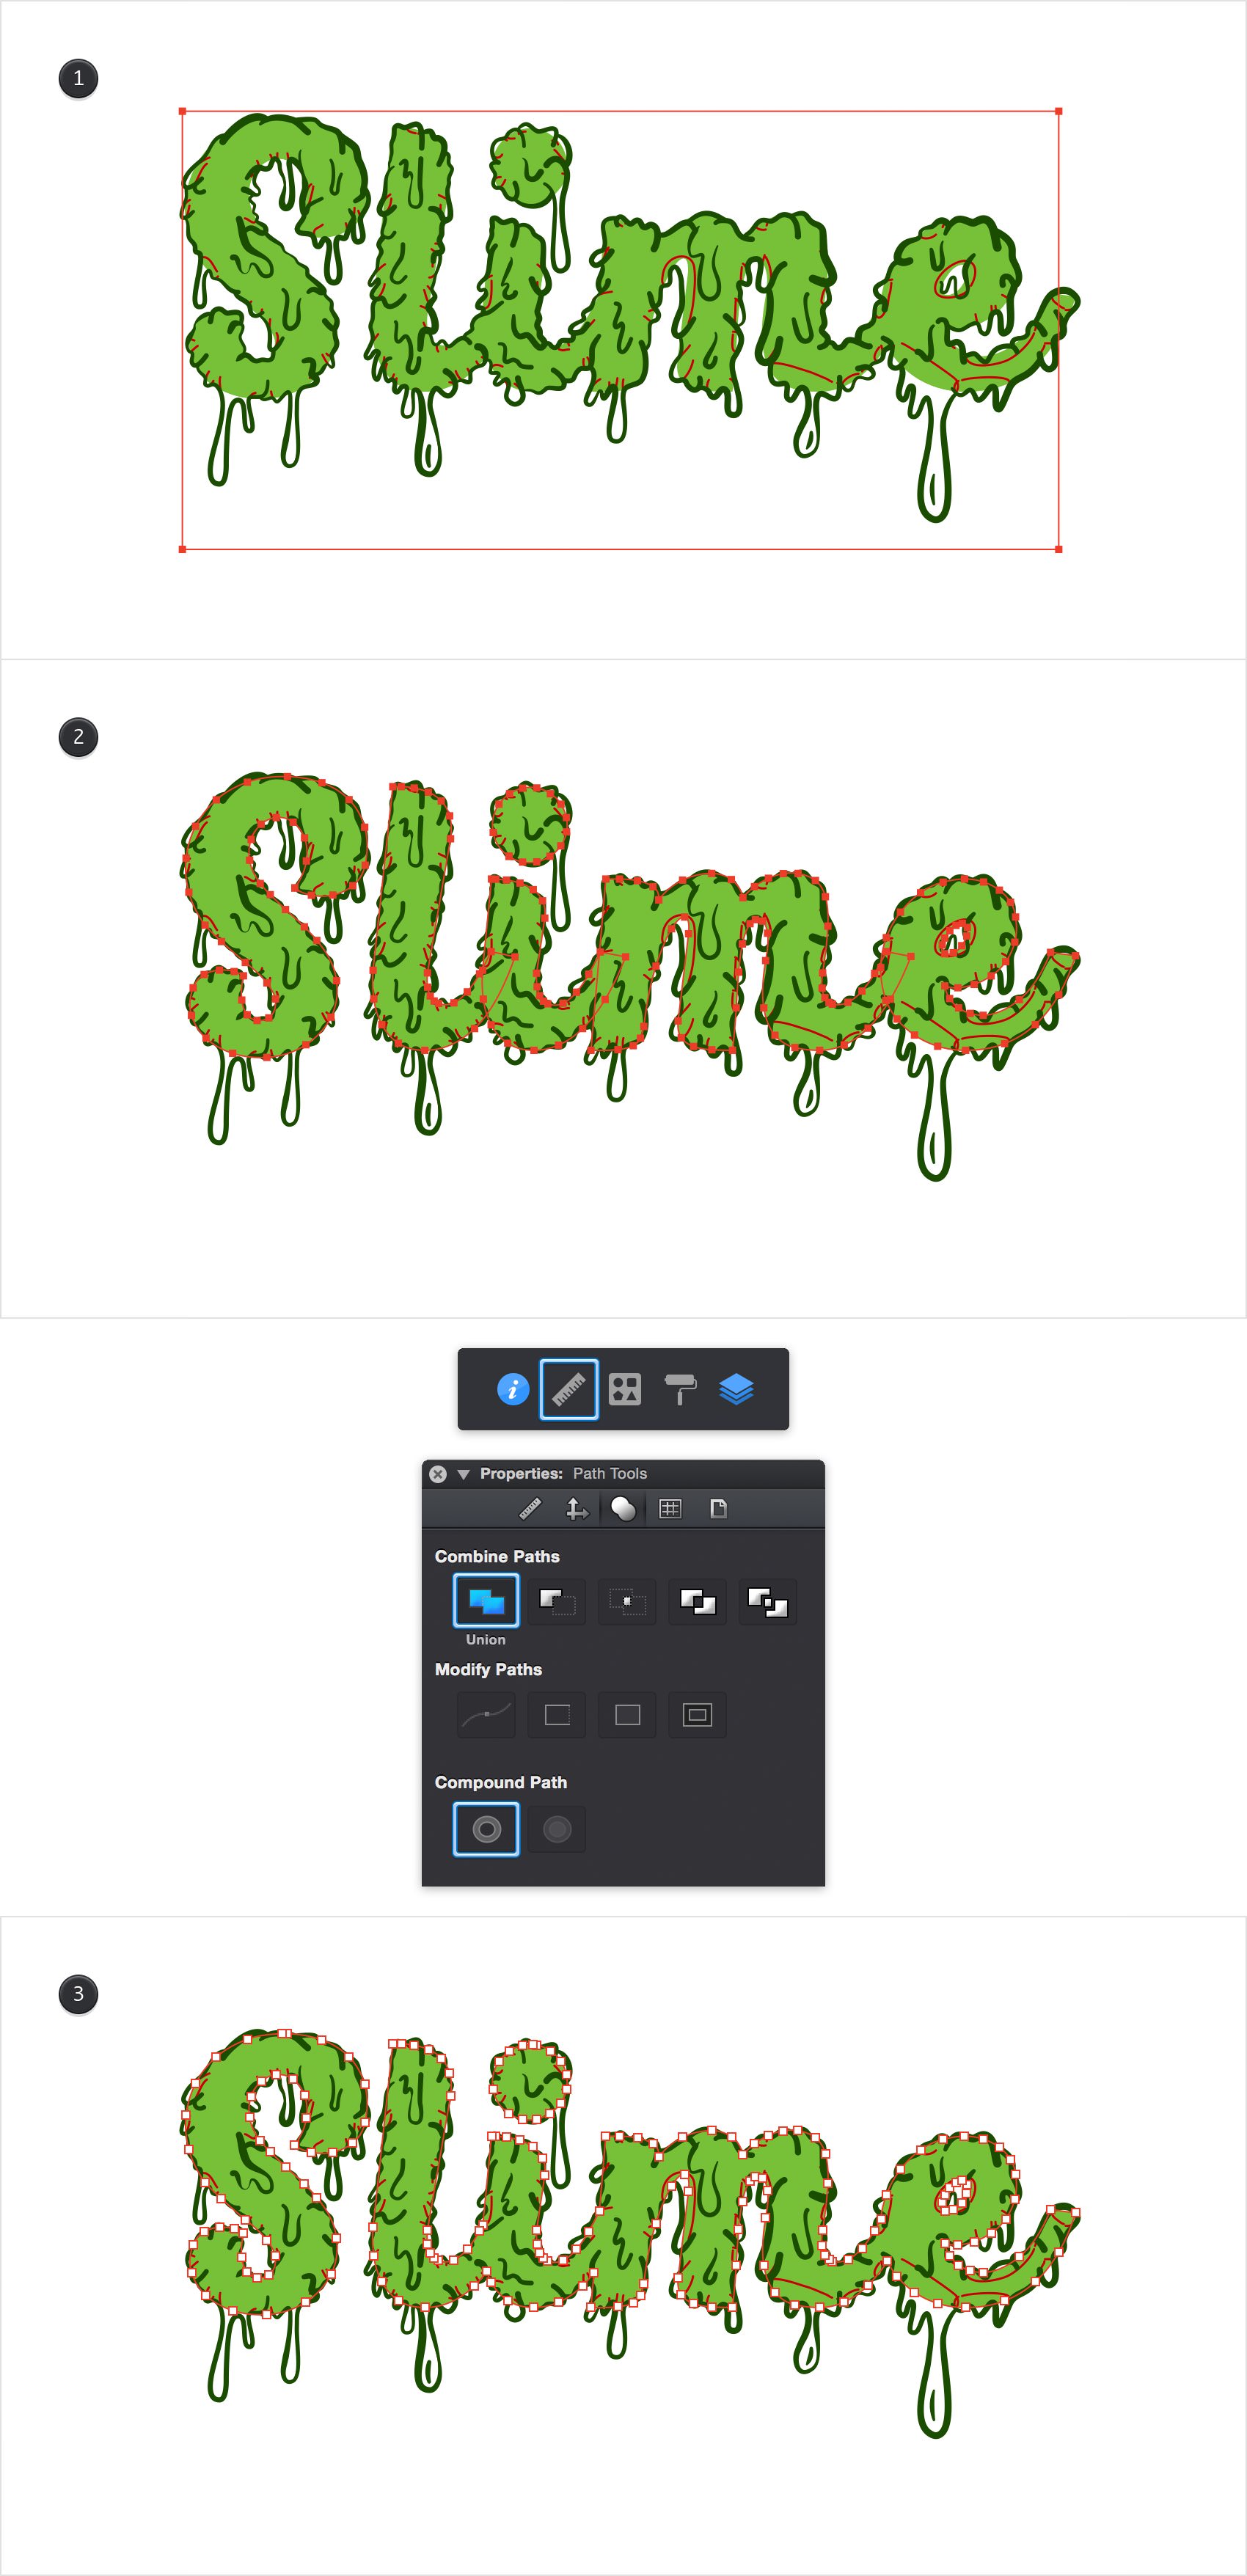
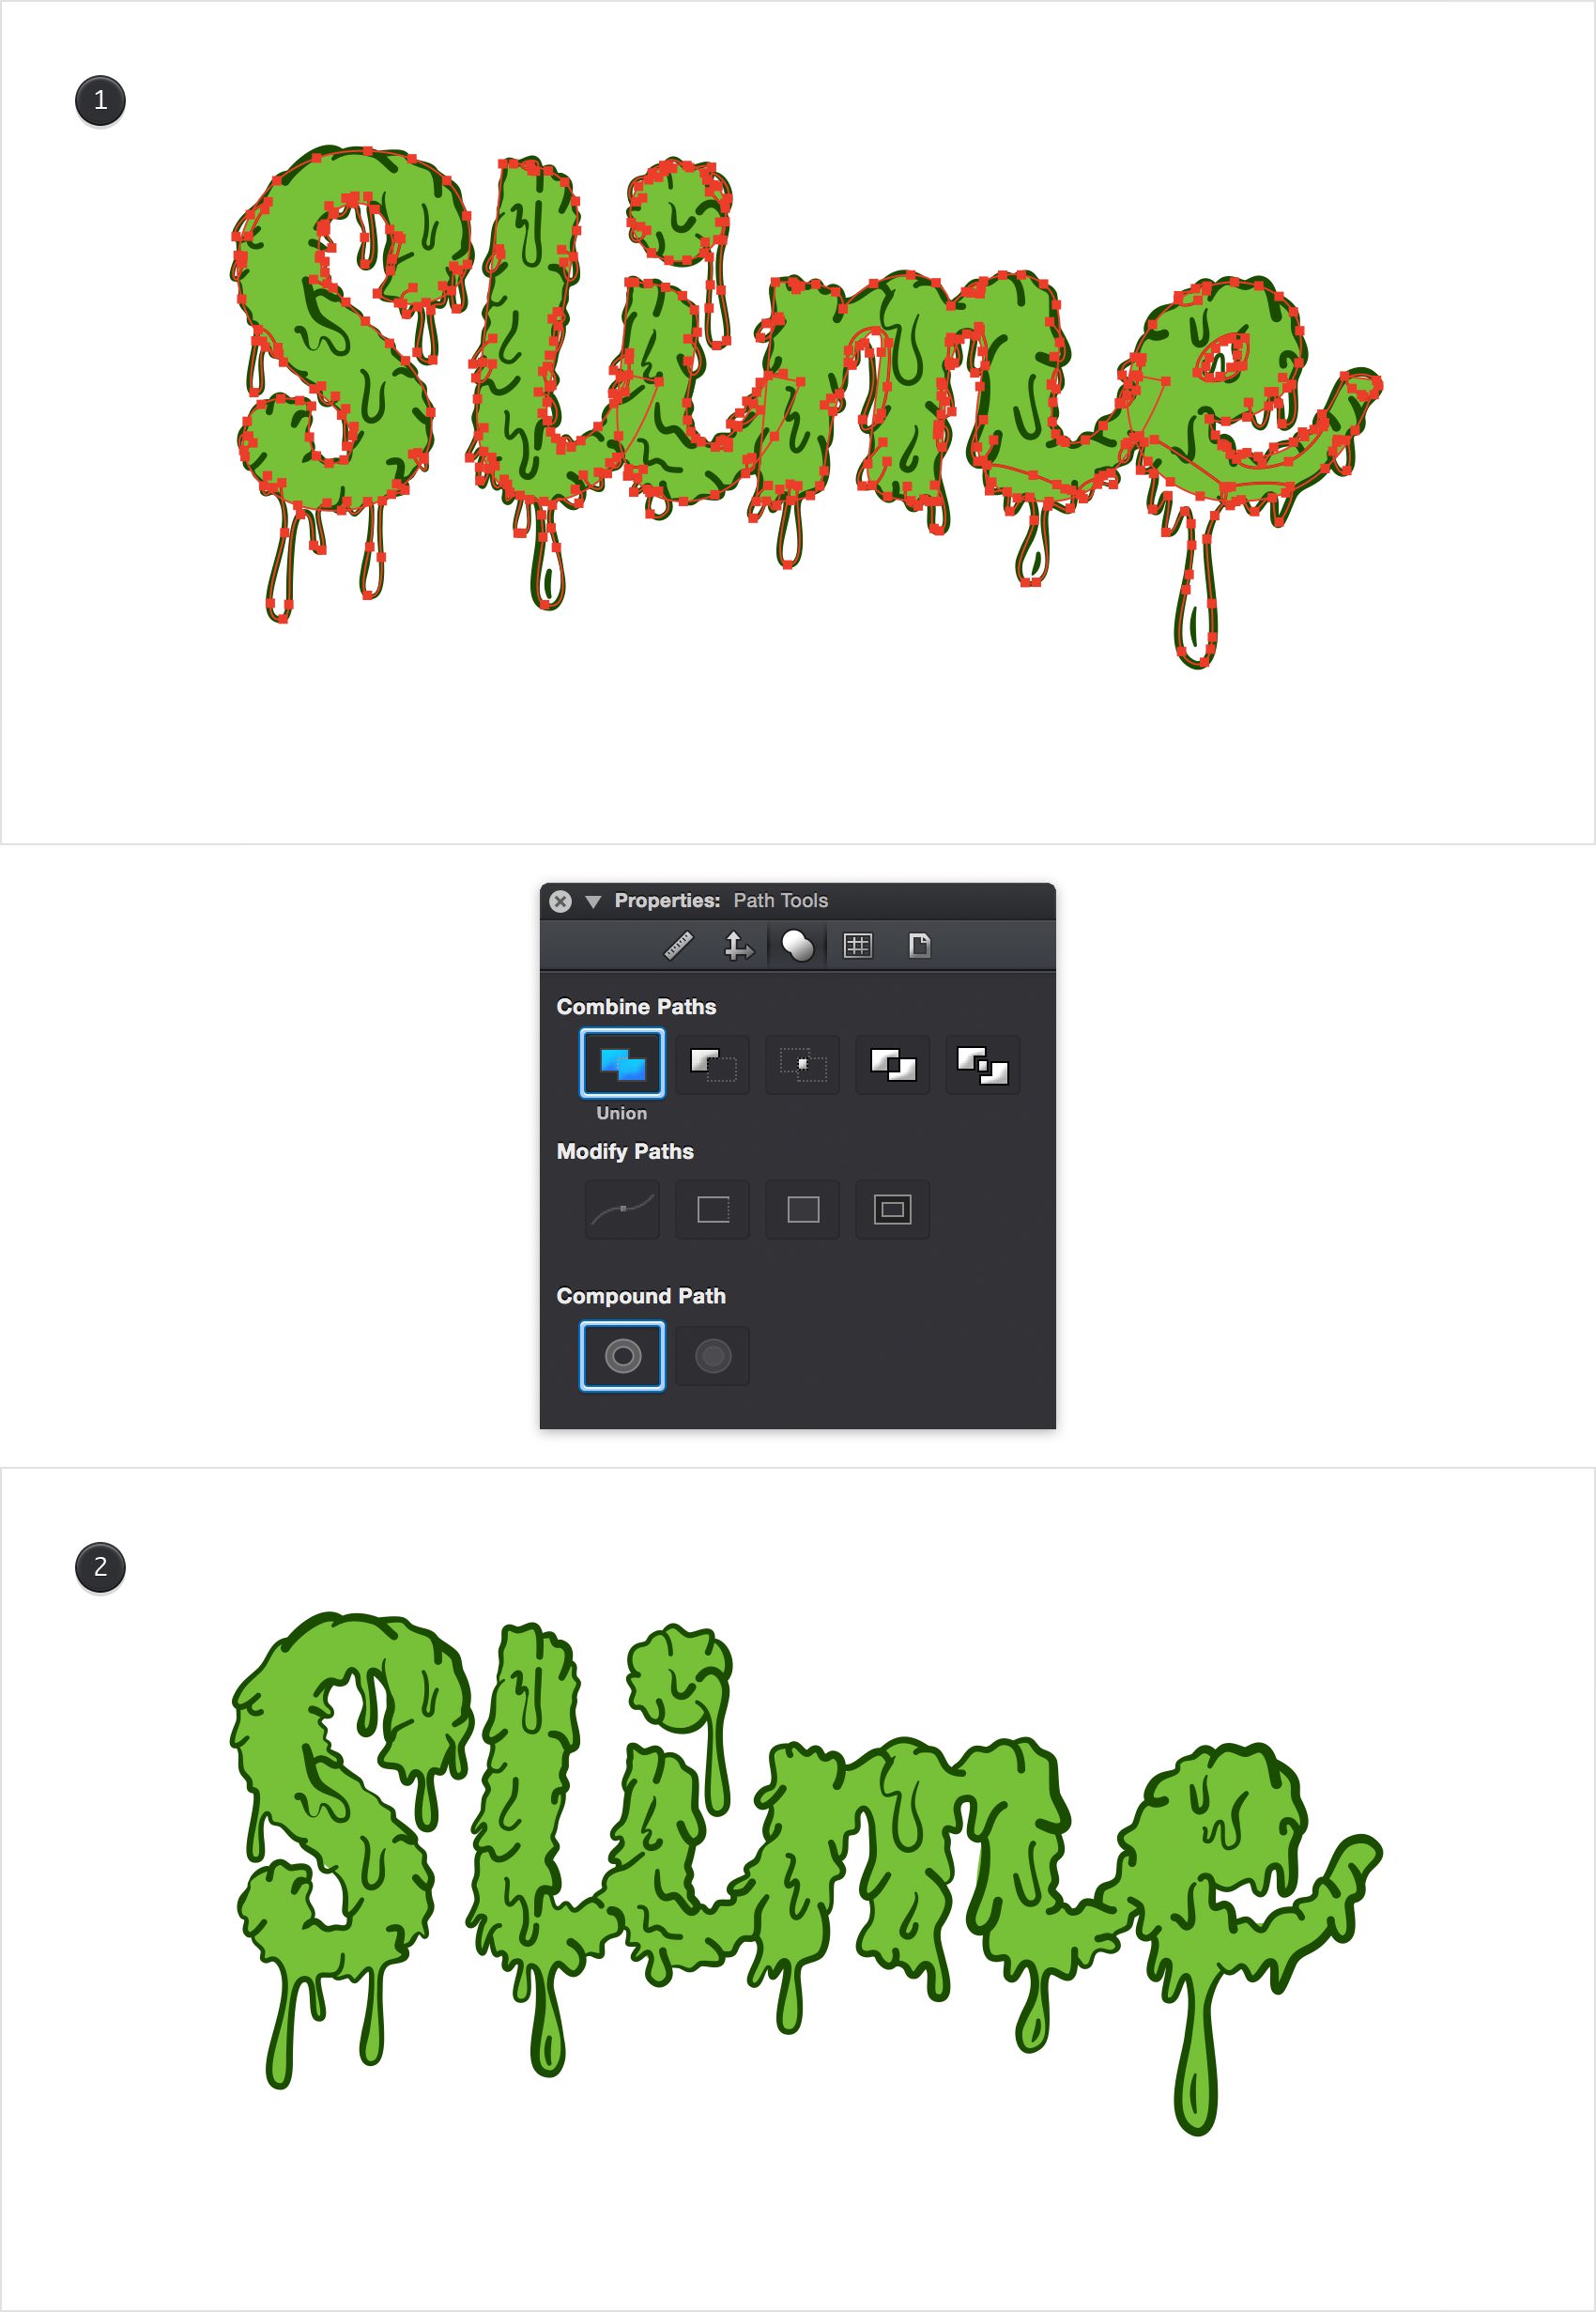
Keep focusing on the Layers pane, open your "green" layer, select that piece of text and go to Modify > Convert Text to Outlines. Make sure that the resulting shapes remain selected, open the Properties pane and go to the Path Tools section. First, click the Unite button and then click the Make Compound Path button.
Step 9
Select all the shapes that are part of your "green" layer and keep focusing on the Path Tools section from the Properties pane. Again, start with the Unite button and then click the Make Compound Path button.
Step 10
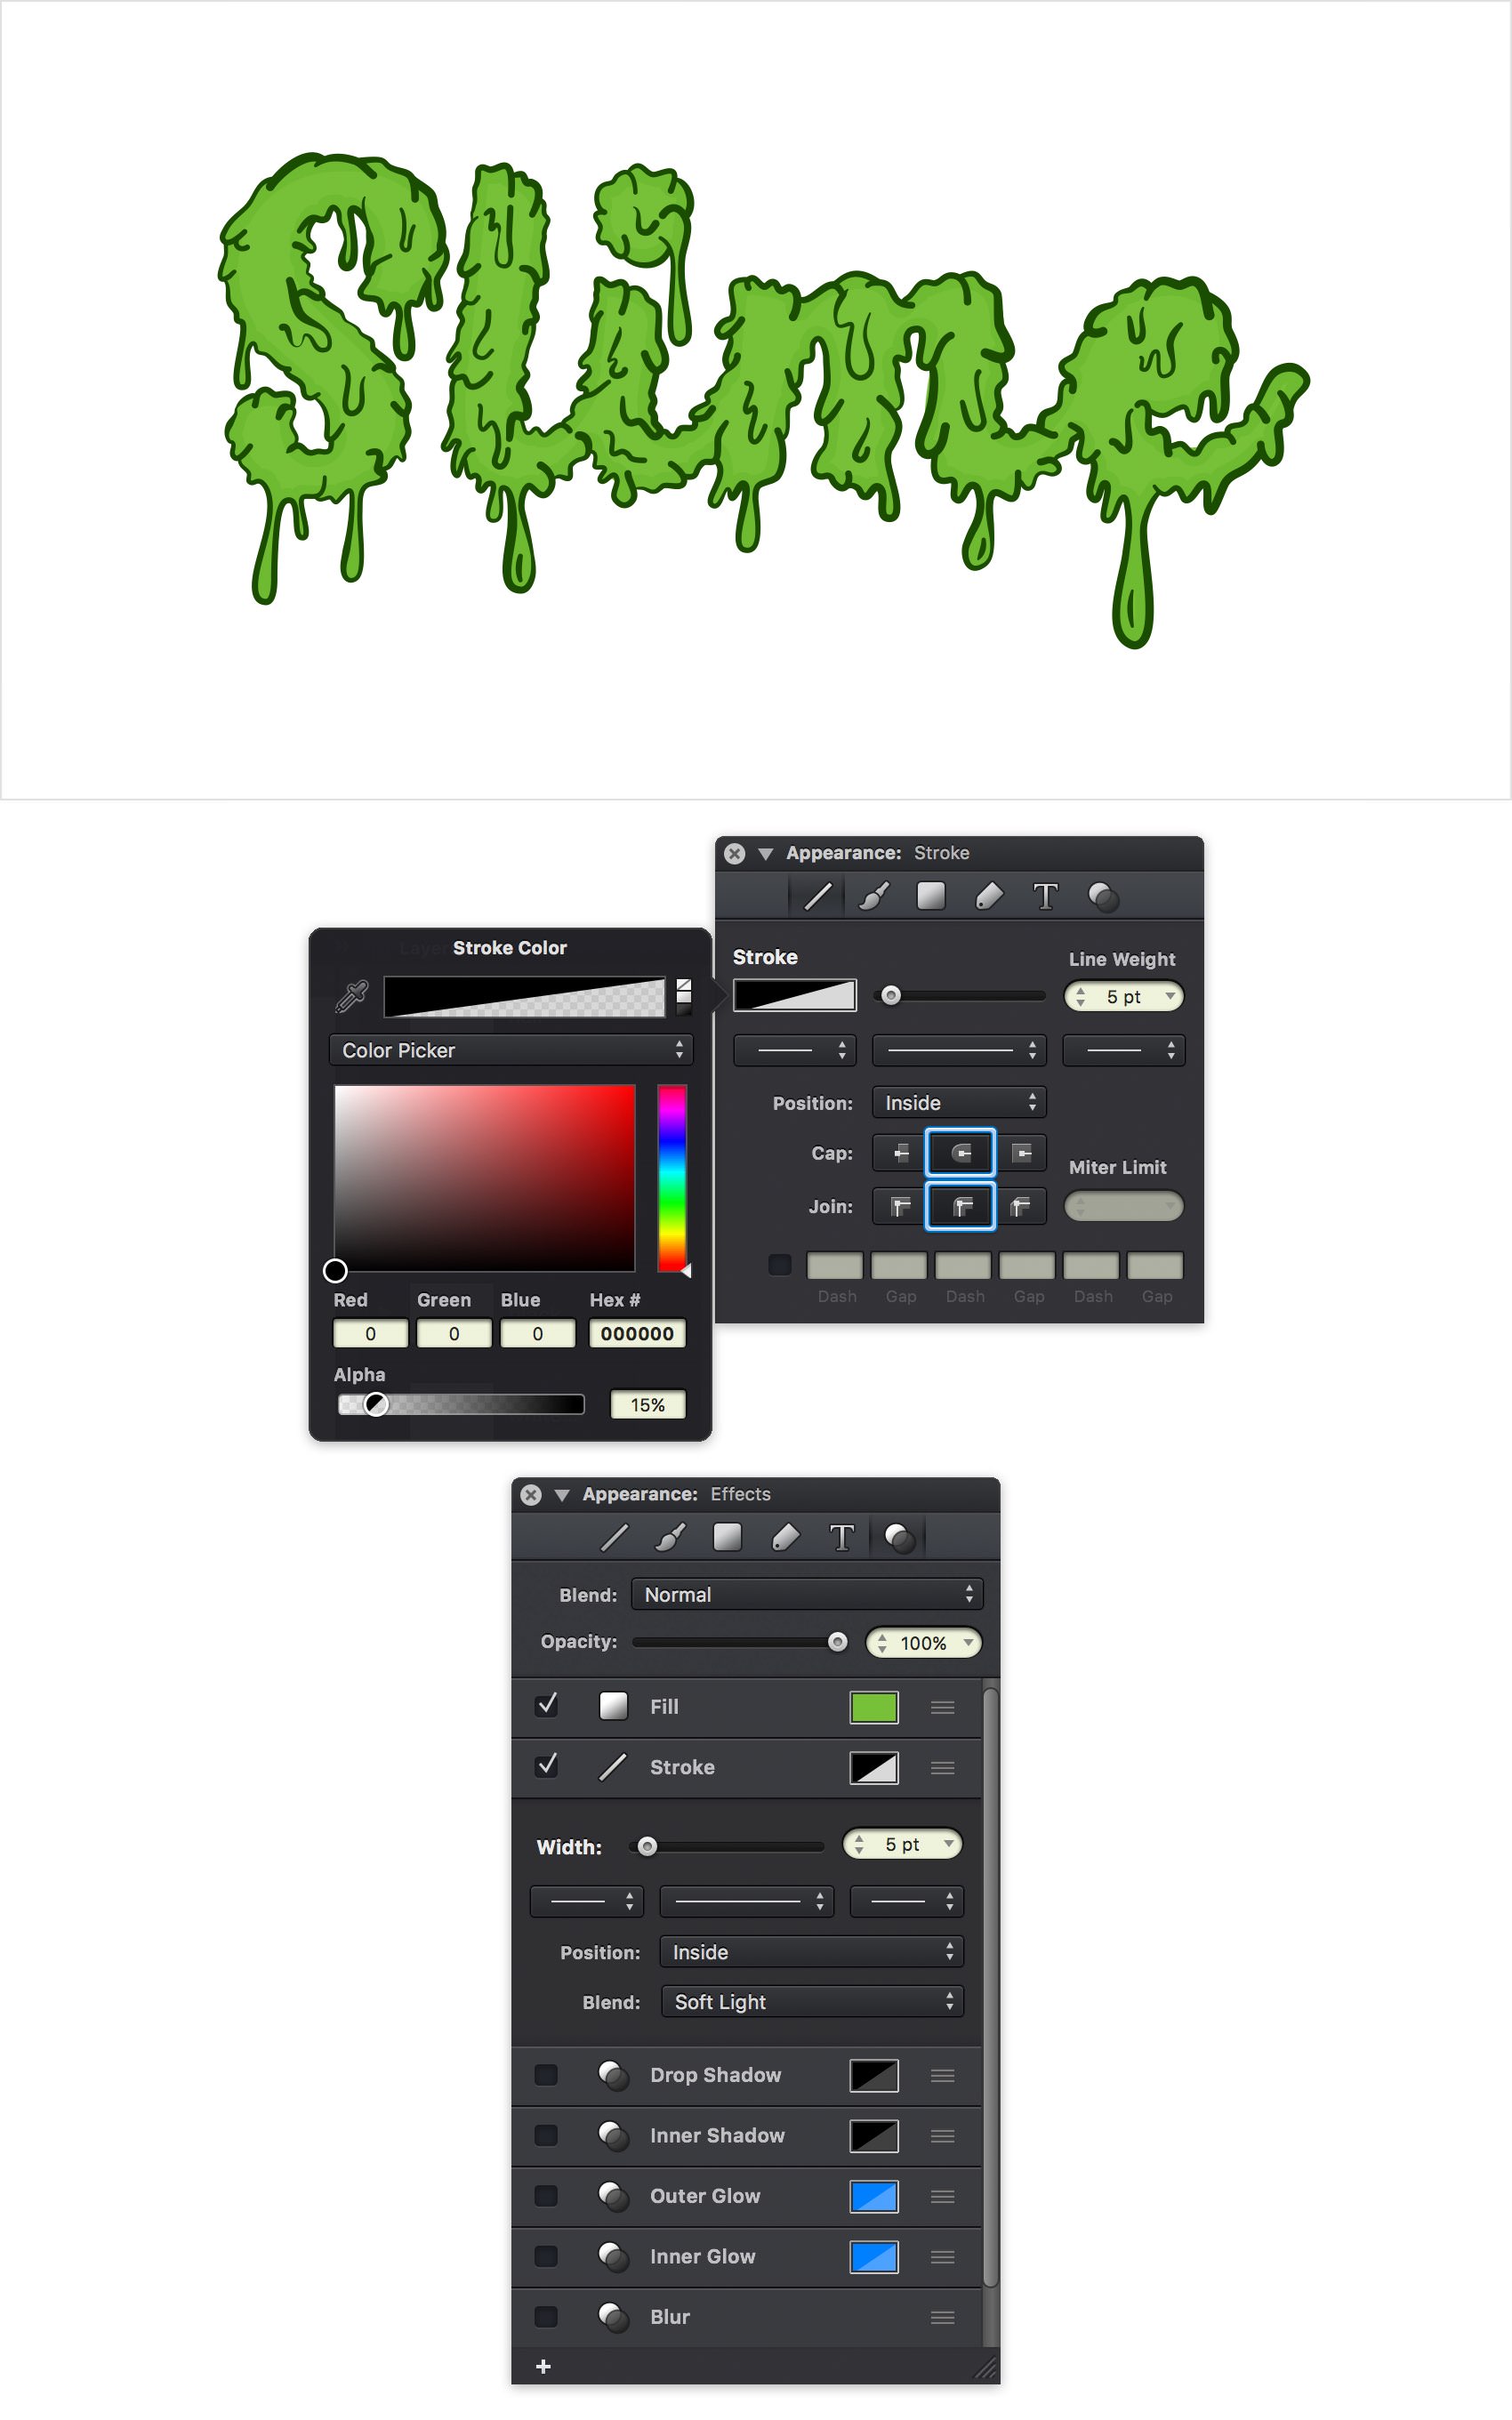
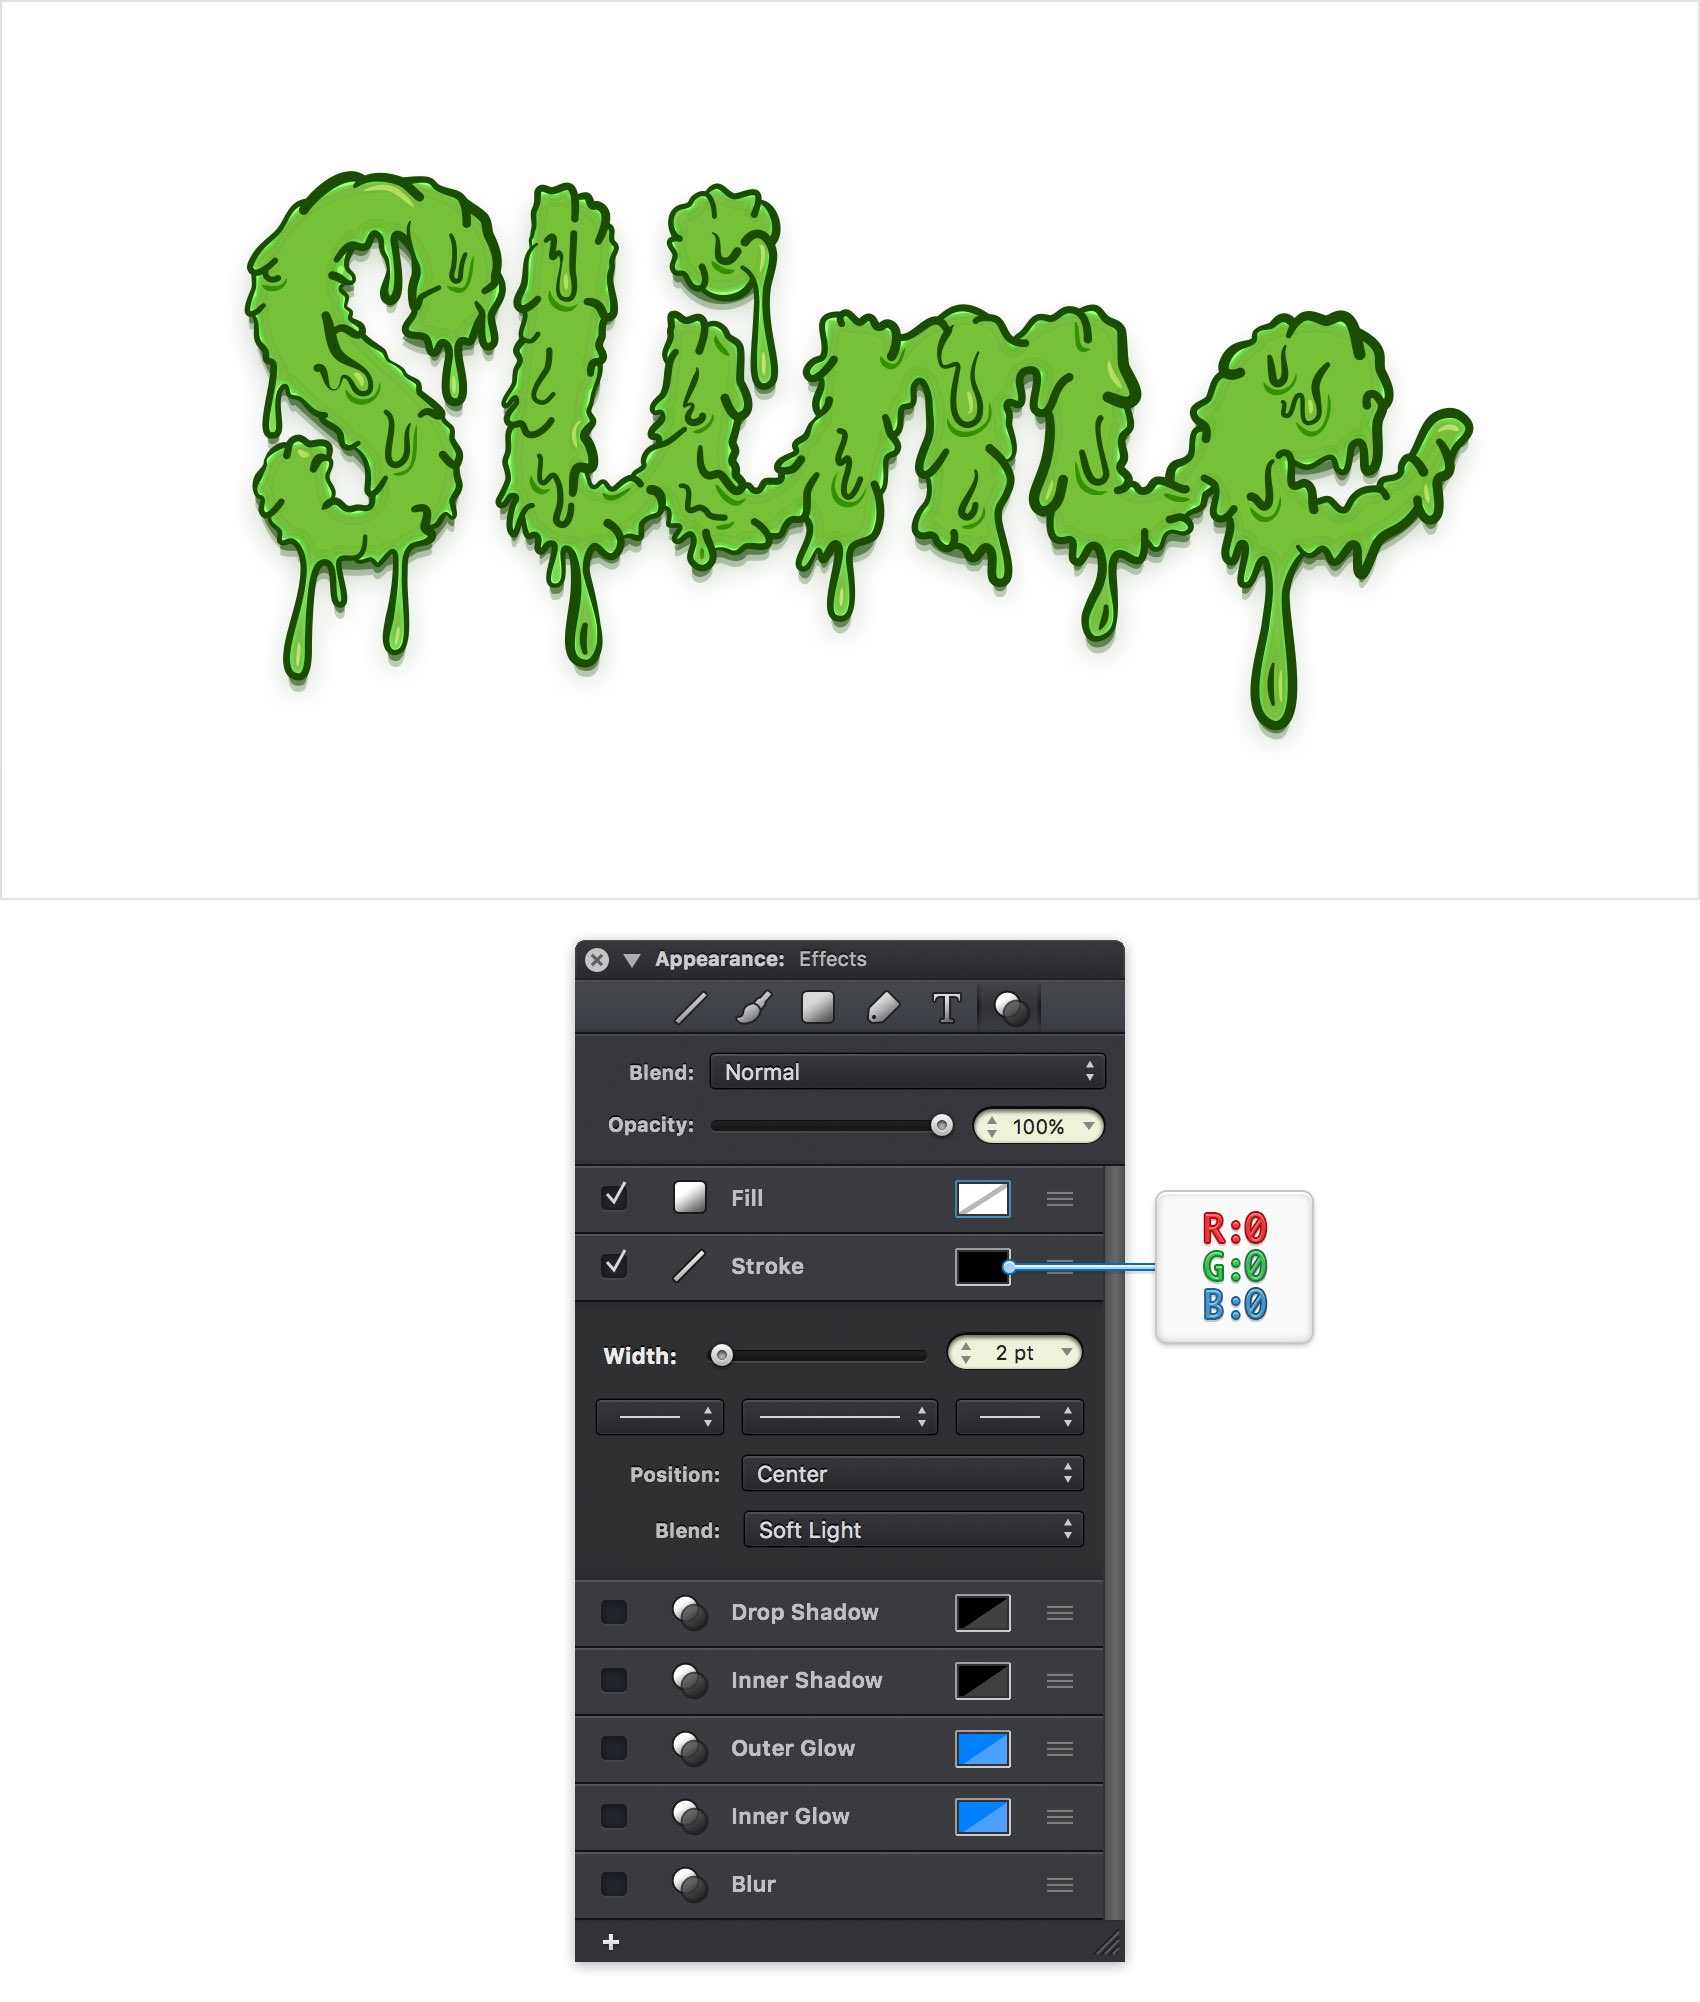
Make sure that your green compound path stays selected and focus on the Stroke section from the Appearance pane. Drag the Line Weight slider to 5 pt, set the Position to Inside, check the Round Cap and the Round Join buttons and then click the stroke color. Make sure that the color is set to black (R=0 G=0 B=0) and drag the Alpha slider to 15%. Move to the Effects section from the Appearance pane, keep focusing on that Stroke and change its Blend Mode to Soft Light.
Step 11
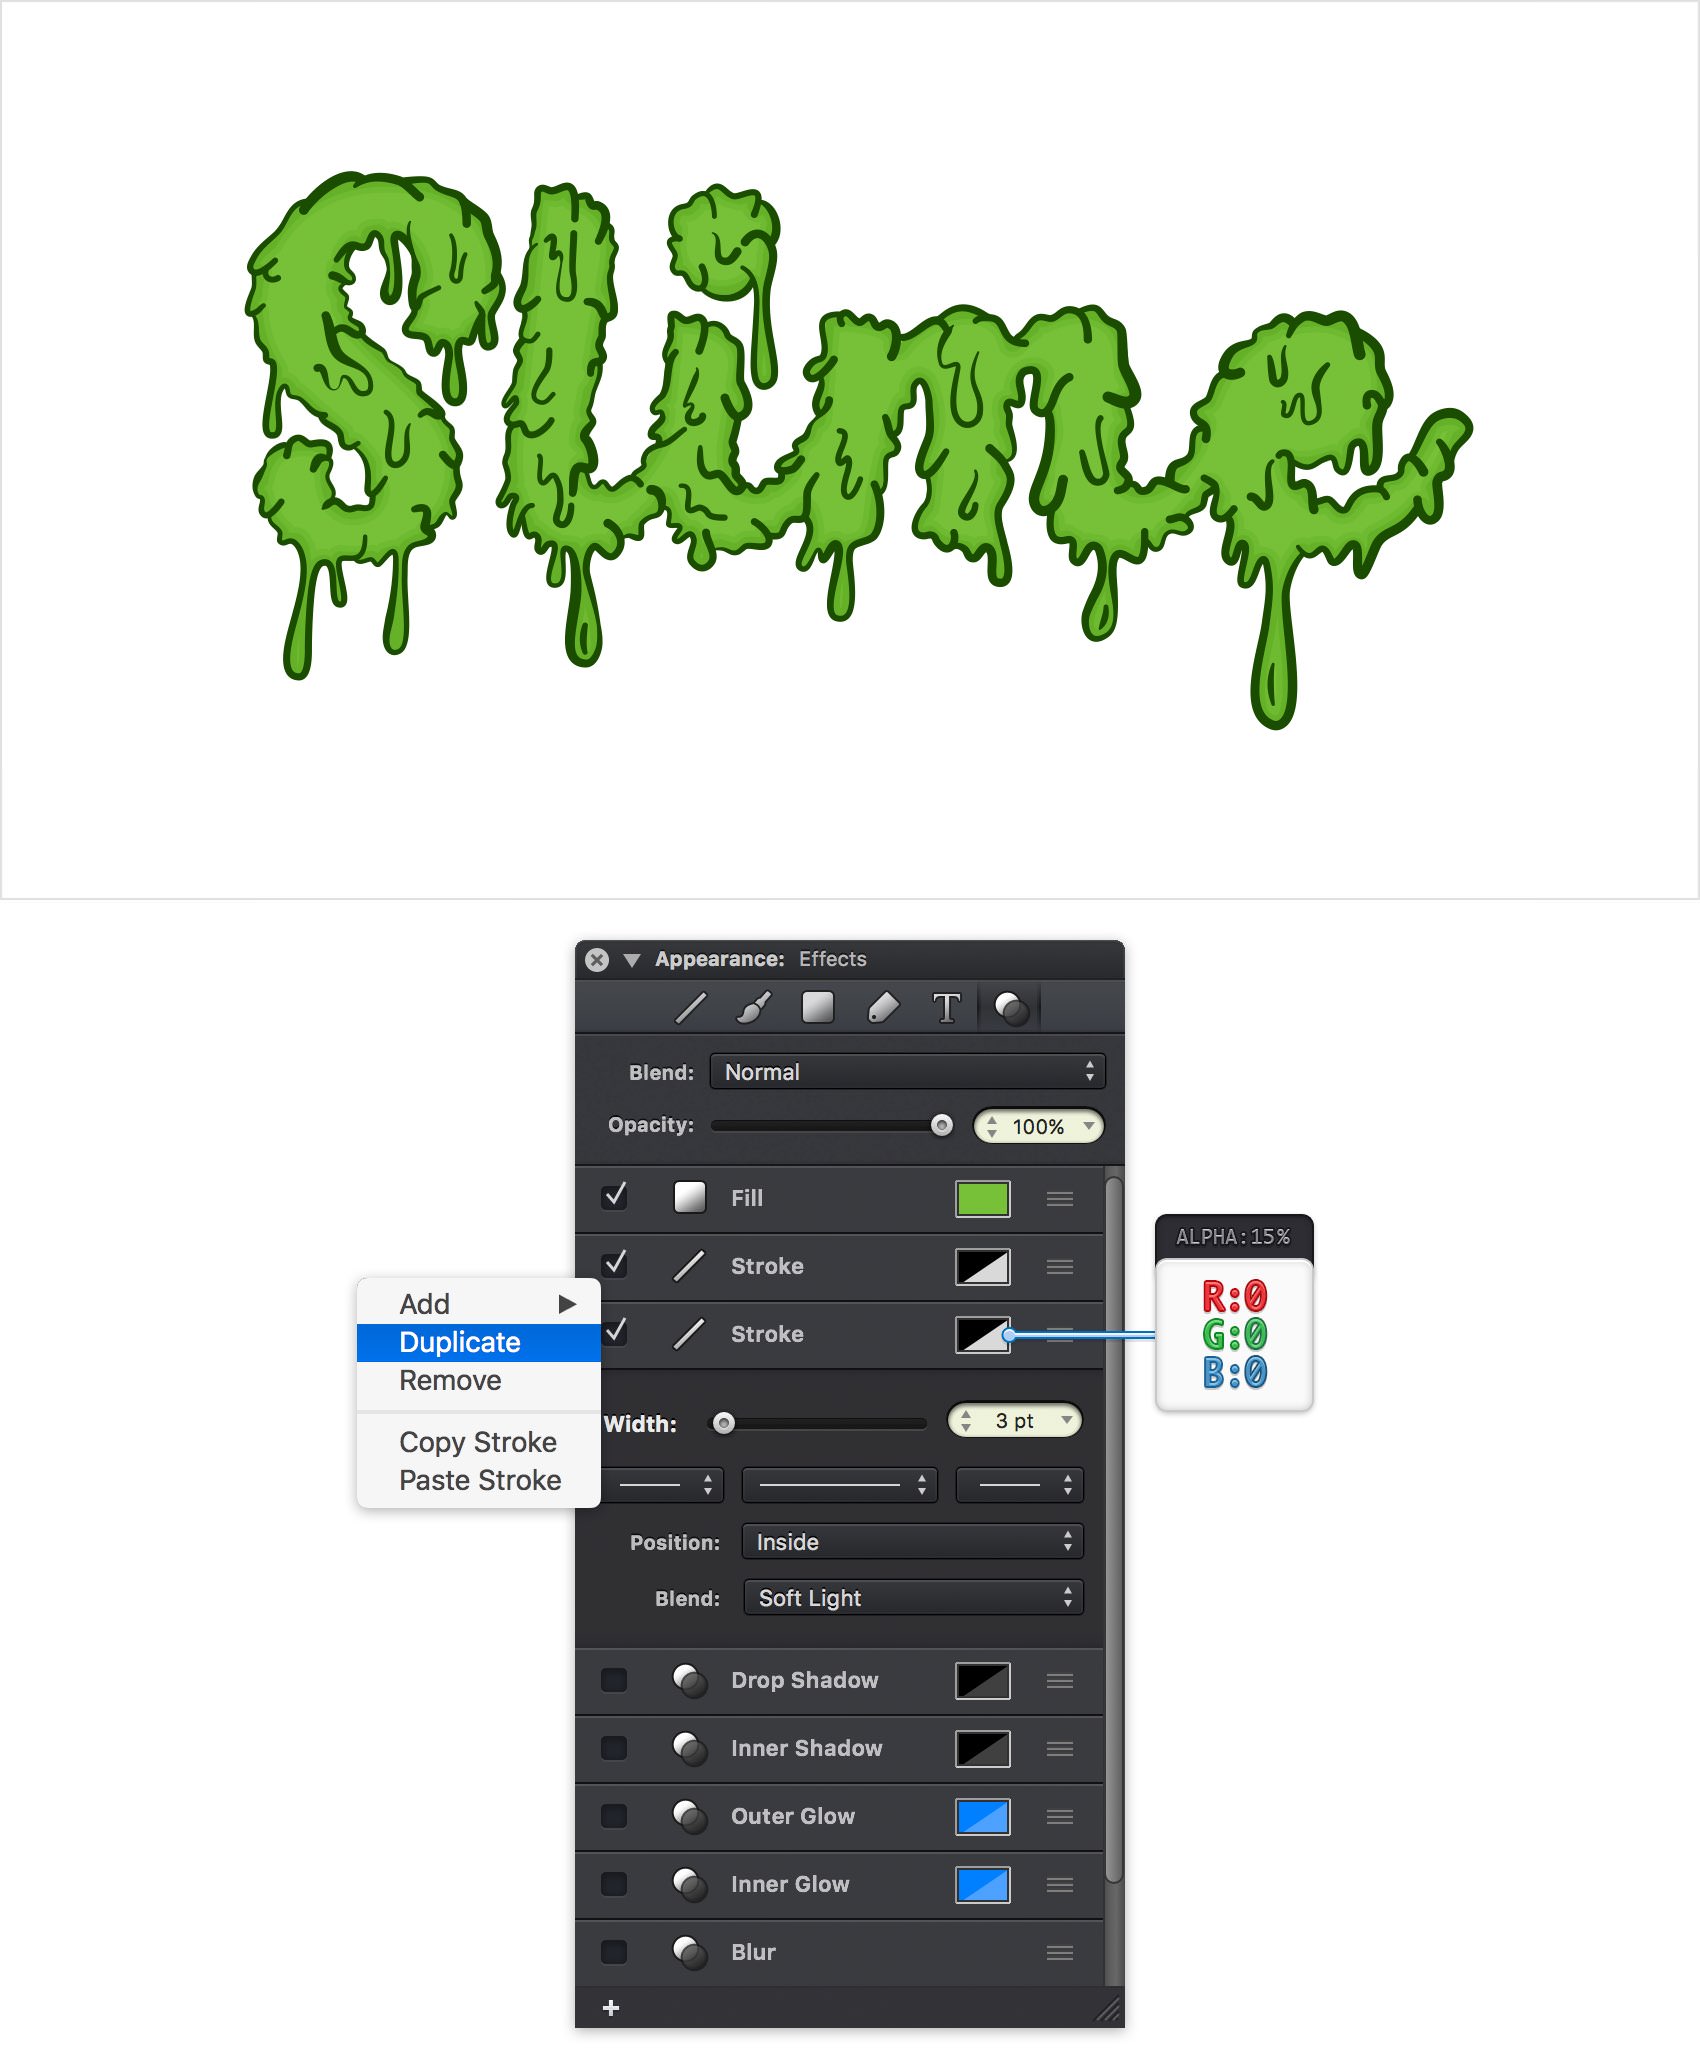
Make sure that your green compound path is still selected, focus on the Effects section from the Appearance pane, right click on the existing stroke and go to Duplicate. Select the bottom Stroke and decrease the Width to 3 pt.
Step 12
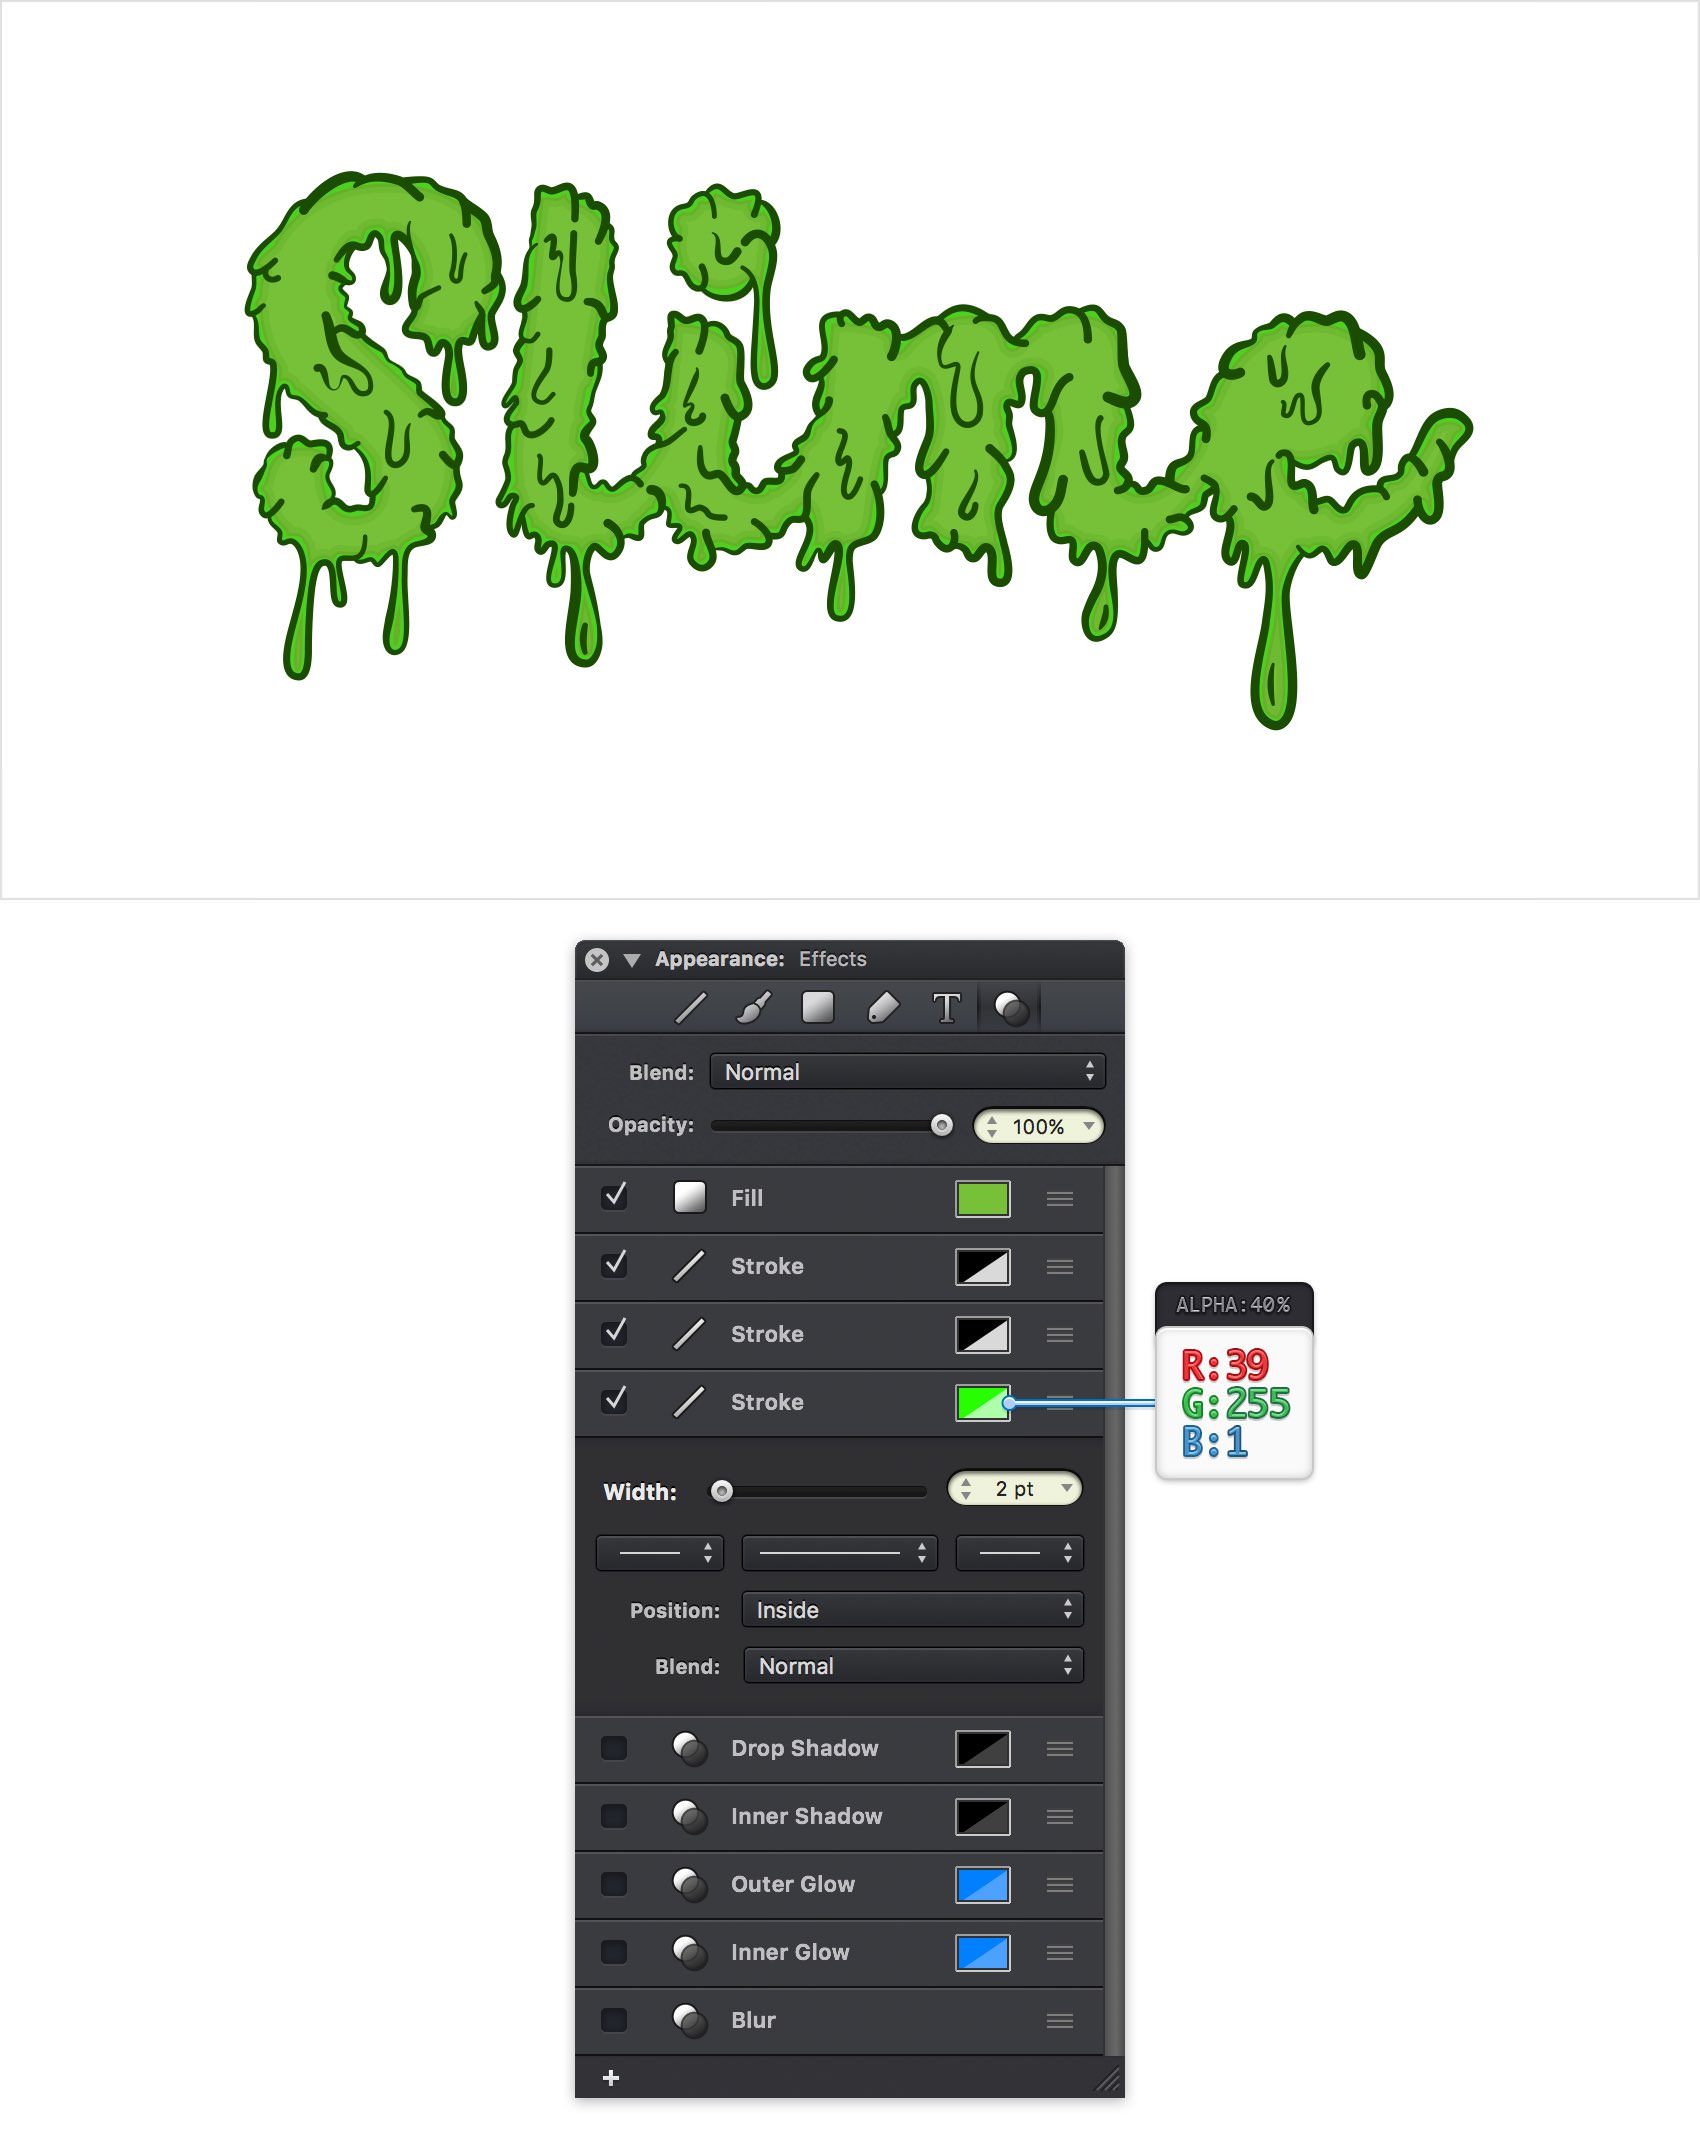
Make sure that your green compound path is still selected, keep focusing on the Effects section from the Appearance pane and duplicate the bottom Stroke. Select the bottom Stroke, decrease its Width to 2 pt and change the Blend Mode to Normal and then open its color panel. Replace the existing color with R=39 G=255 B=1 and drag the Alpha slider to 40%.
Step 13
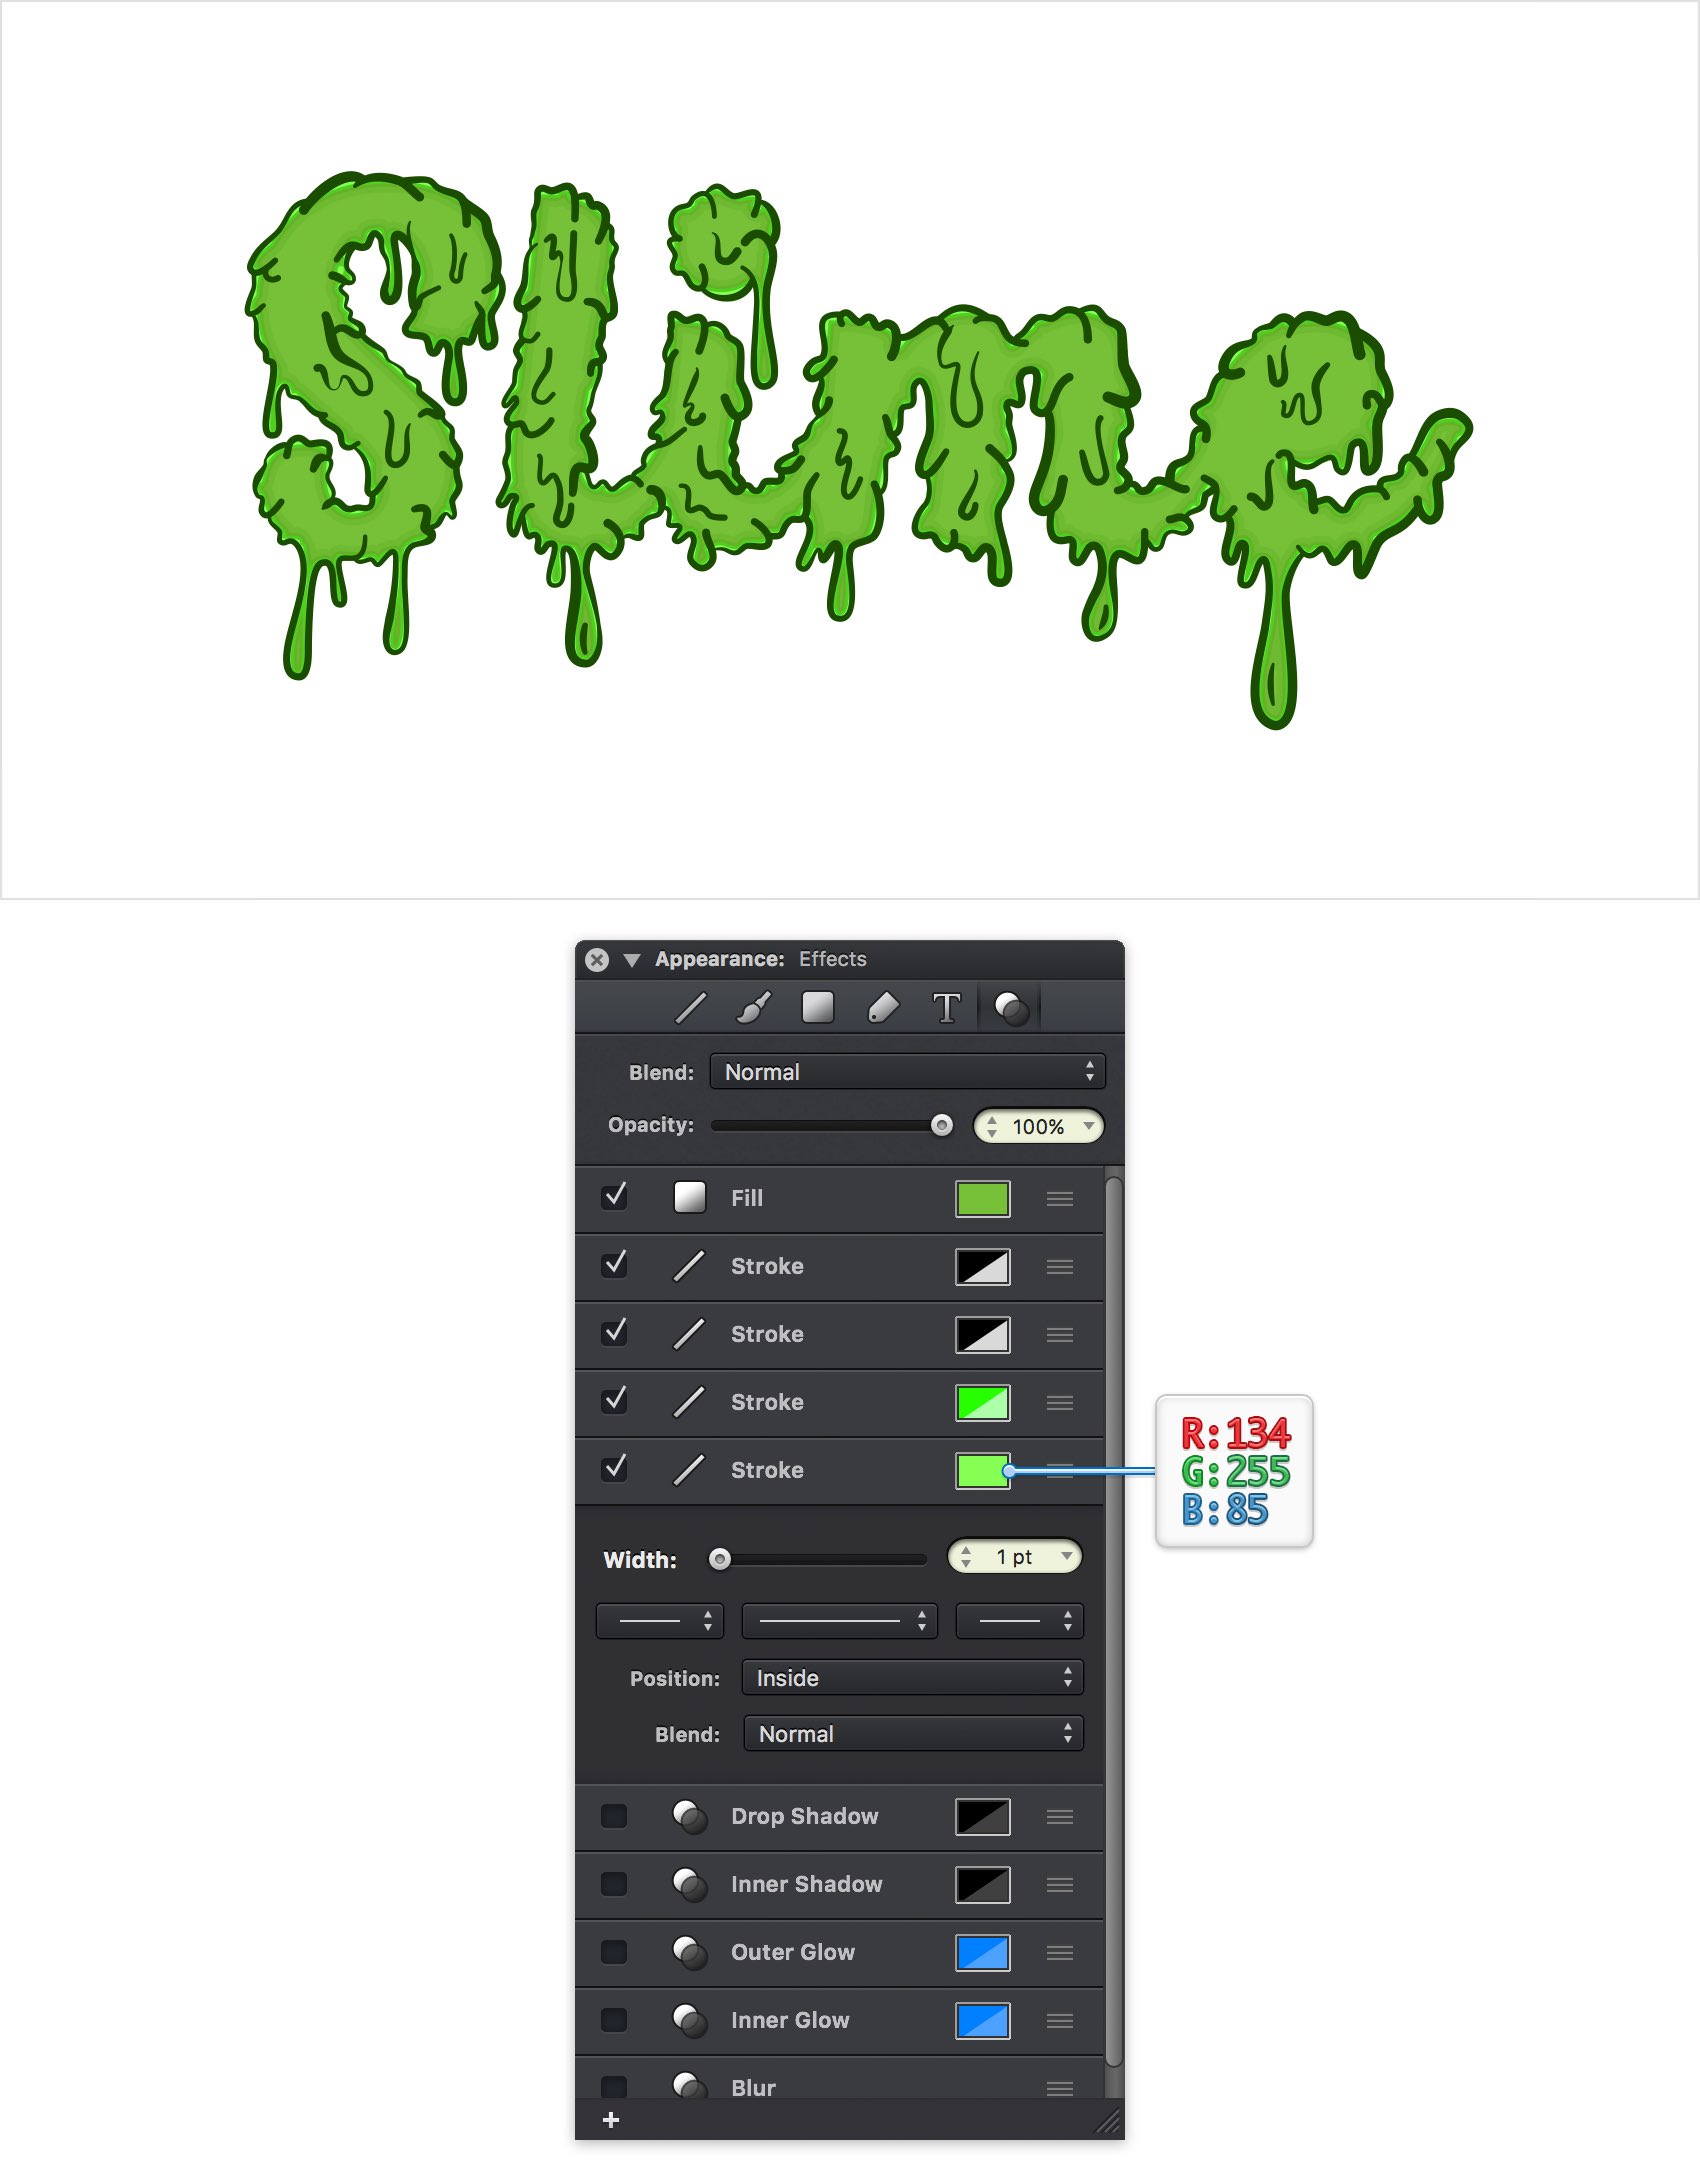
Make sure that your green compound path is still selected, keep focusing on the Effects section from the Appearance pane and duplicate the bottom Stroke. Select the bottom Stroke and replace the existing attributes with the ones shown in the following image.
Step 14
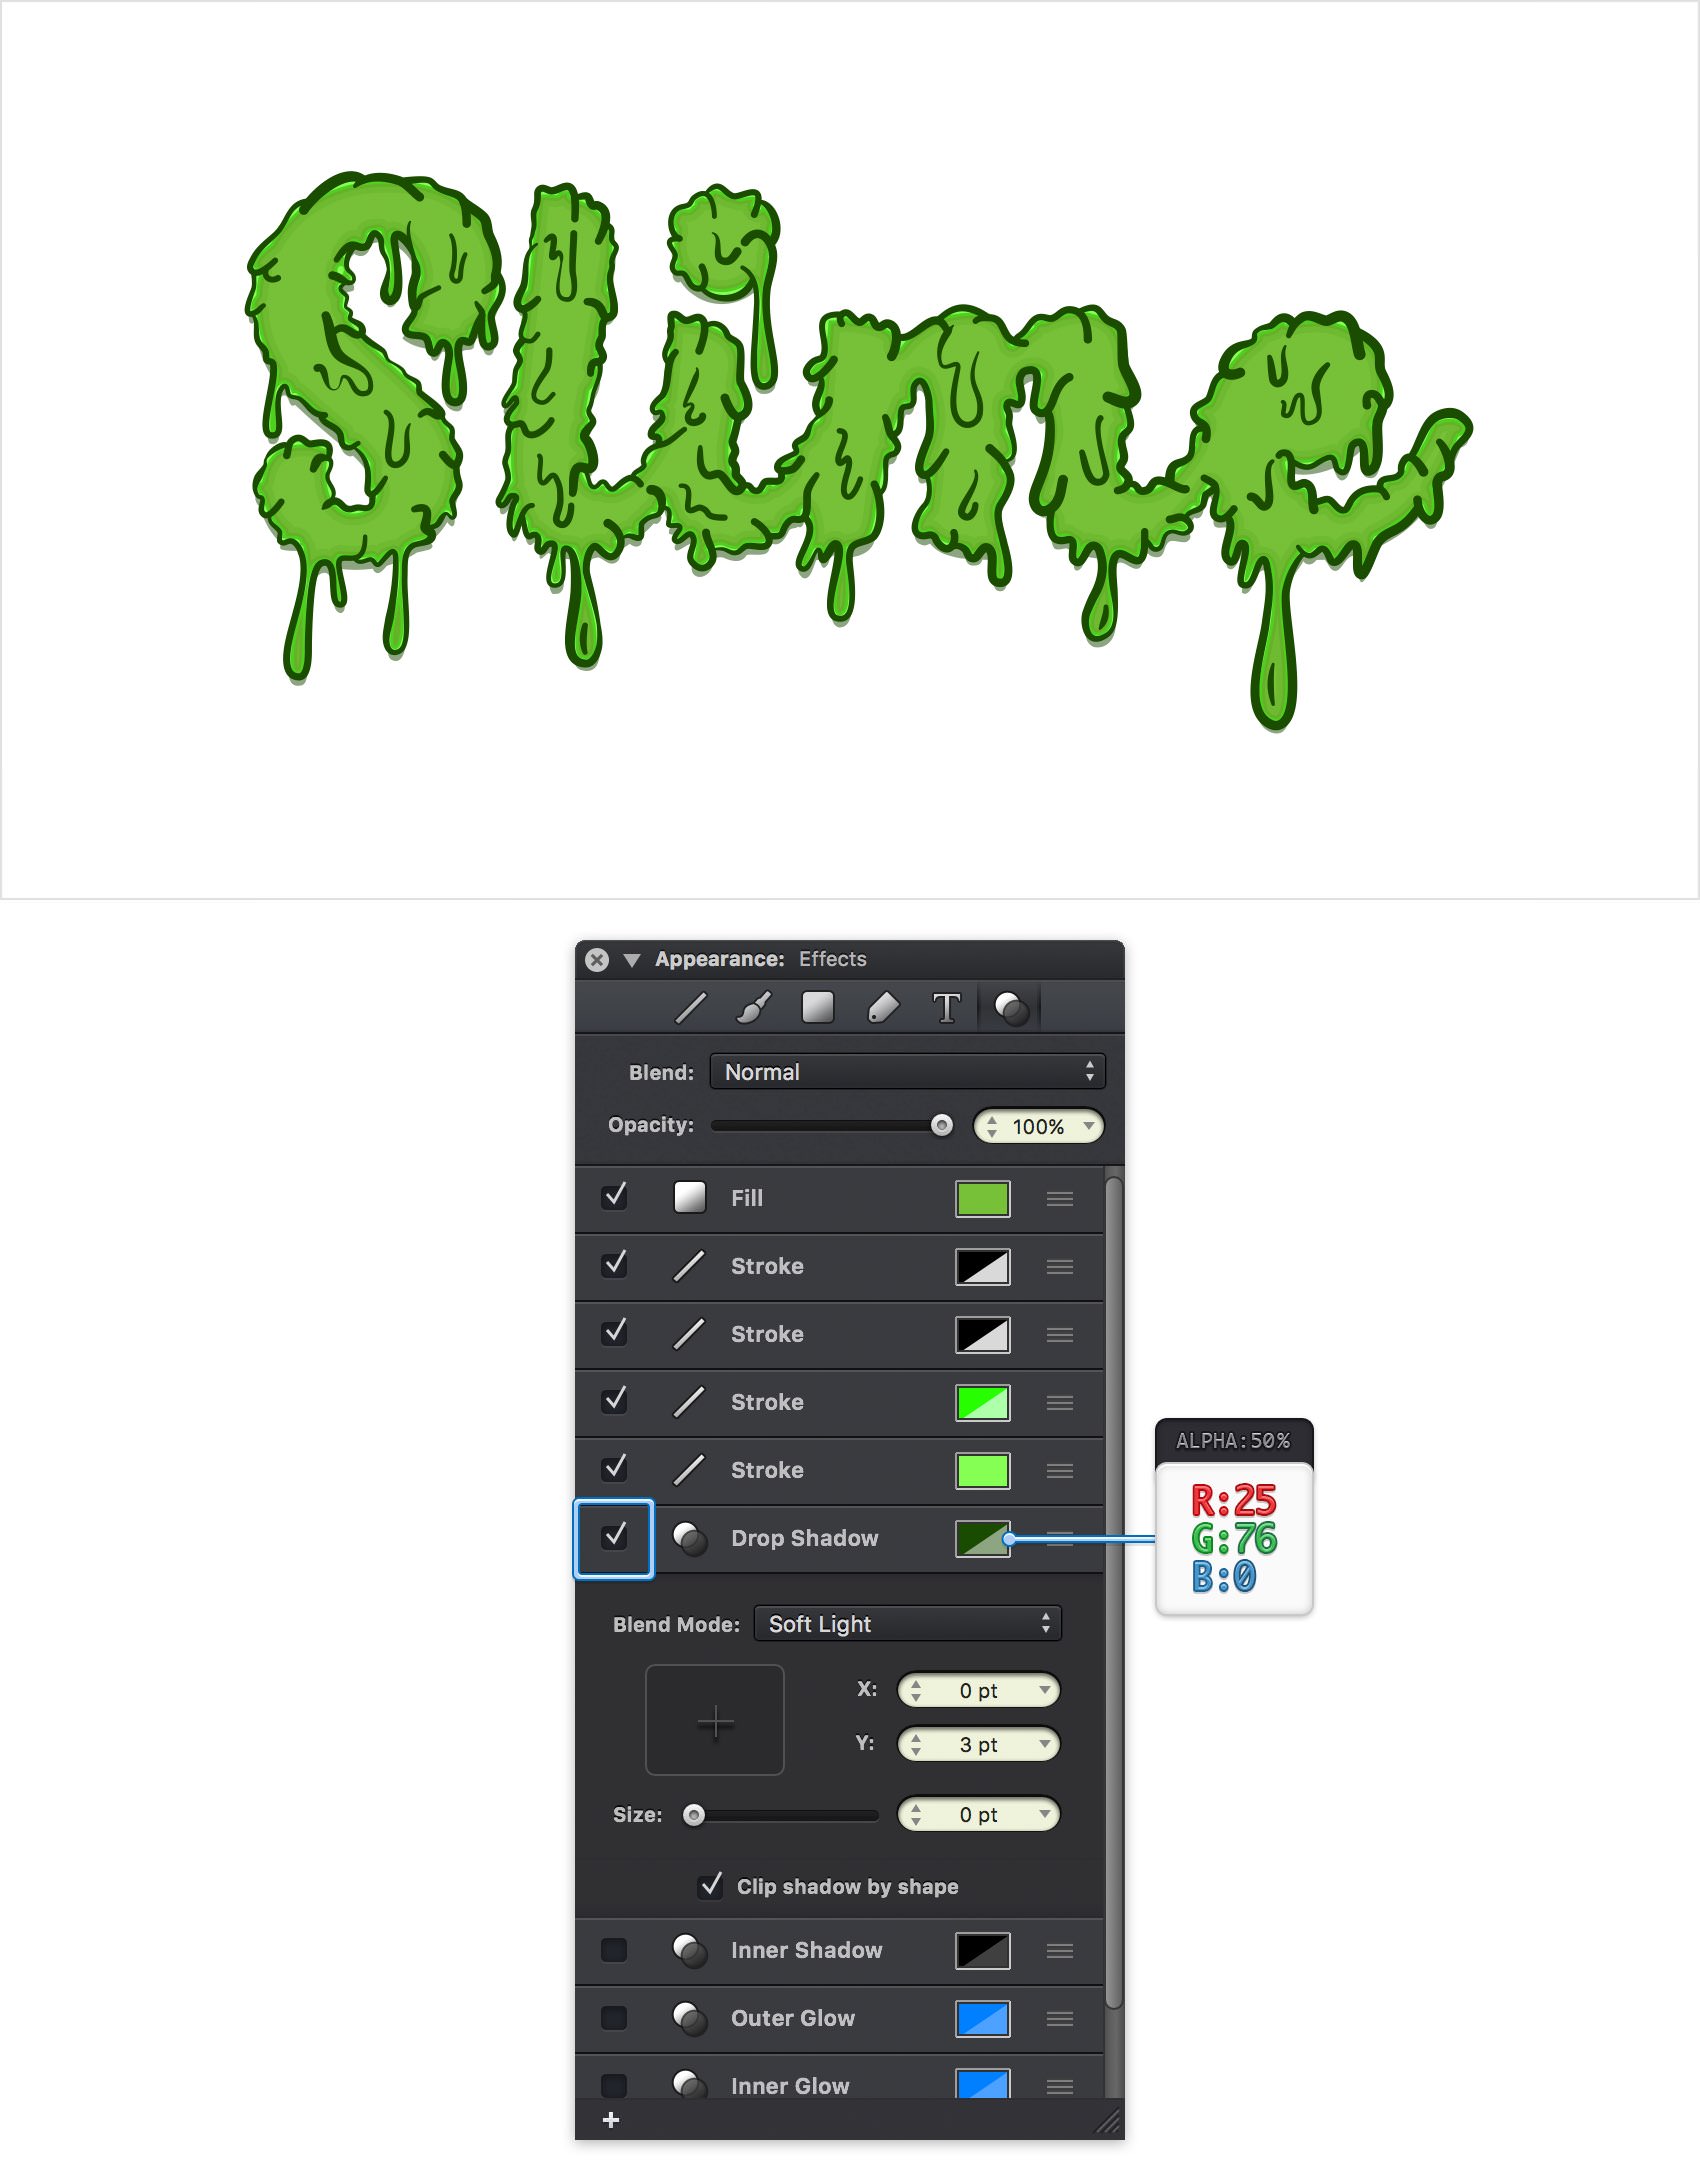
Make sure that your green compound path is still selected, keep focusing on the Effects section from the Appearance pane and check that little box that stands for your Drop Shadow to activate it. Change the Blend Mode to Soft Light, enter 0 pt in the X box and 3 pt in the Y box, drag the Size slider to 0 pt and then open its color panel. Replace the existing color with R=25 G=76 B=0 and drag the Alpha slider to 50%.
Step 15
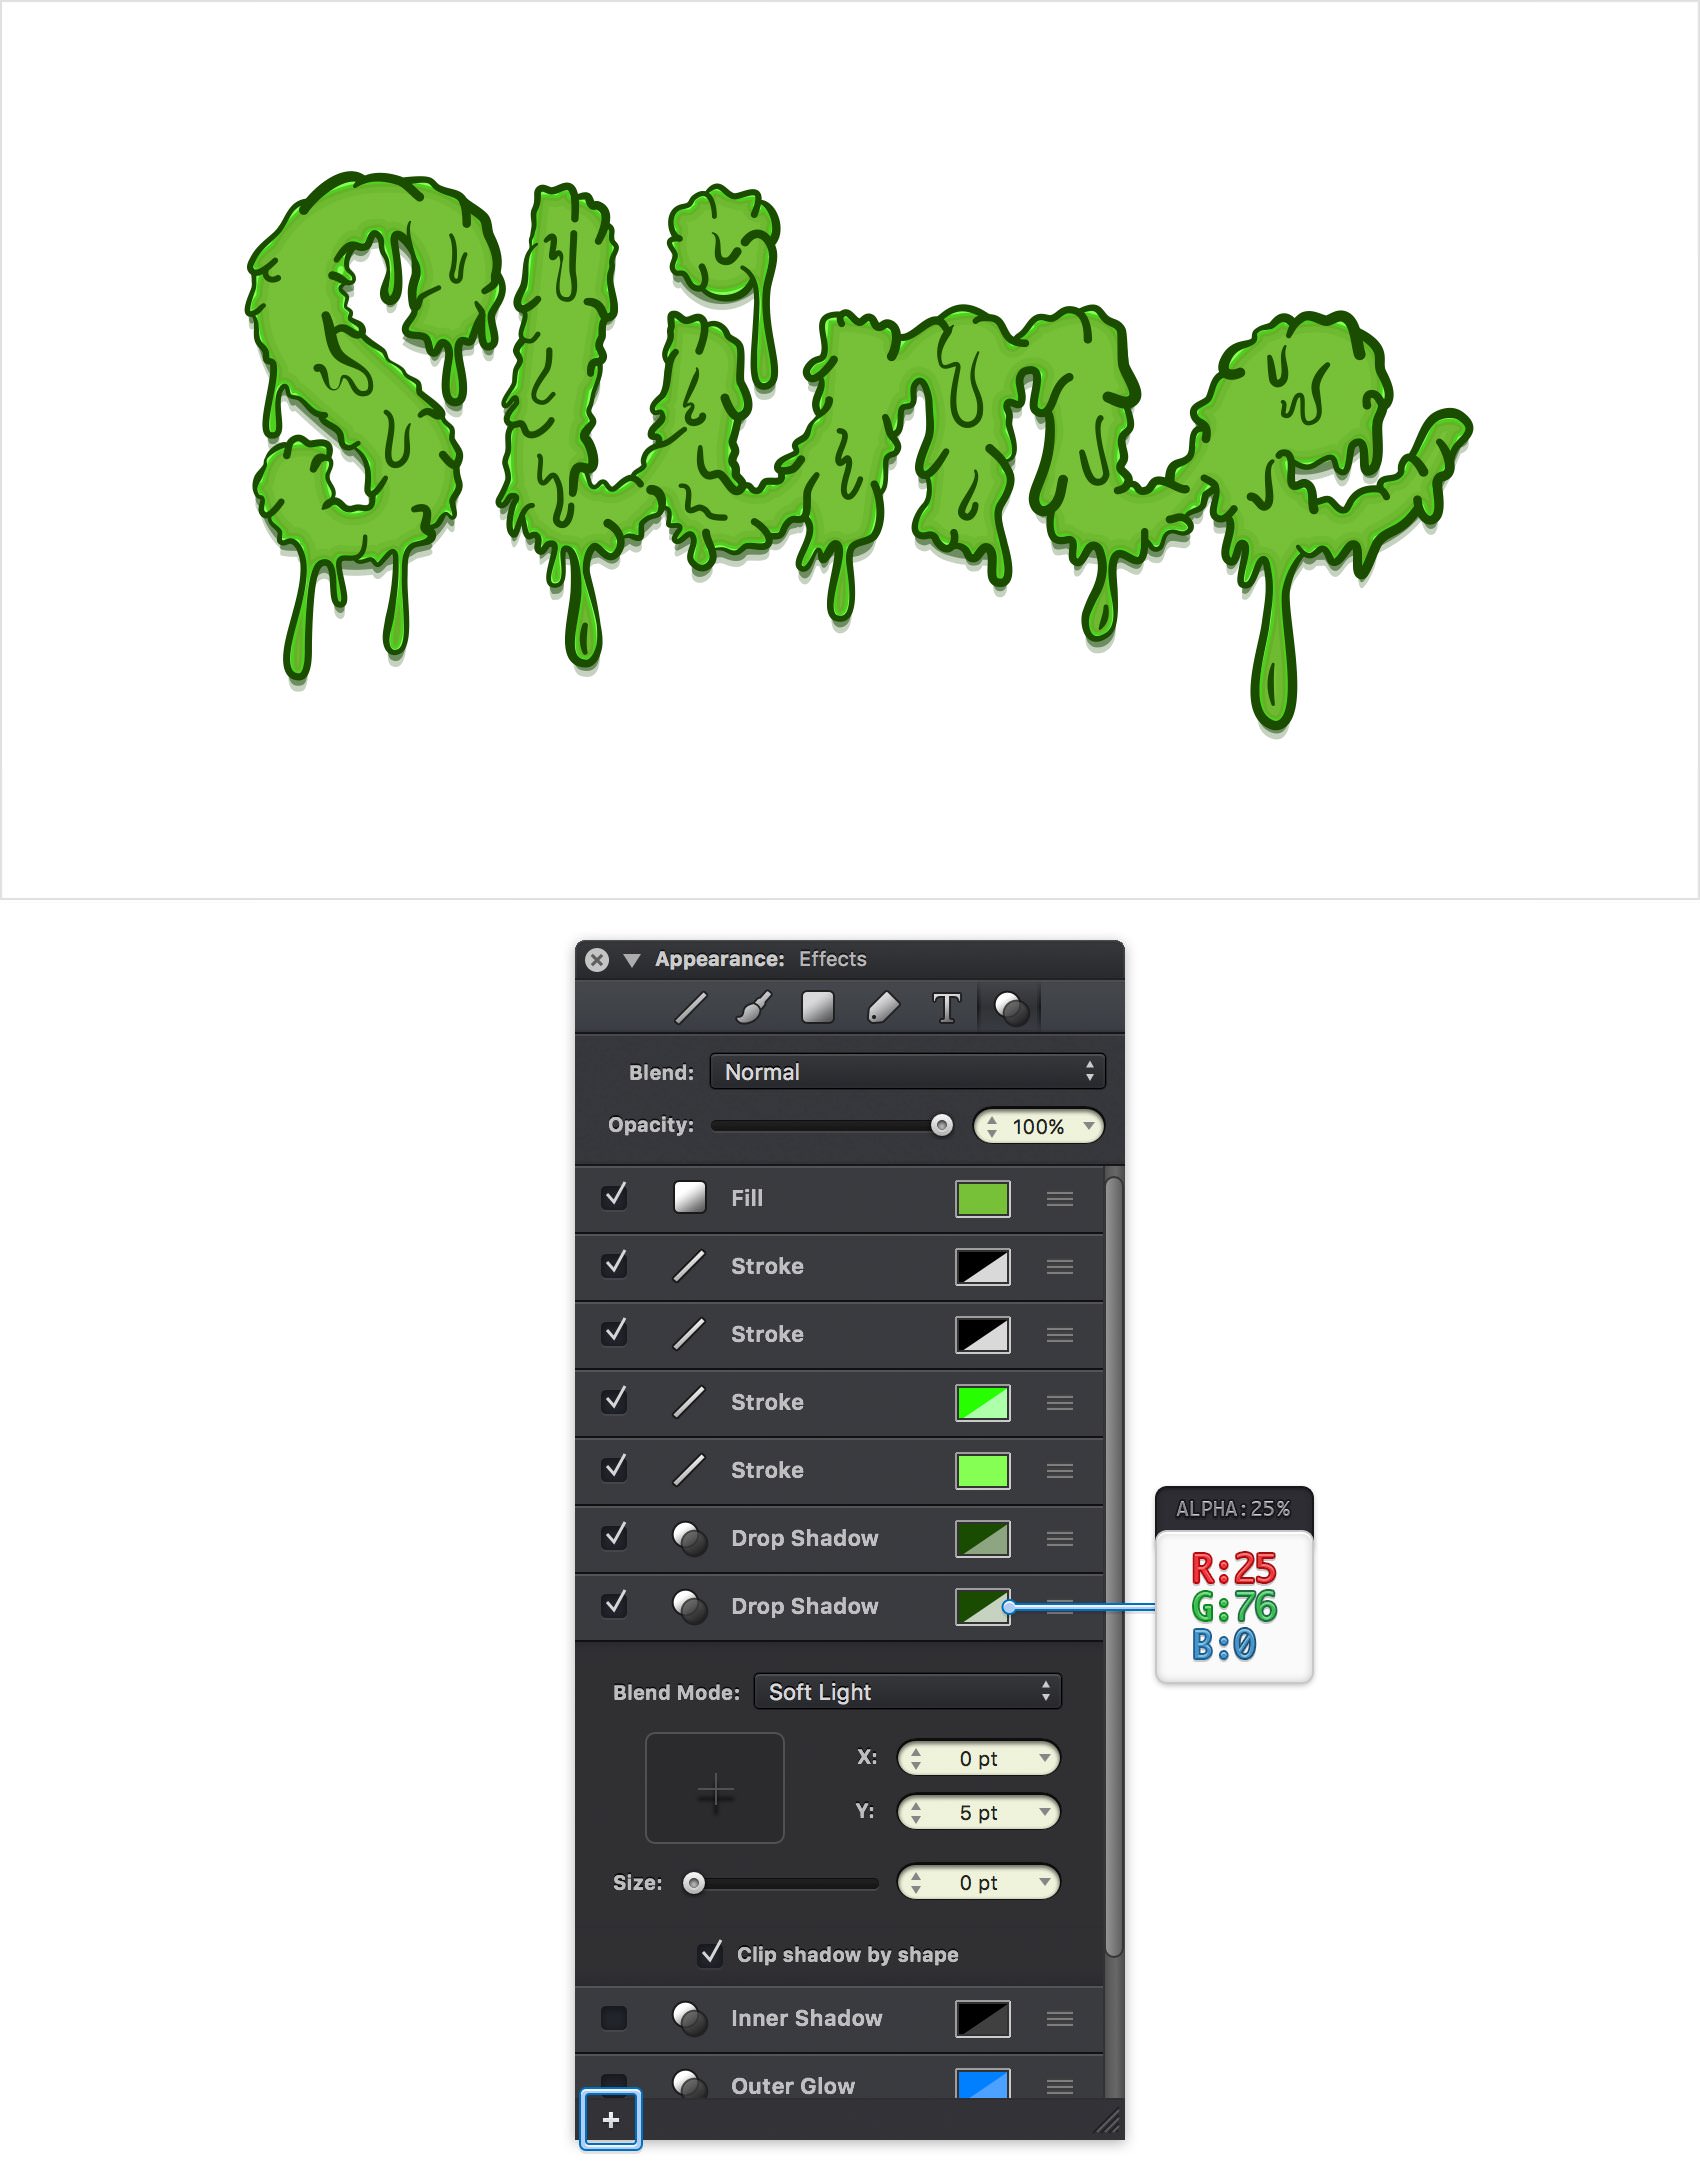
Make sure that your green compound path is still selected, keep focusing on the Effects section from the Appearance pane and add a second Drop Shadow using the plus button located in the bottom, left corner of your pane. Select this new Drop Shadow, drag it below the existing effect and enter the attributes shown in the following image.
Step 16
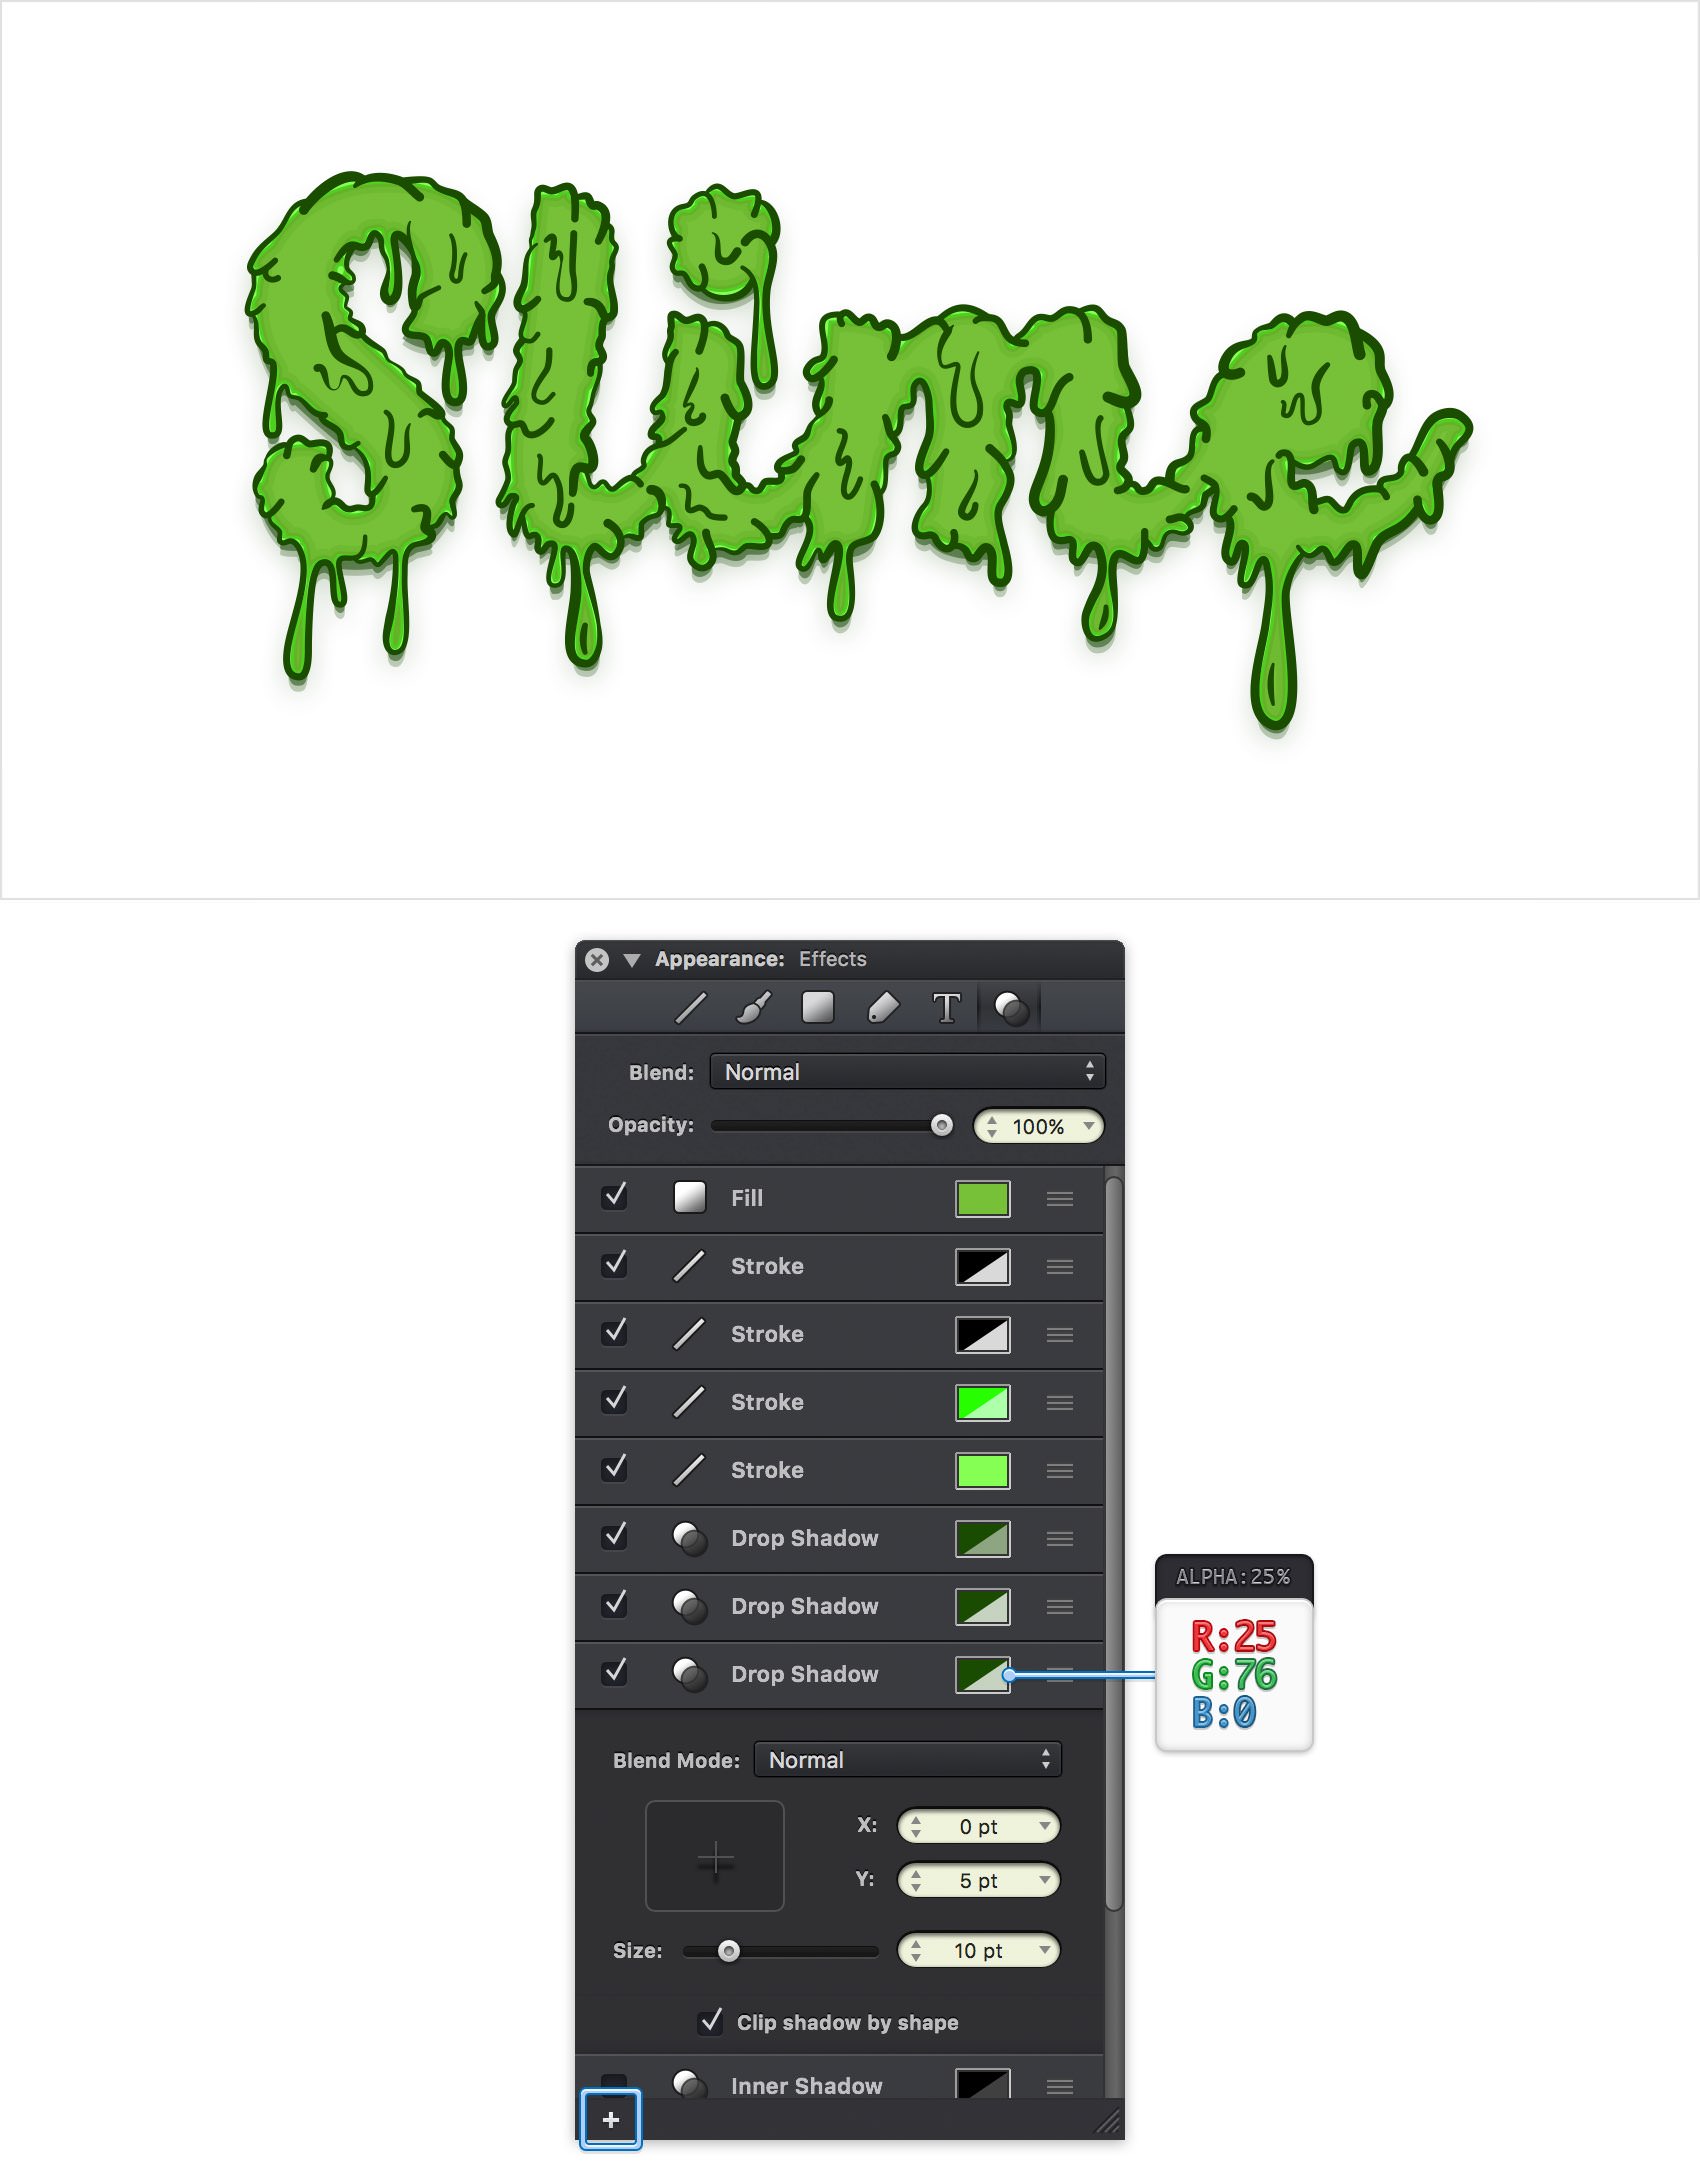
Make sure that your green compound path is still selected, keep focusing on the Effects section from the Appearance pane and add a third Drop Shadow. Select this new Drop Shadow, drag it below the other two effects and enter the attributes shown in the following image.
Step 17
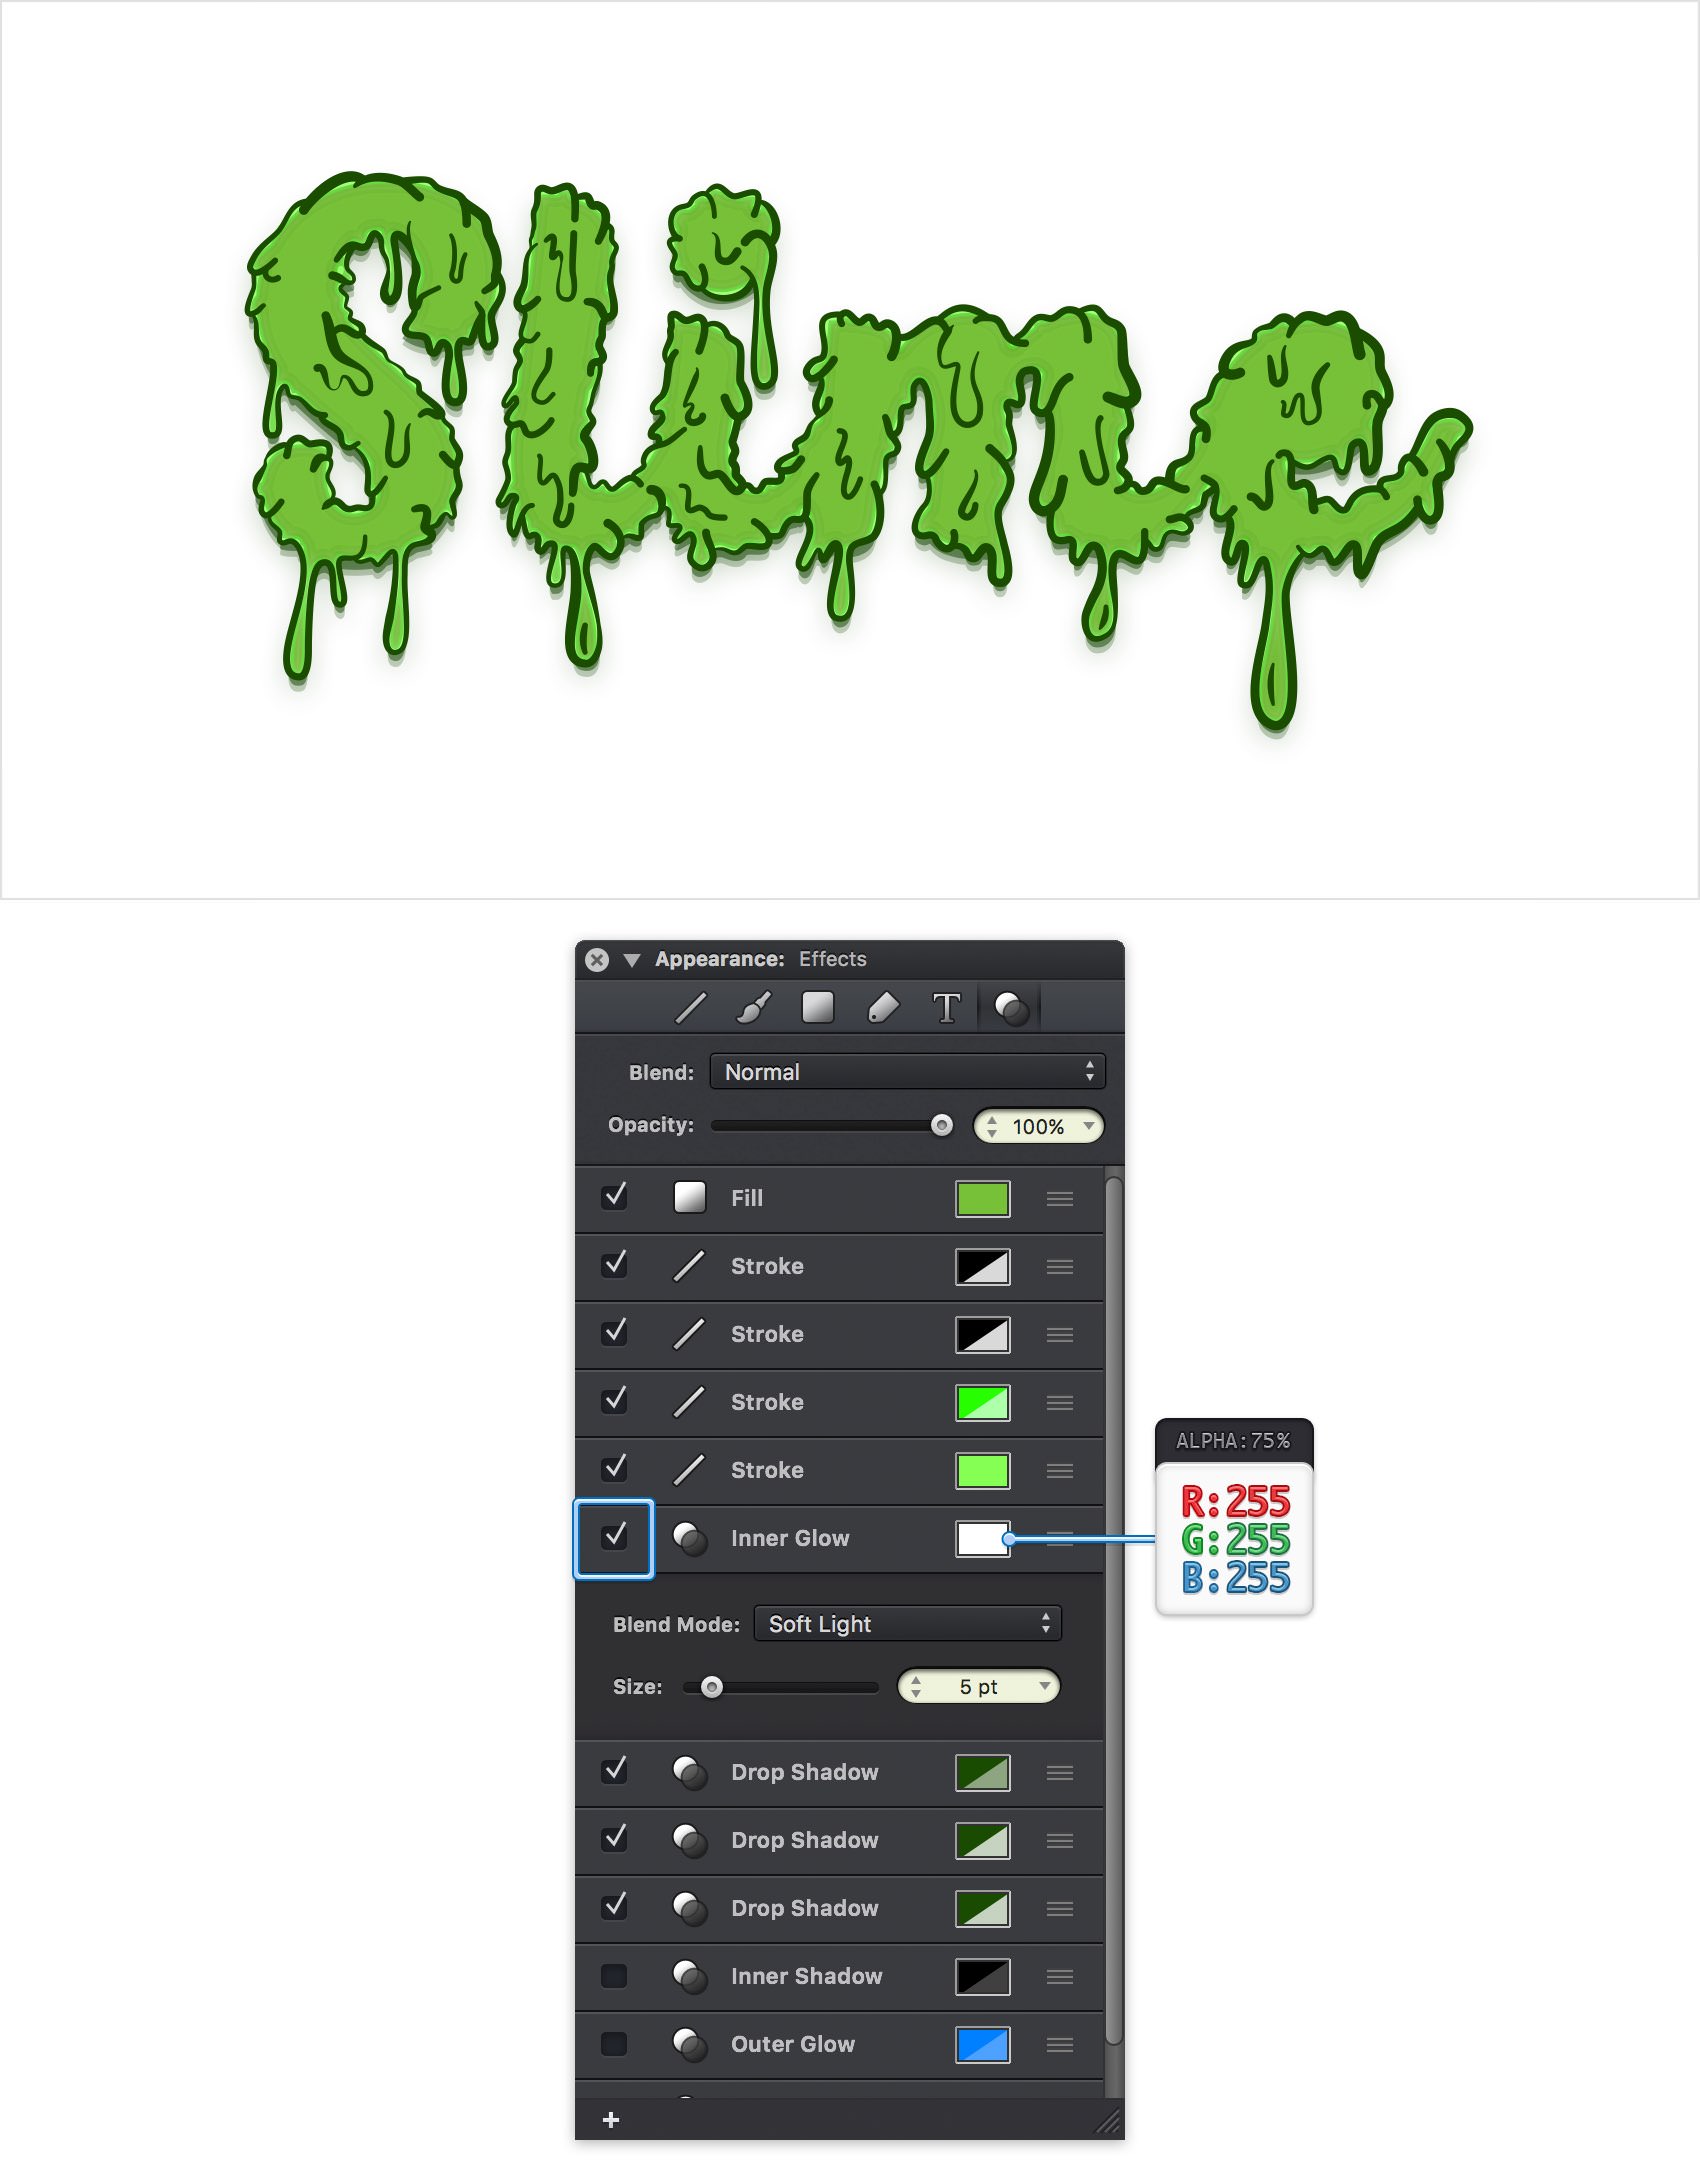
Make sure that your green compound path is still selected, keep focusing on the Effects section from the Appearance pane and activate the existing Inner Glow effect. Drag it above those Drop Shadow effects and then enter the attributes shown in the following image.
Step 18
Focus on the Layers pane, add a new layer and name it "white". Drag it in the top of the pane and make sure that it stays selected.
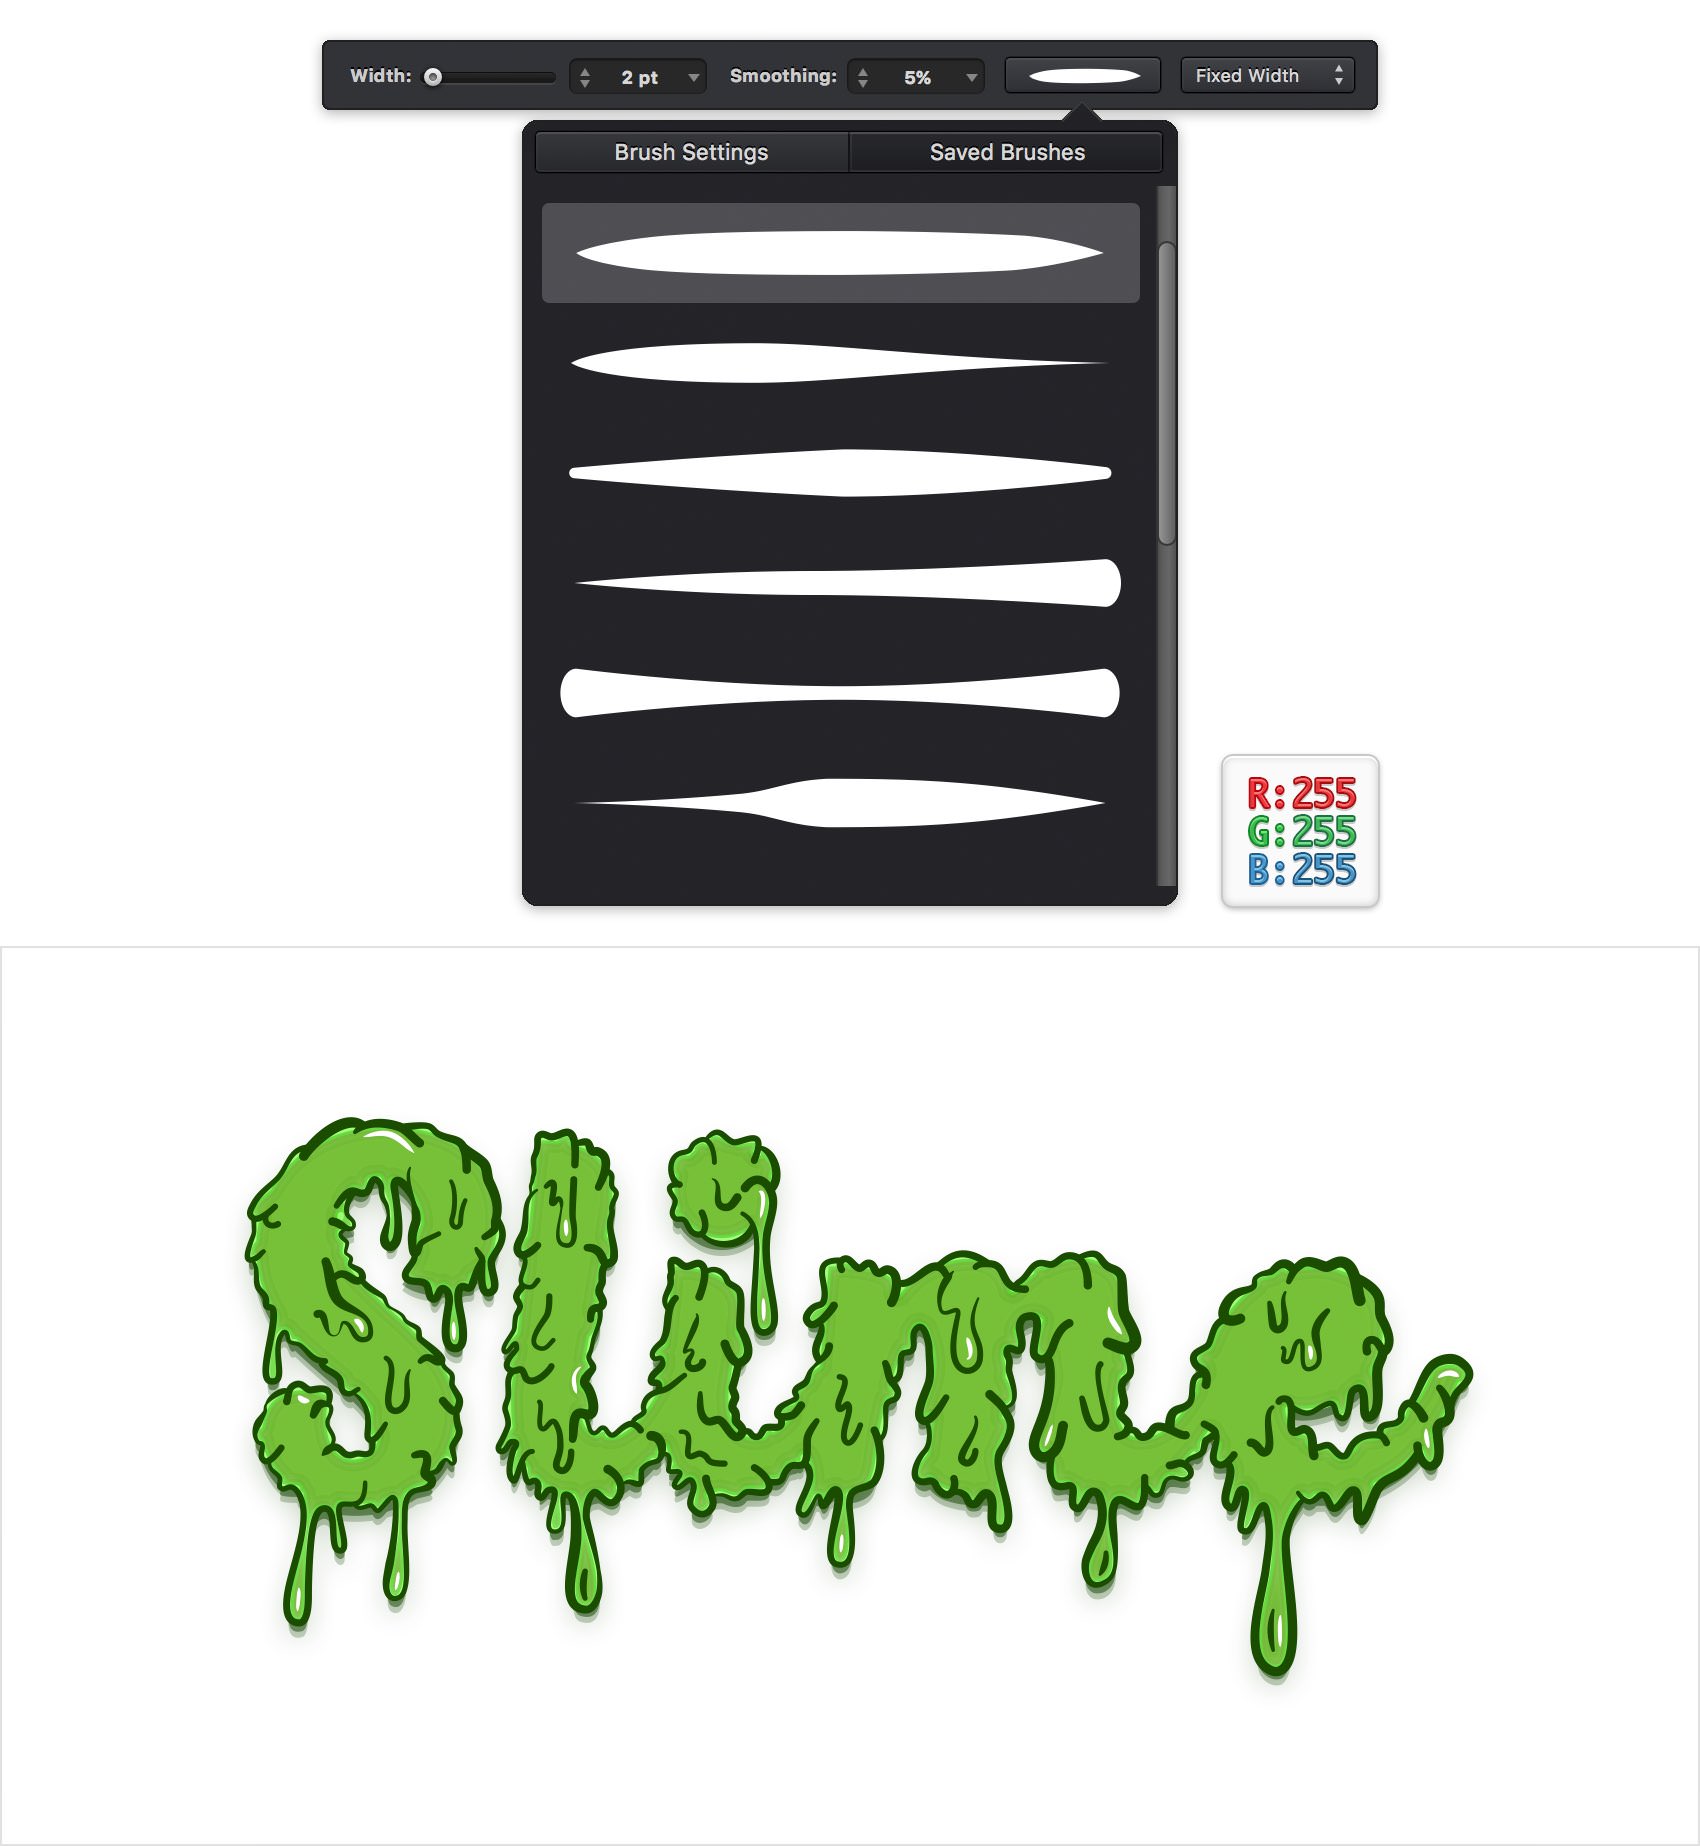
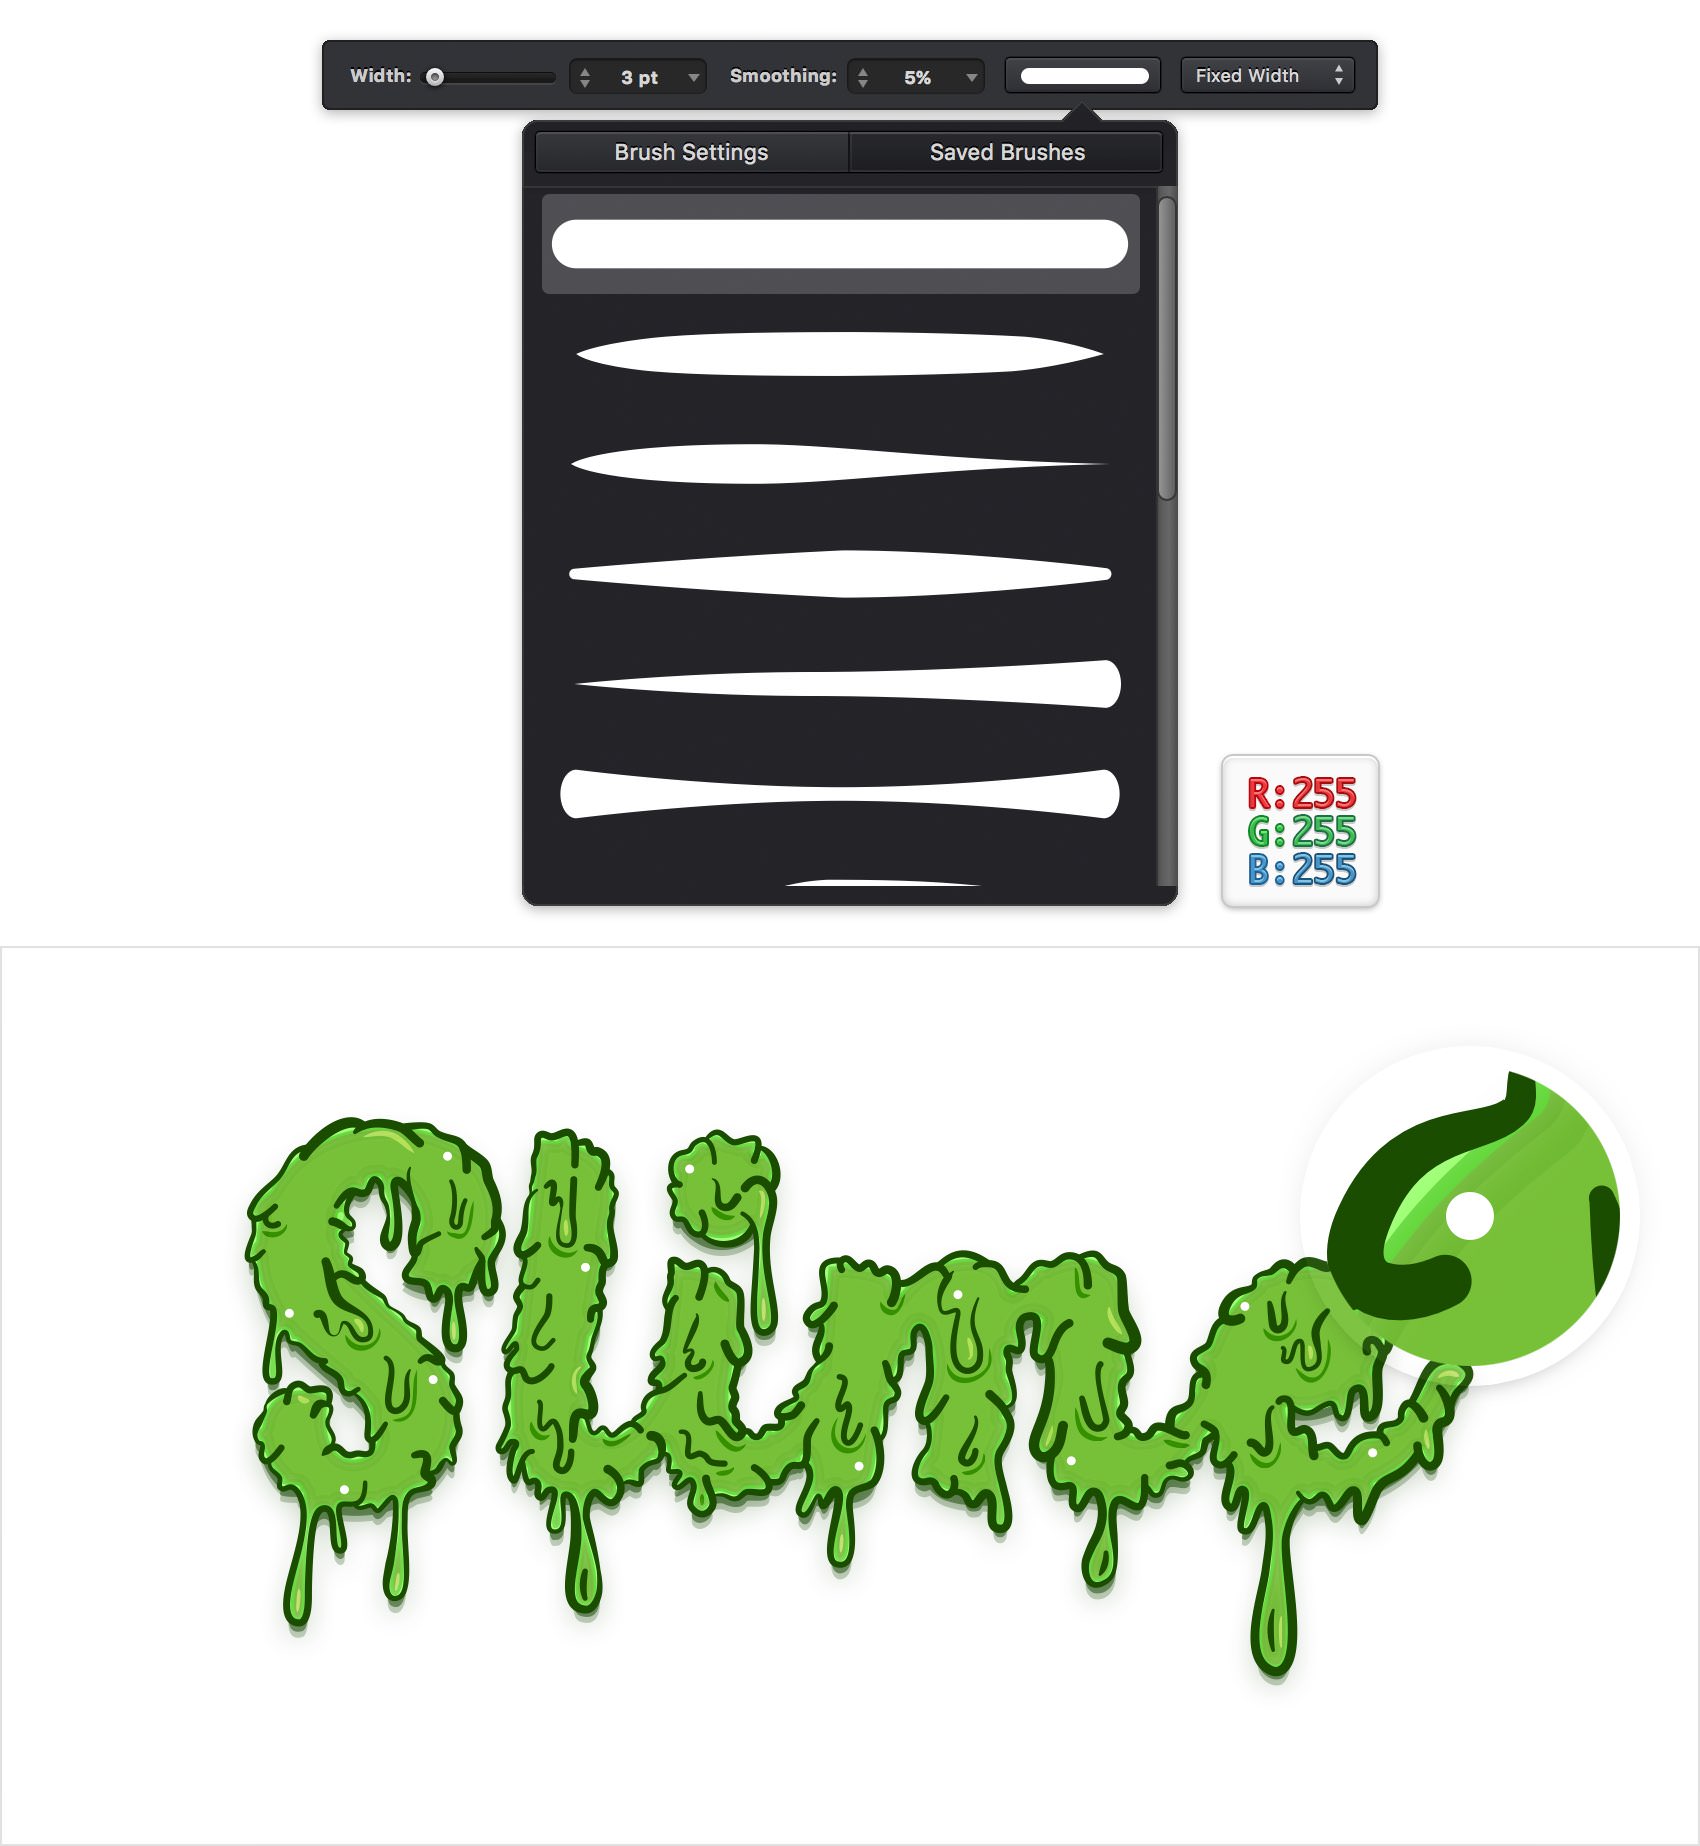
Pick the Brush Tool (B) and focus on the tool options bar. Drag the Width slider to 2 pt, keep the Smoothing at 5% and then open the Saved Brushes fly-out window. Select the brush highlighted in the following image, set the stroke color to white and then draw several, subtle paths above the dripping section from your text roughly as shown in the following image.
Step 19
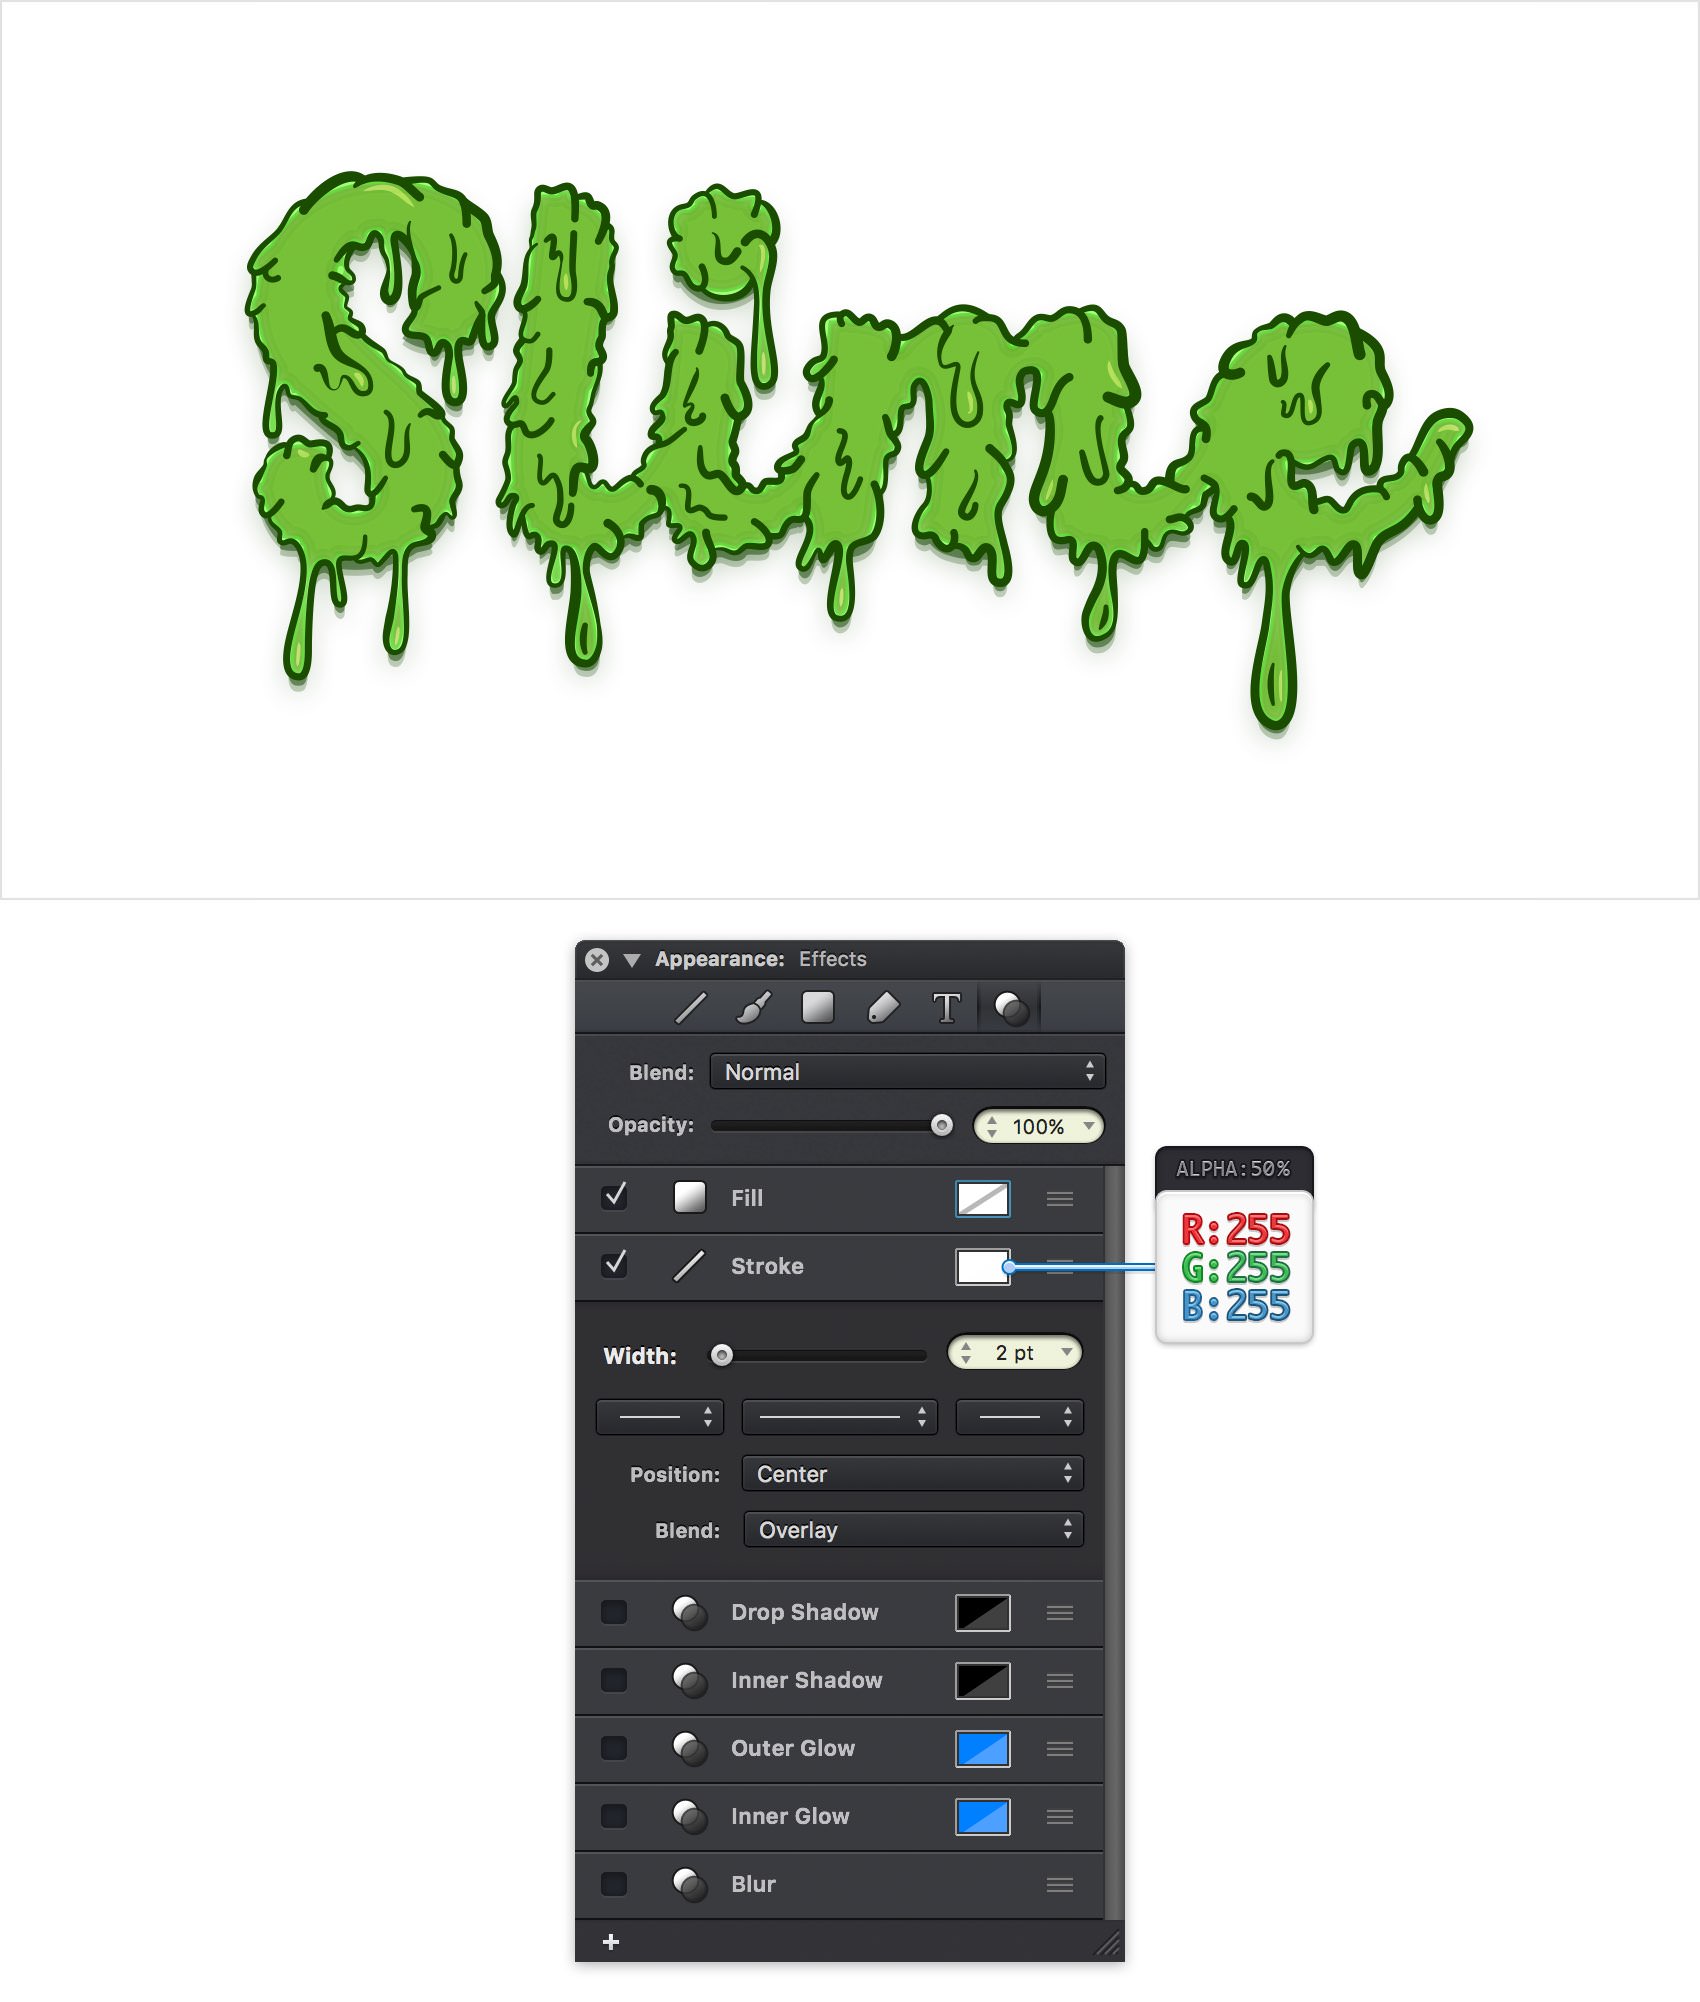
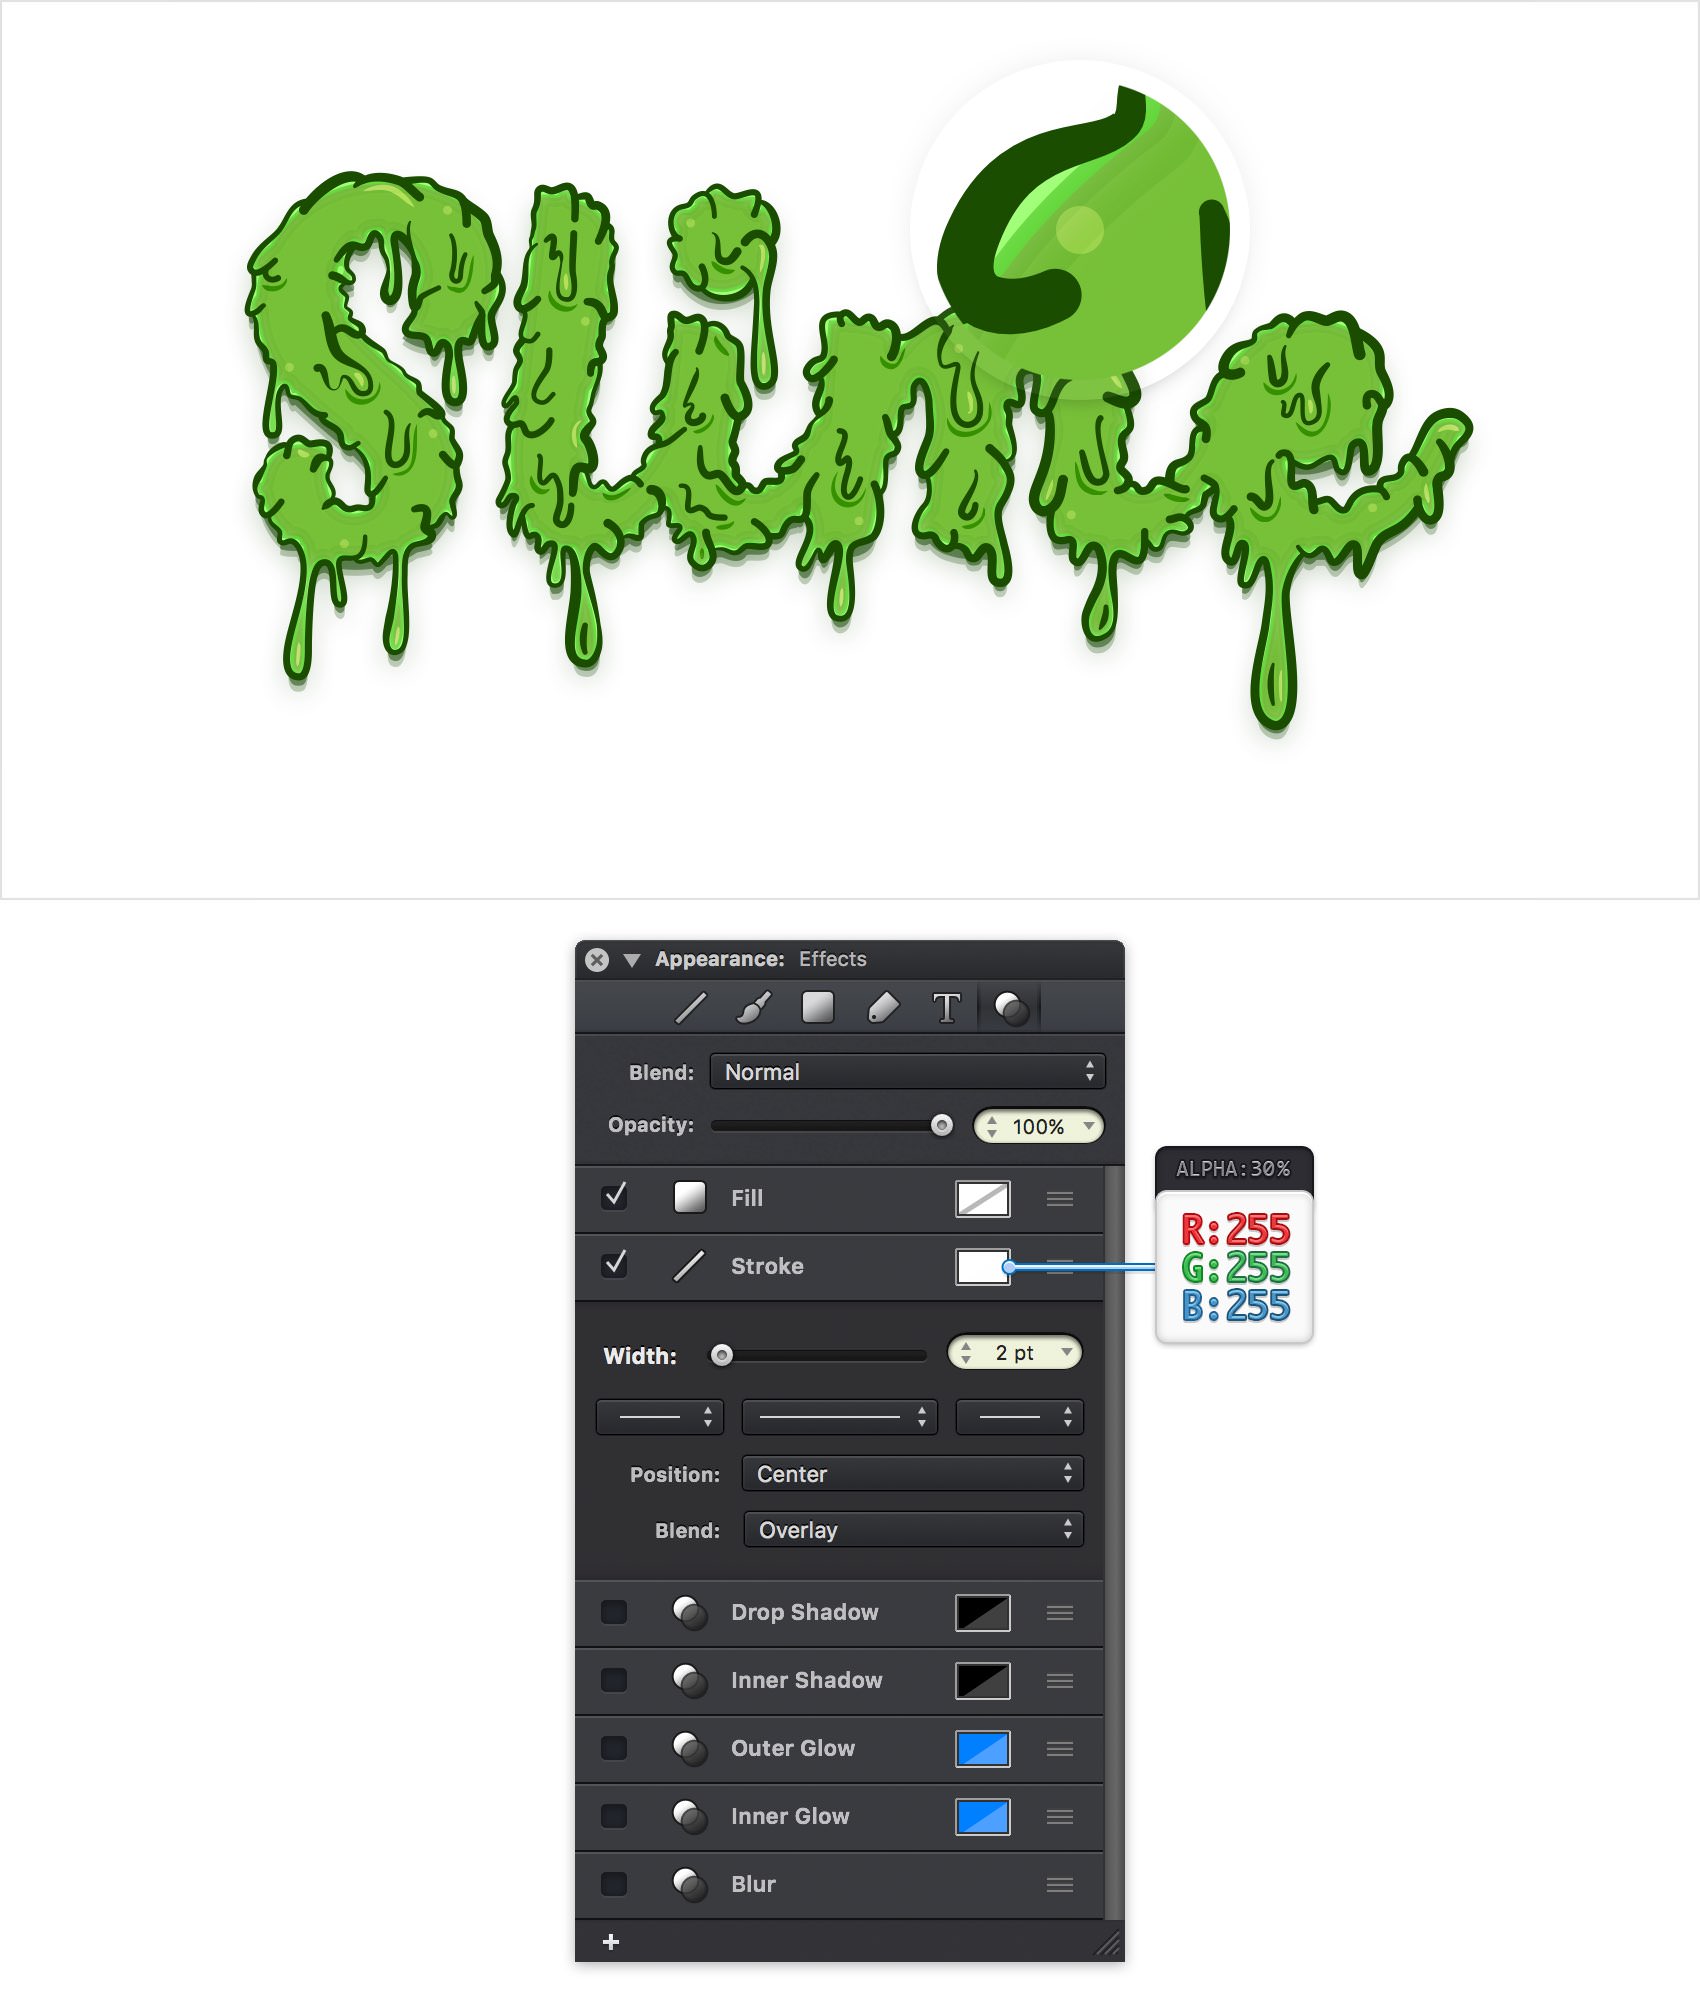
Make sure that all the paths from your "white" layer are selected and focus on the Effects section from the Appearance pane. Select the Stroke, change the Blend Mode to Overlay and then open its color panel and drag the Alpha slider to 50%.
Step 20
Return to the Layers pane, add a new layer and name it "black". Drag it in the top of the pane and make sure that it stays selected.
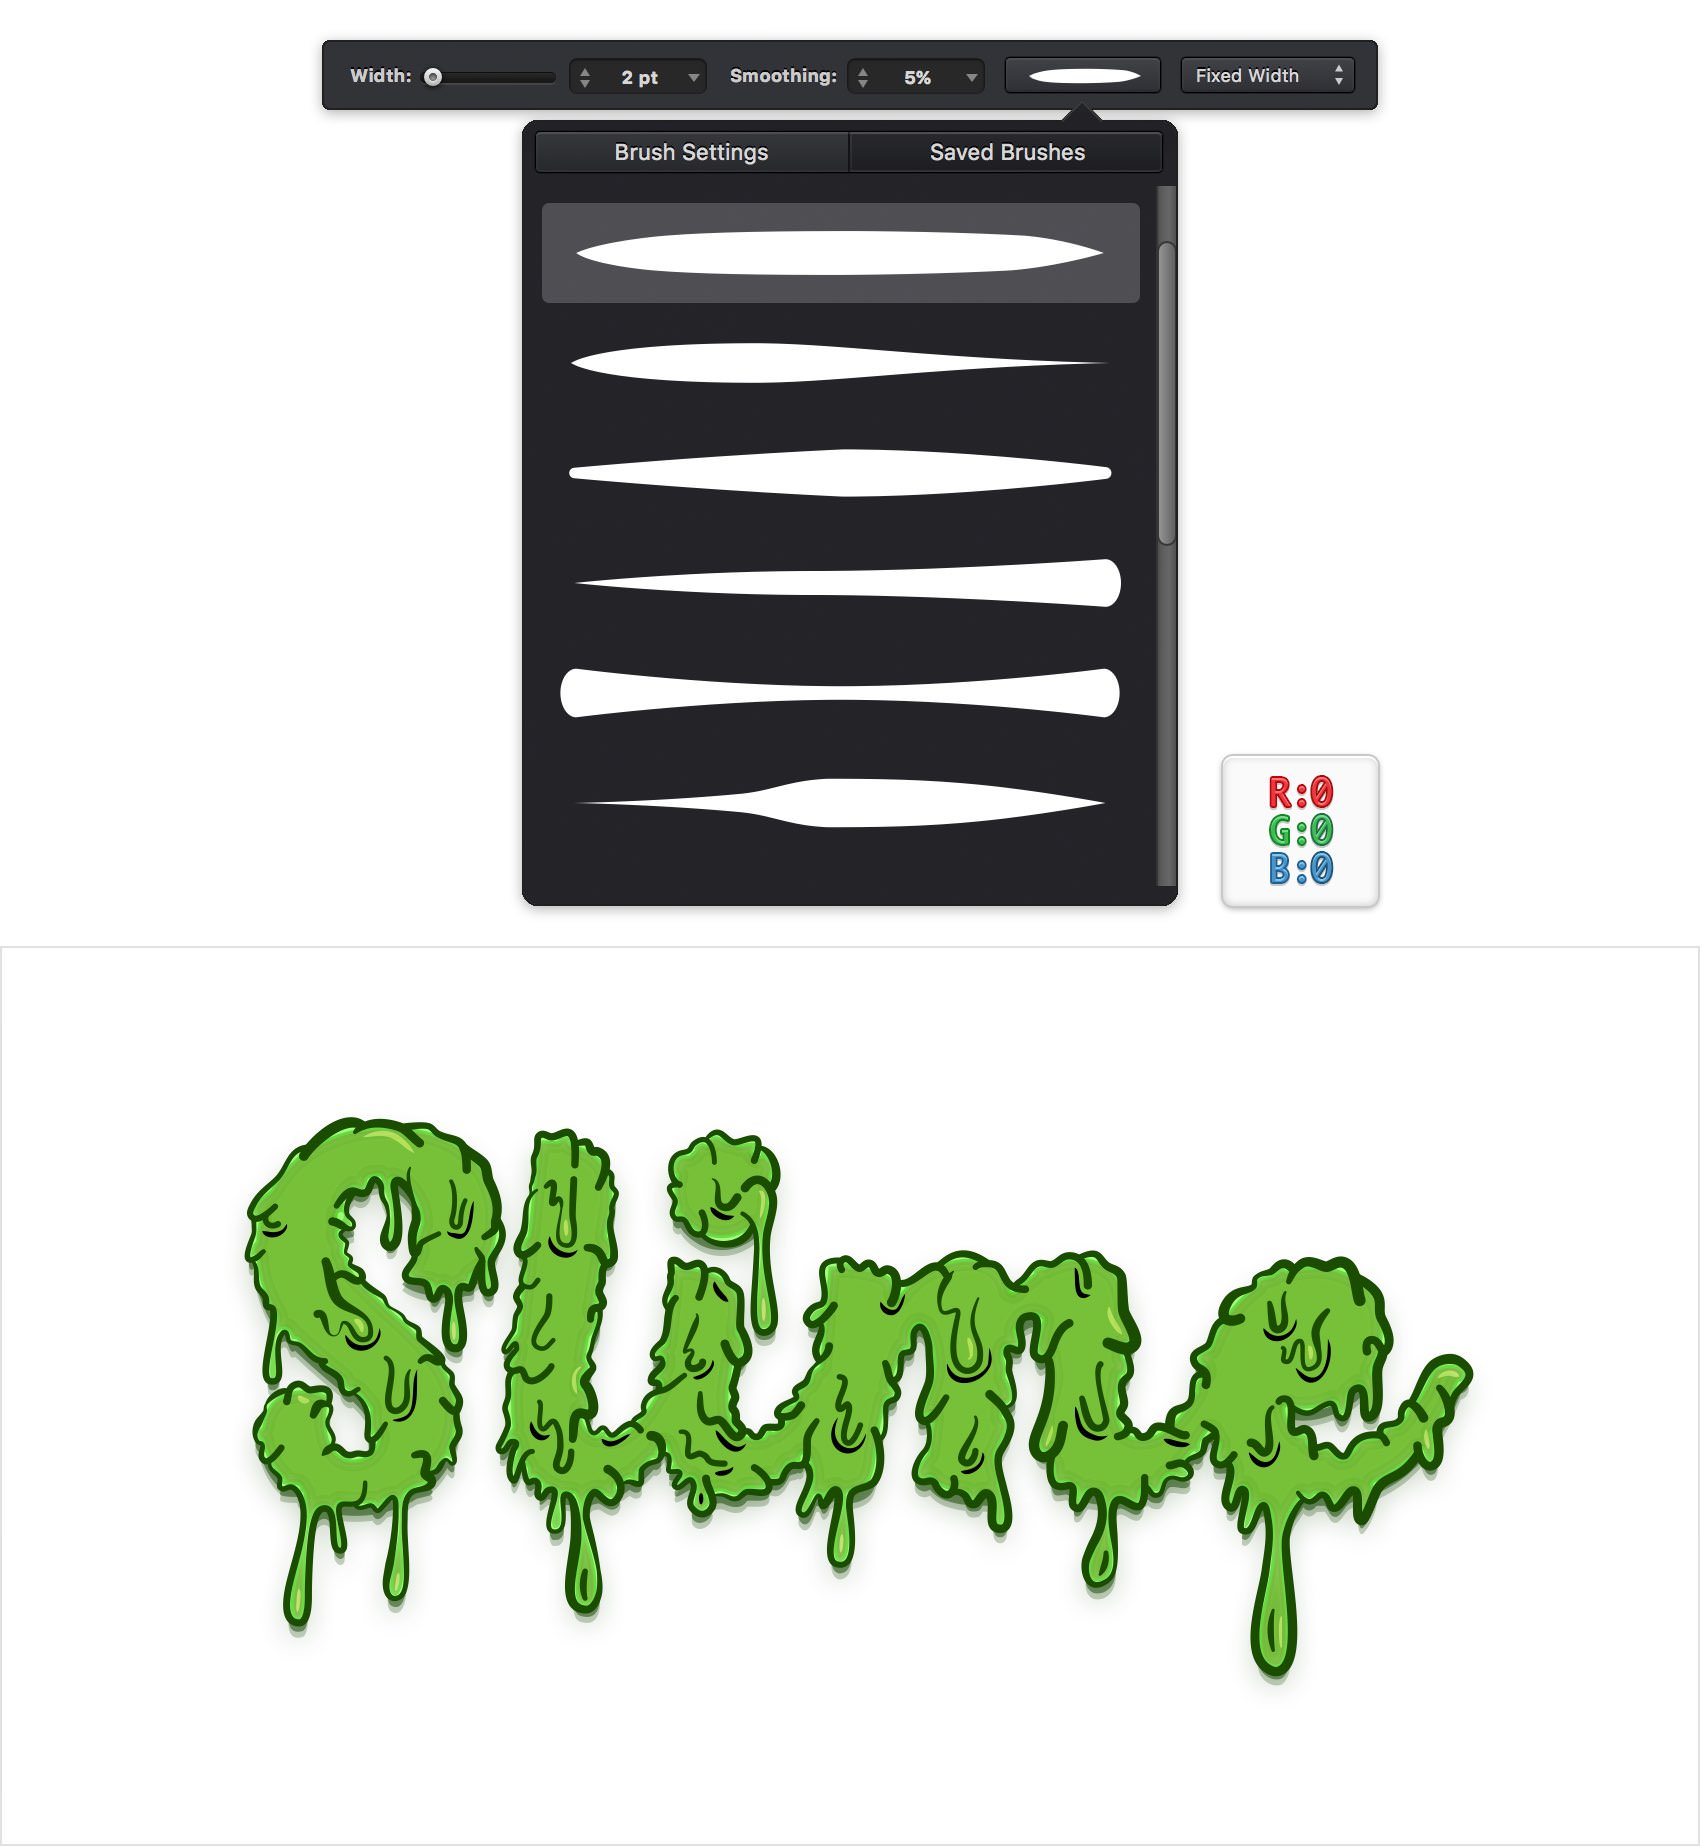
Pick the Brush Tool (B) and make sure that the same brush used in the previous step is still active. Set the stroke color to black and then draw several, subtle paths below the dripping section from your text roughly as shown in the following image.
Step 21
Make sure that all the paths from your "black" layer are selected and focus on the Effects section from the Appearance pane. Select the Stroke and change the Blend Mode to Soft Light.
Step 22
Focus on the Layers pane, add a new layer and name it "dots 3". Drag it in the top of the pane and make sure that it stays selected.
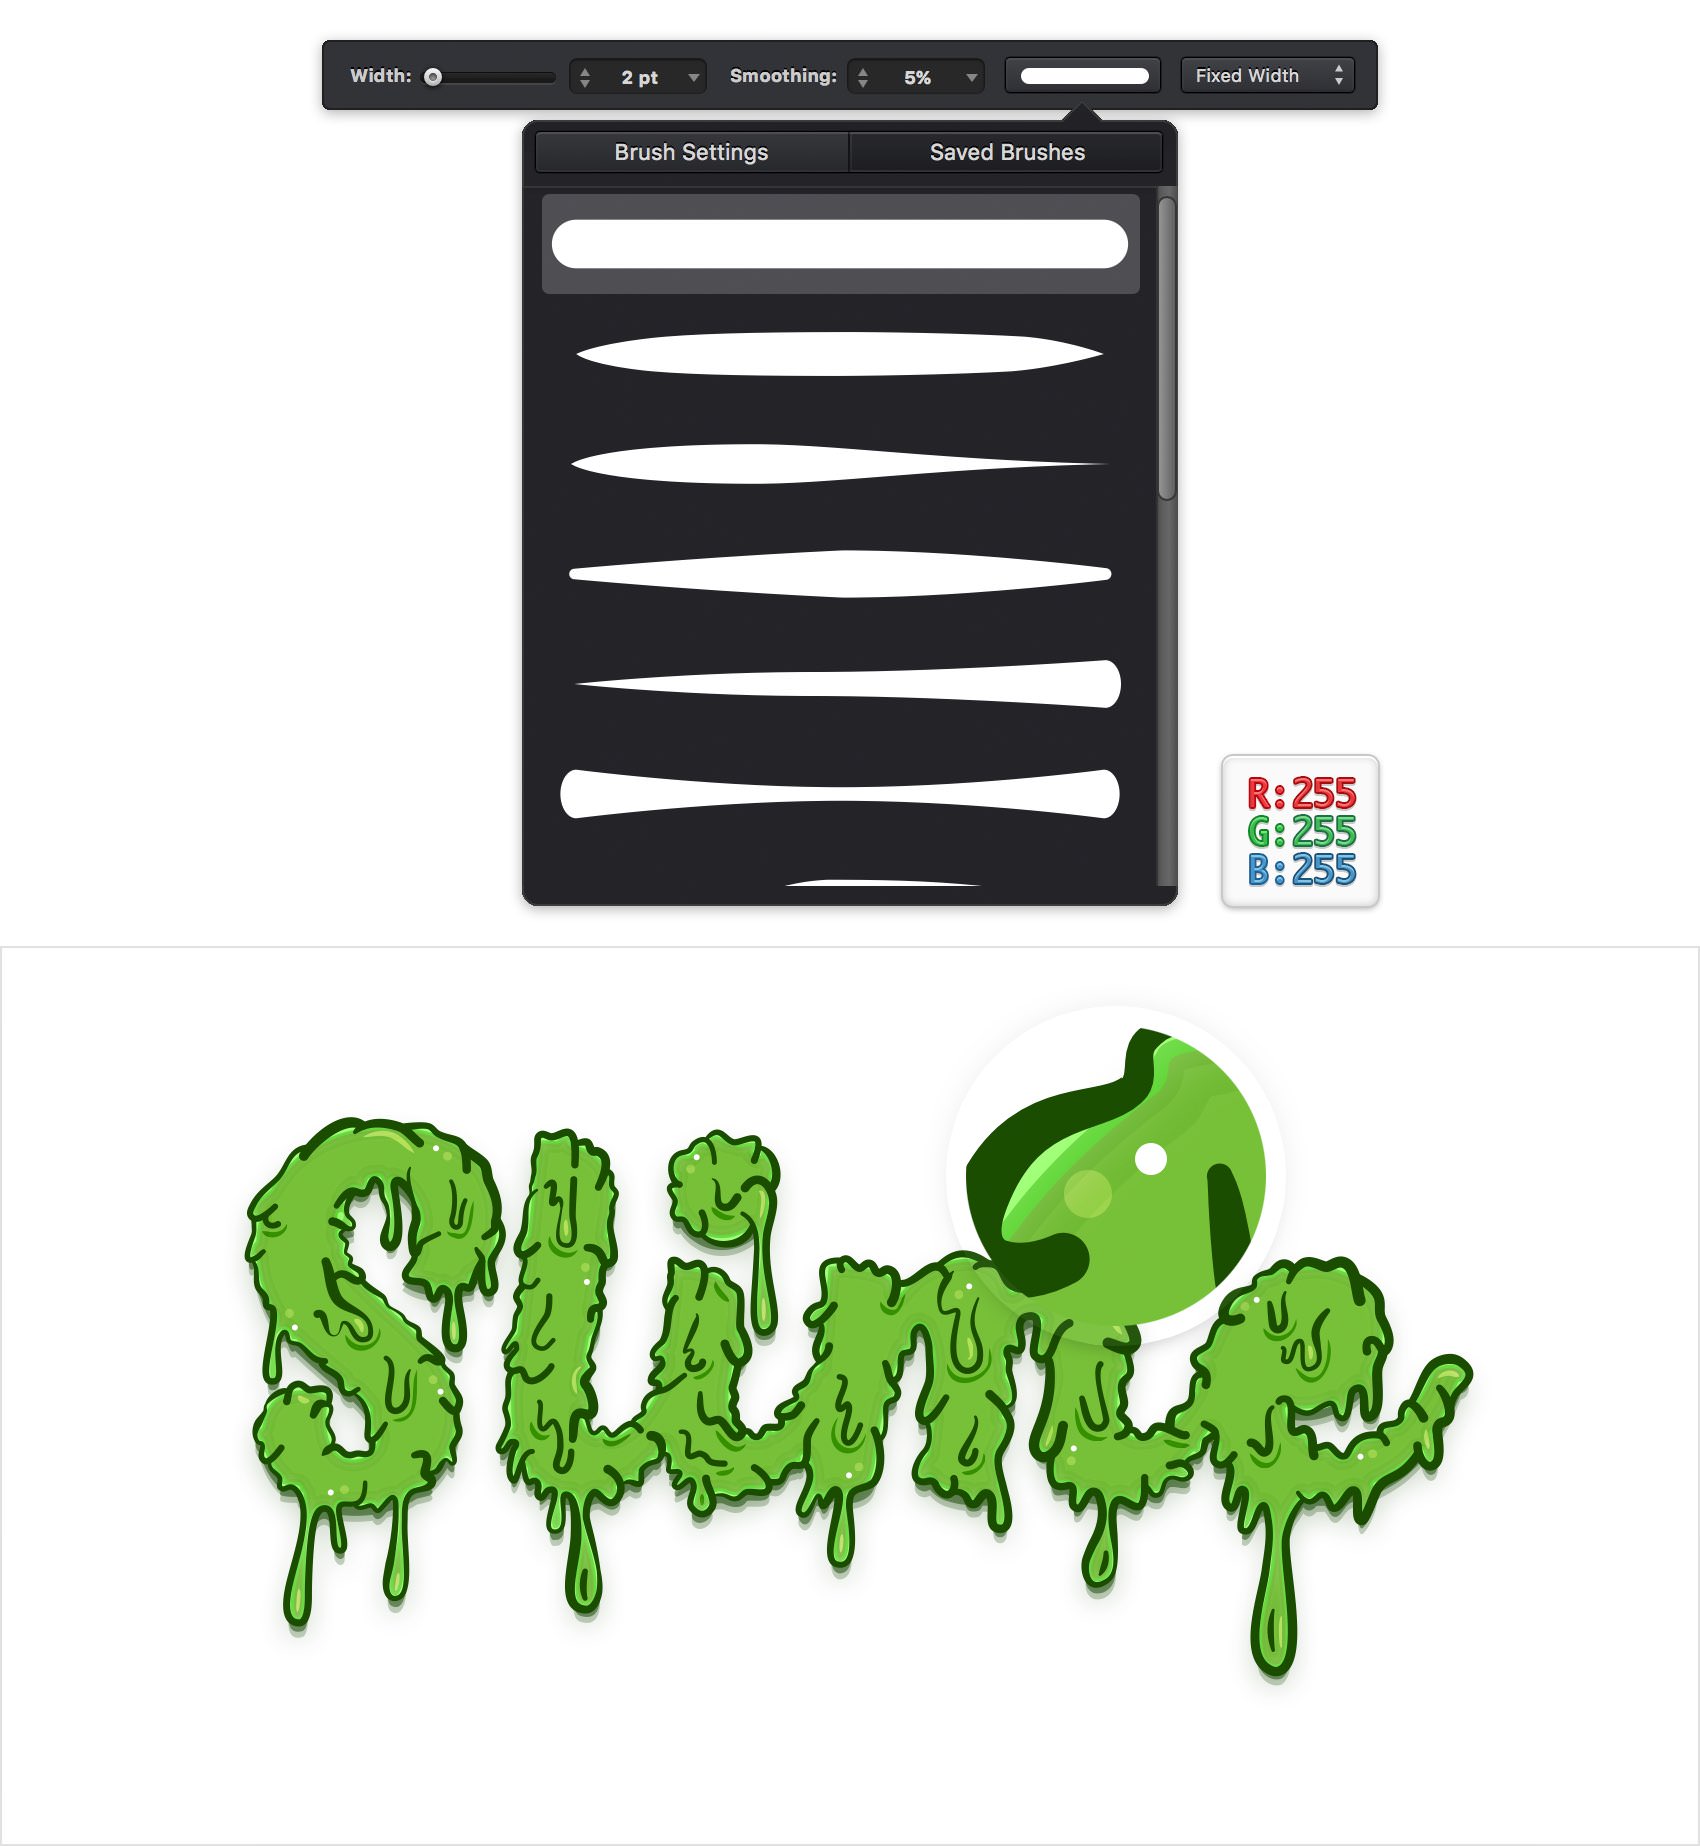
Pick the Brush Tool (B) and focus on the tool options bar. Drag the Width slider to 3 pt, keep the Smoothing at 5% and then open the Saved Brushes fly-out window. Select the brush that you saved in the beginning of the tutorial, set the stroke color to white and then click on your canvas to easily add a 3 px dot. Use this technique to add a bunch of similar dots and spread them roughly as shown in the following image.
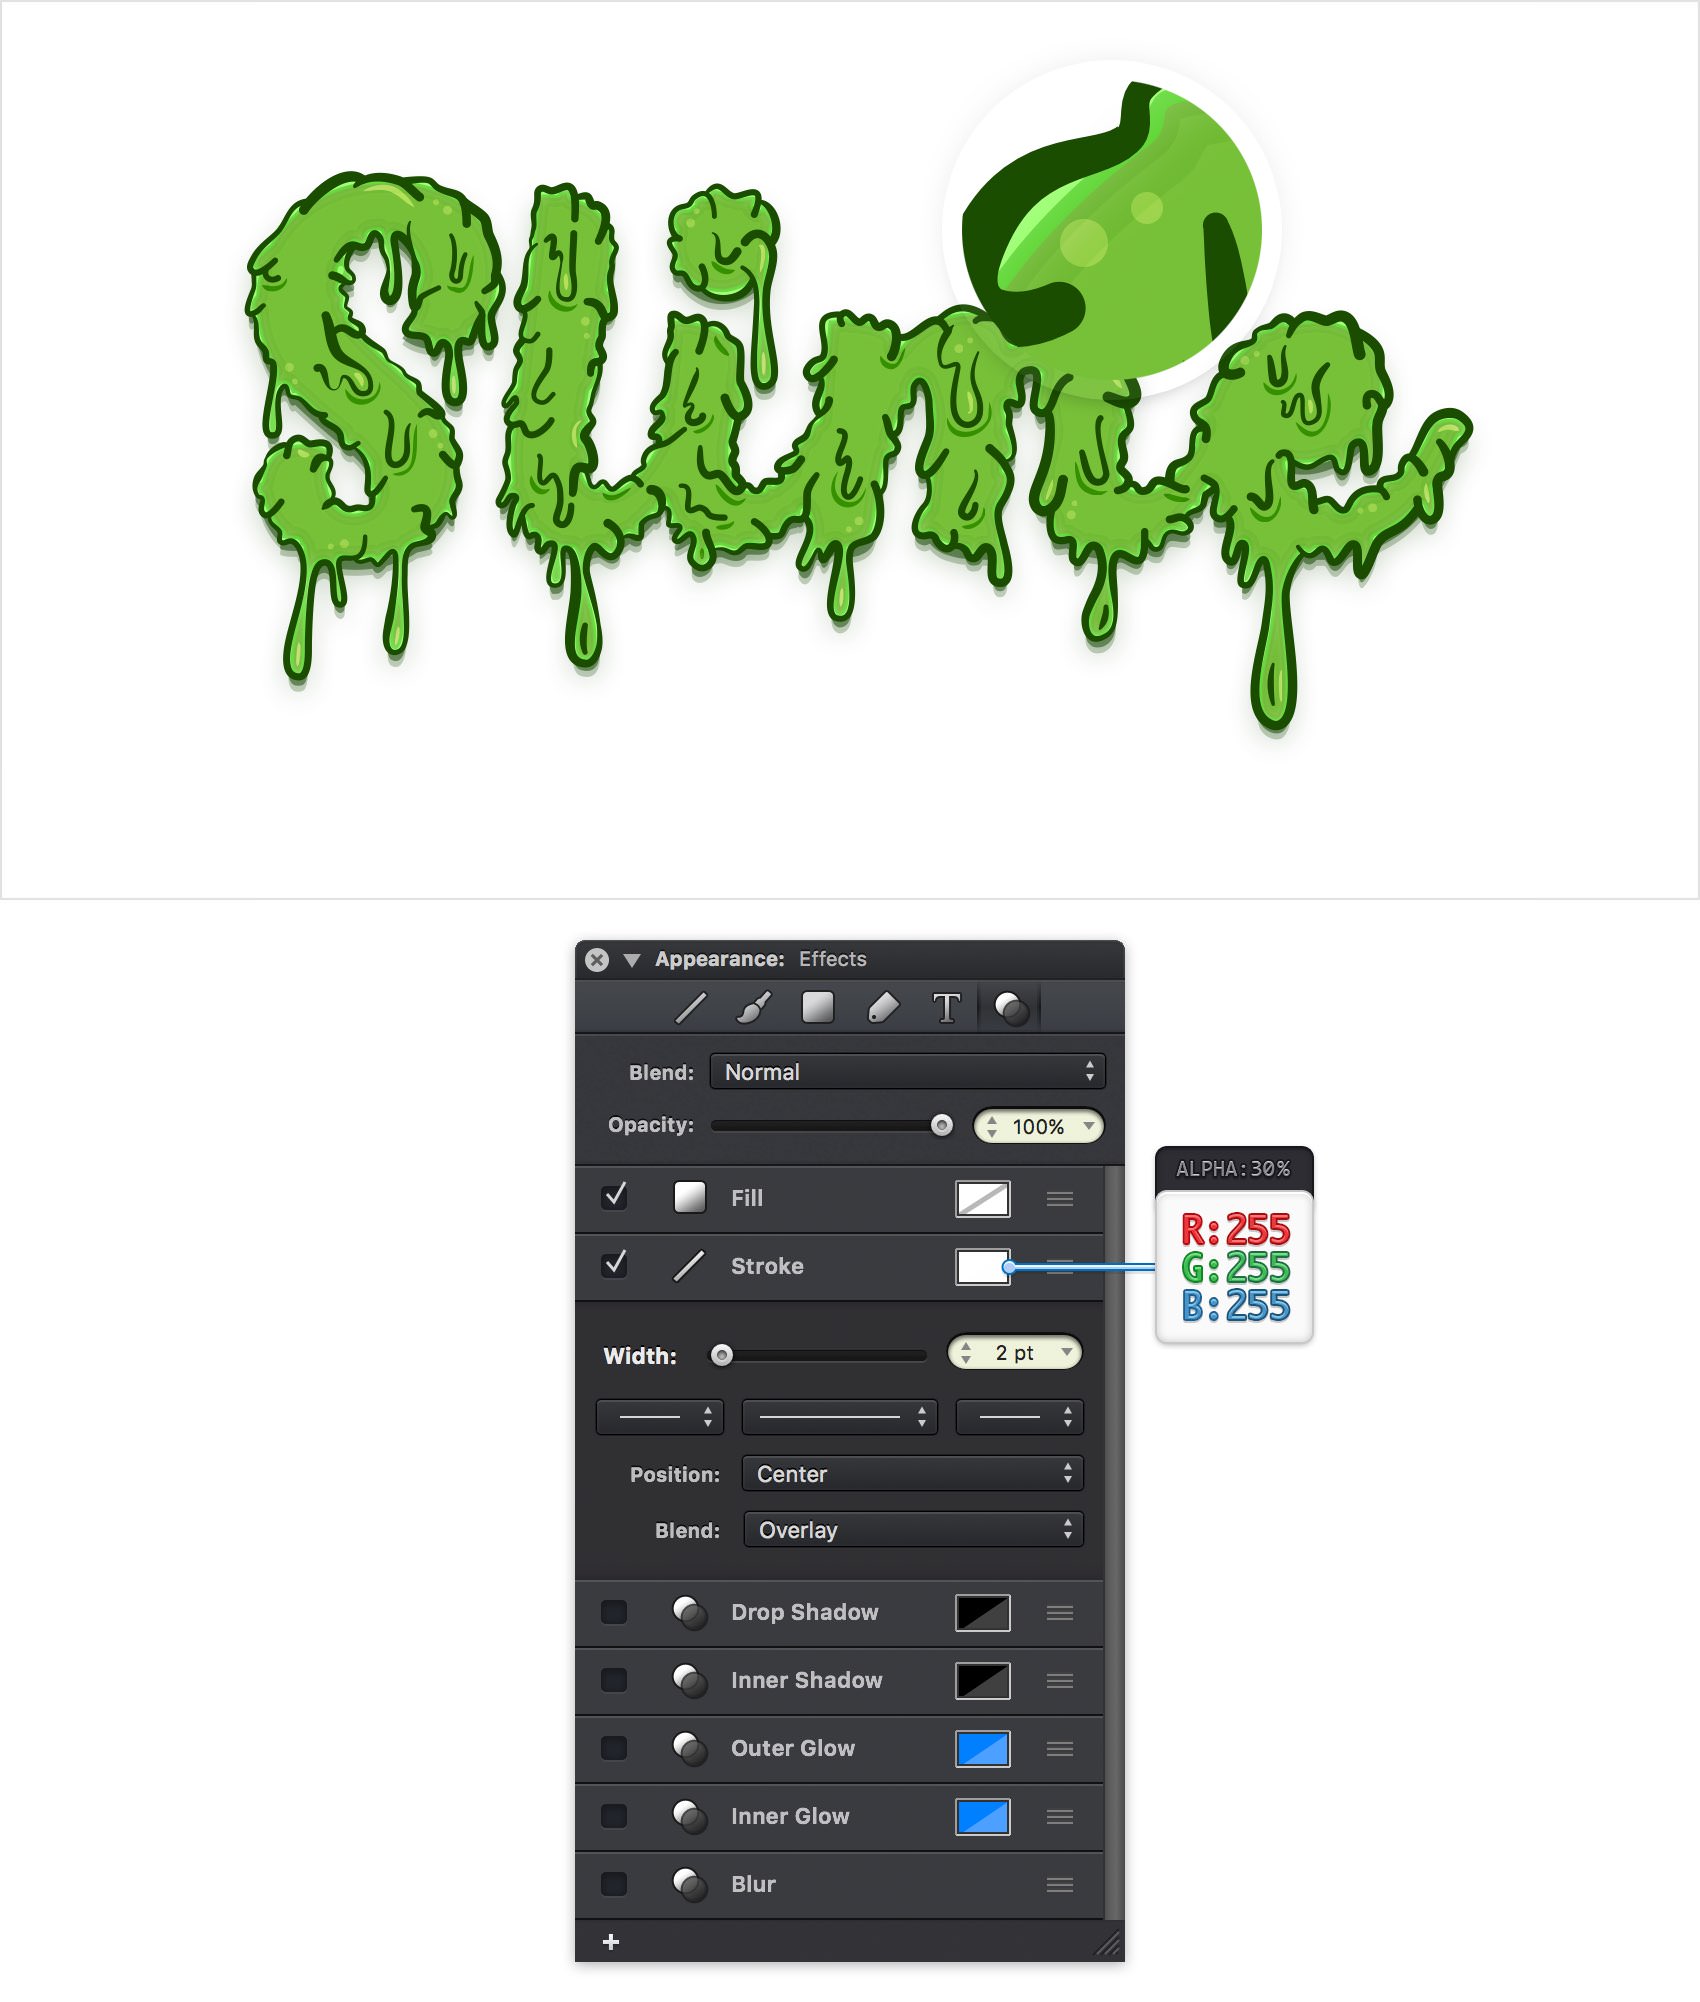
Step 23
Make sure that all the points from your "dots 3" layer are selected and focus on the Effects section from the Appearance pane. Select the Stroke, change the Blend Mode to Overlay and then open its color panel and drag the Alpha slider to 30%.
Step 24
Focus on the Layers pane, add a new layer and name it "dots 2". Drag it in the top of the pane and make sure that it stays selected.
Pick the Brush Tool (B) and decrease the Width slider to 2 pt. Move to your canvas and add a bunch of 2 px dots near those 3 px dots roughly as shown in the following image.
Step 25
Make sure that all the points from your "dots 2" layer are selected and focus on the Effects section from the Appearance pane. Select the Stroke, change the Blend Mode to Overlay and then open its color panel and drag the Alpha slider to 30%.
Step 26
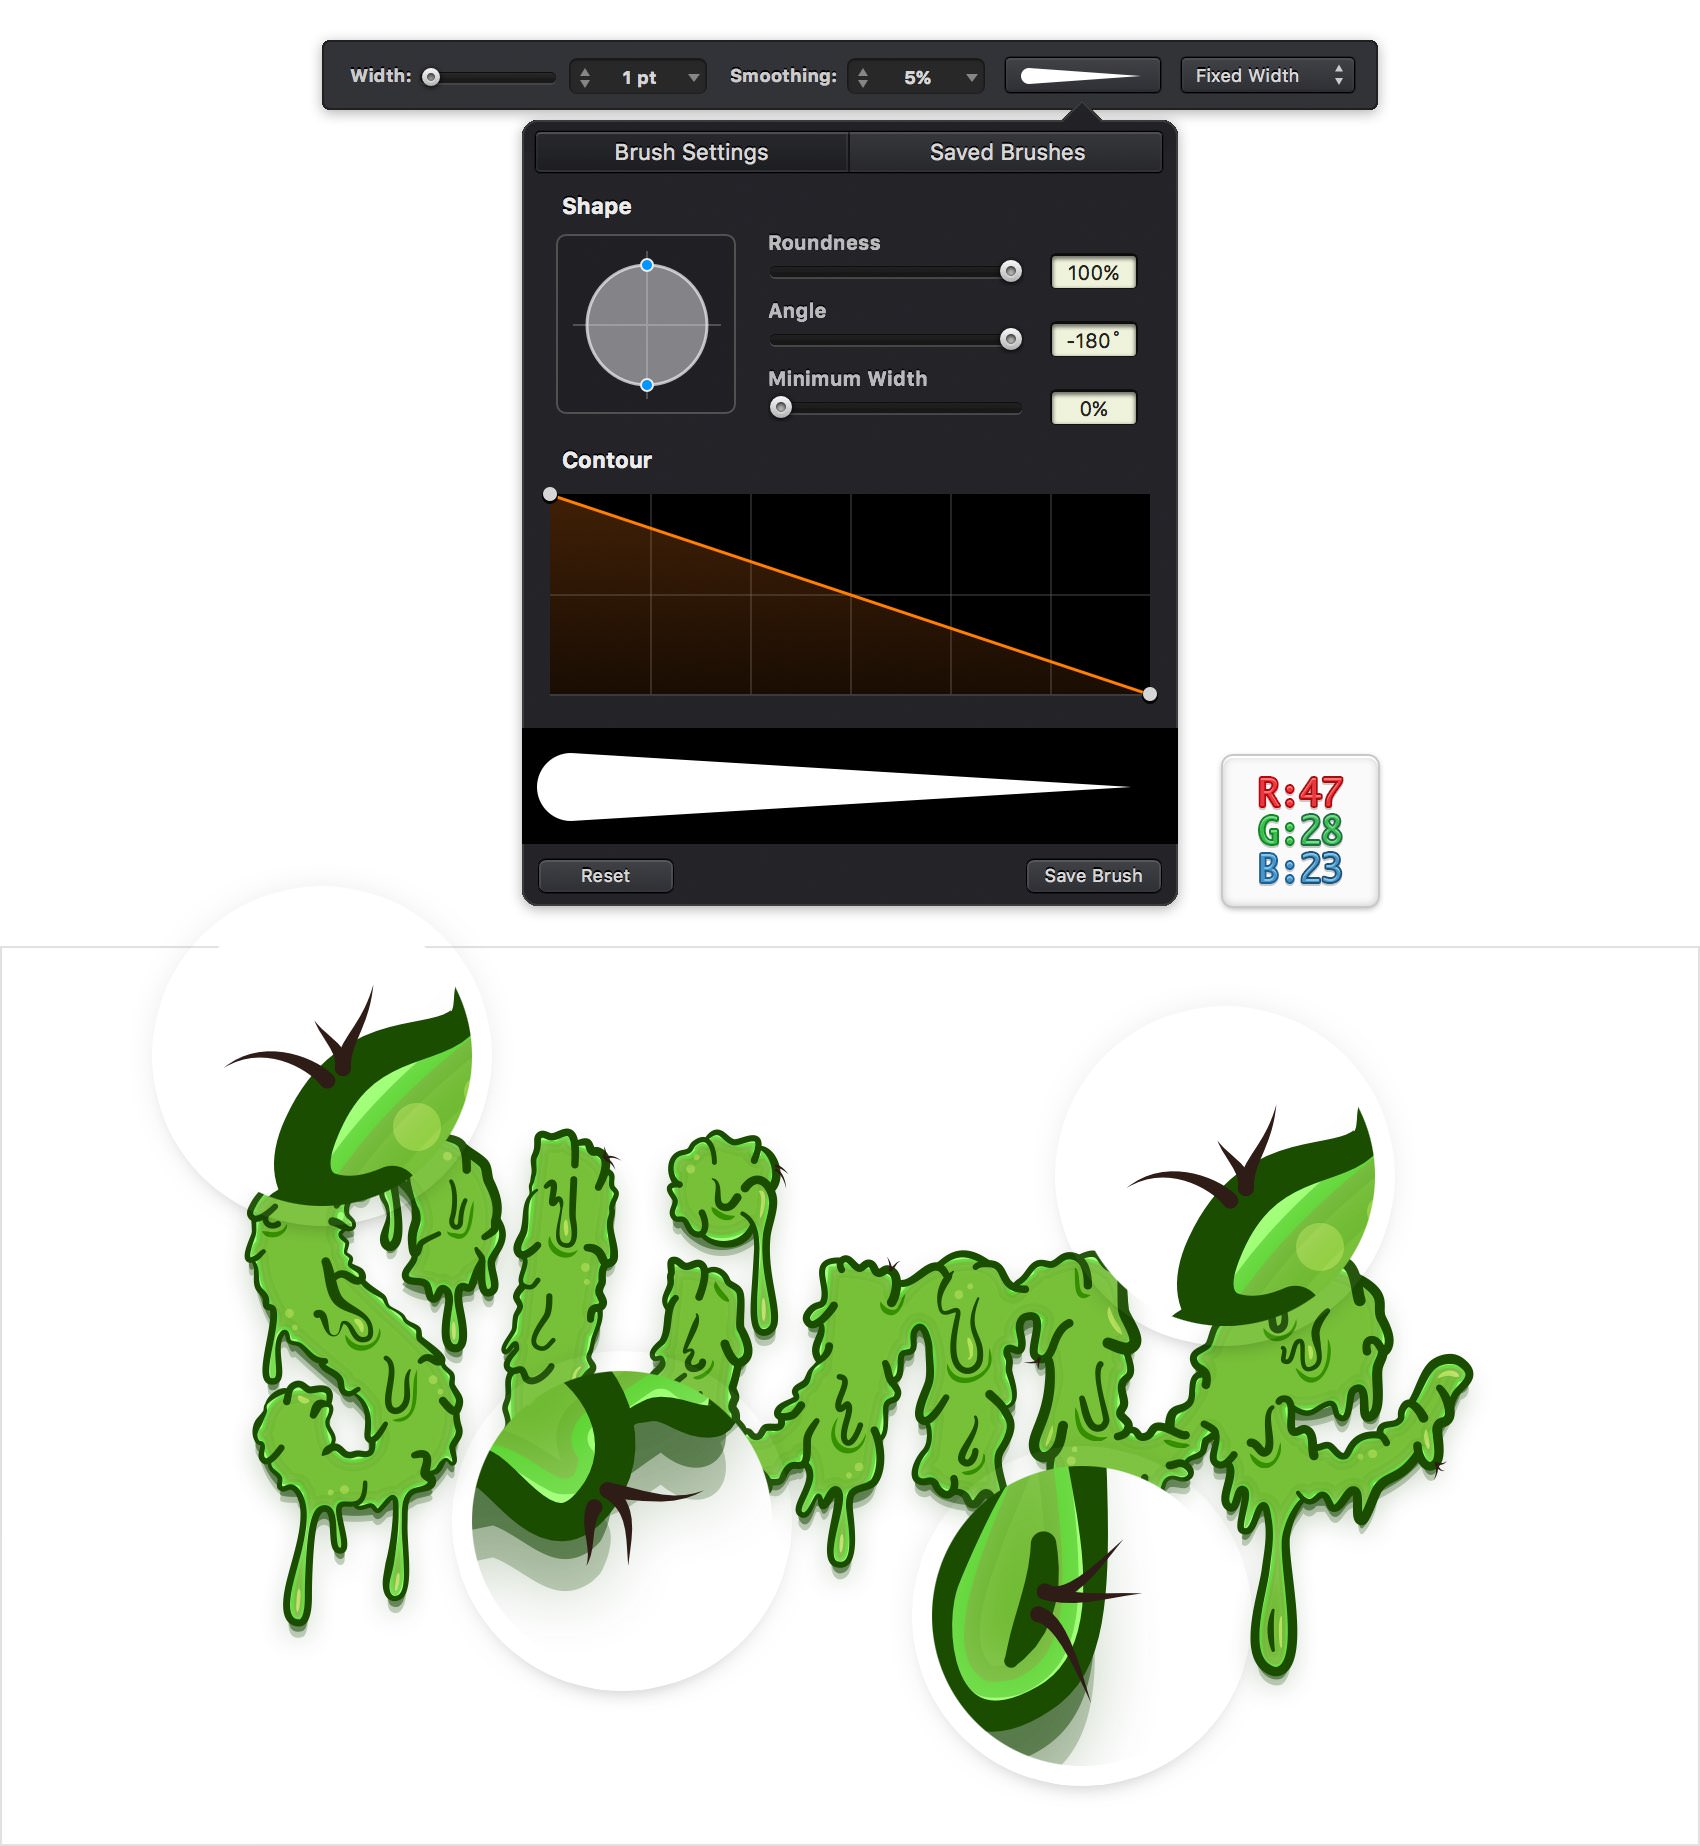
Focus on the Layers pane, add a new layer and name it "hair". Drag it in the top of the pane and make sure that it stays selected.
Pick the Brush Tool (B) and focus on the tool options bar. Drag the Width slider to 1 pt, keep the Smoothing at 5% and then open the Brush Settings fly-out window. Drag the Roundness slider to 100%, ignore the other two sliders and then move to the Contour section. Select the left end of that orange path and drag it in the top, left corner and then select the other end and drag it in the bottom, right corner.
Now, set the stroke color to R=47 G=28 B=23 and use this brush to add some tiny hair pieces across your text as shown in the following image.
Step 27
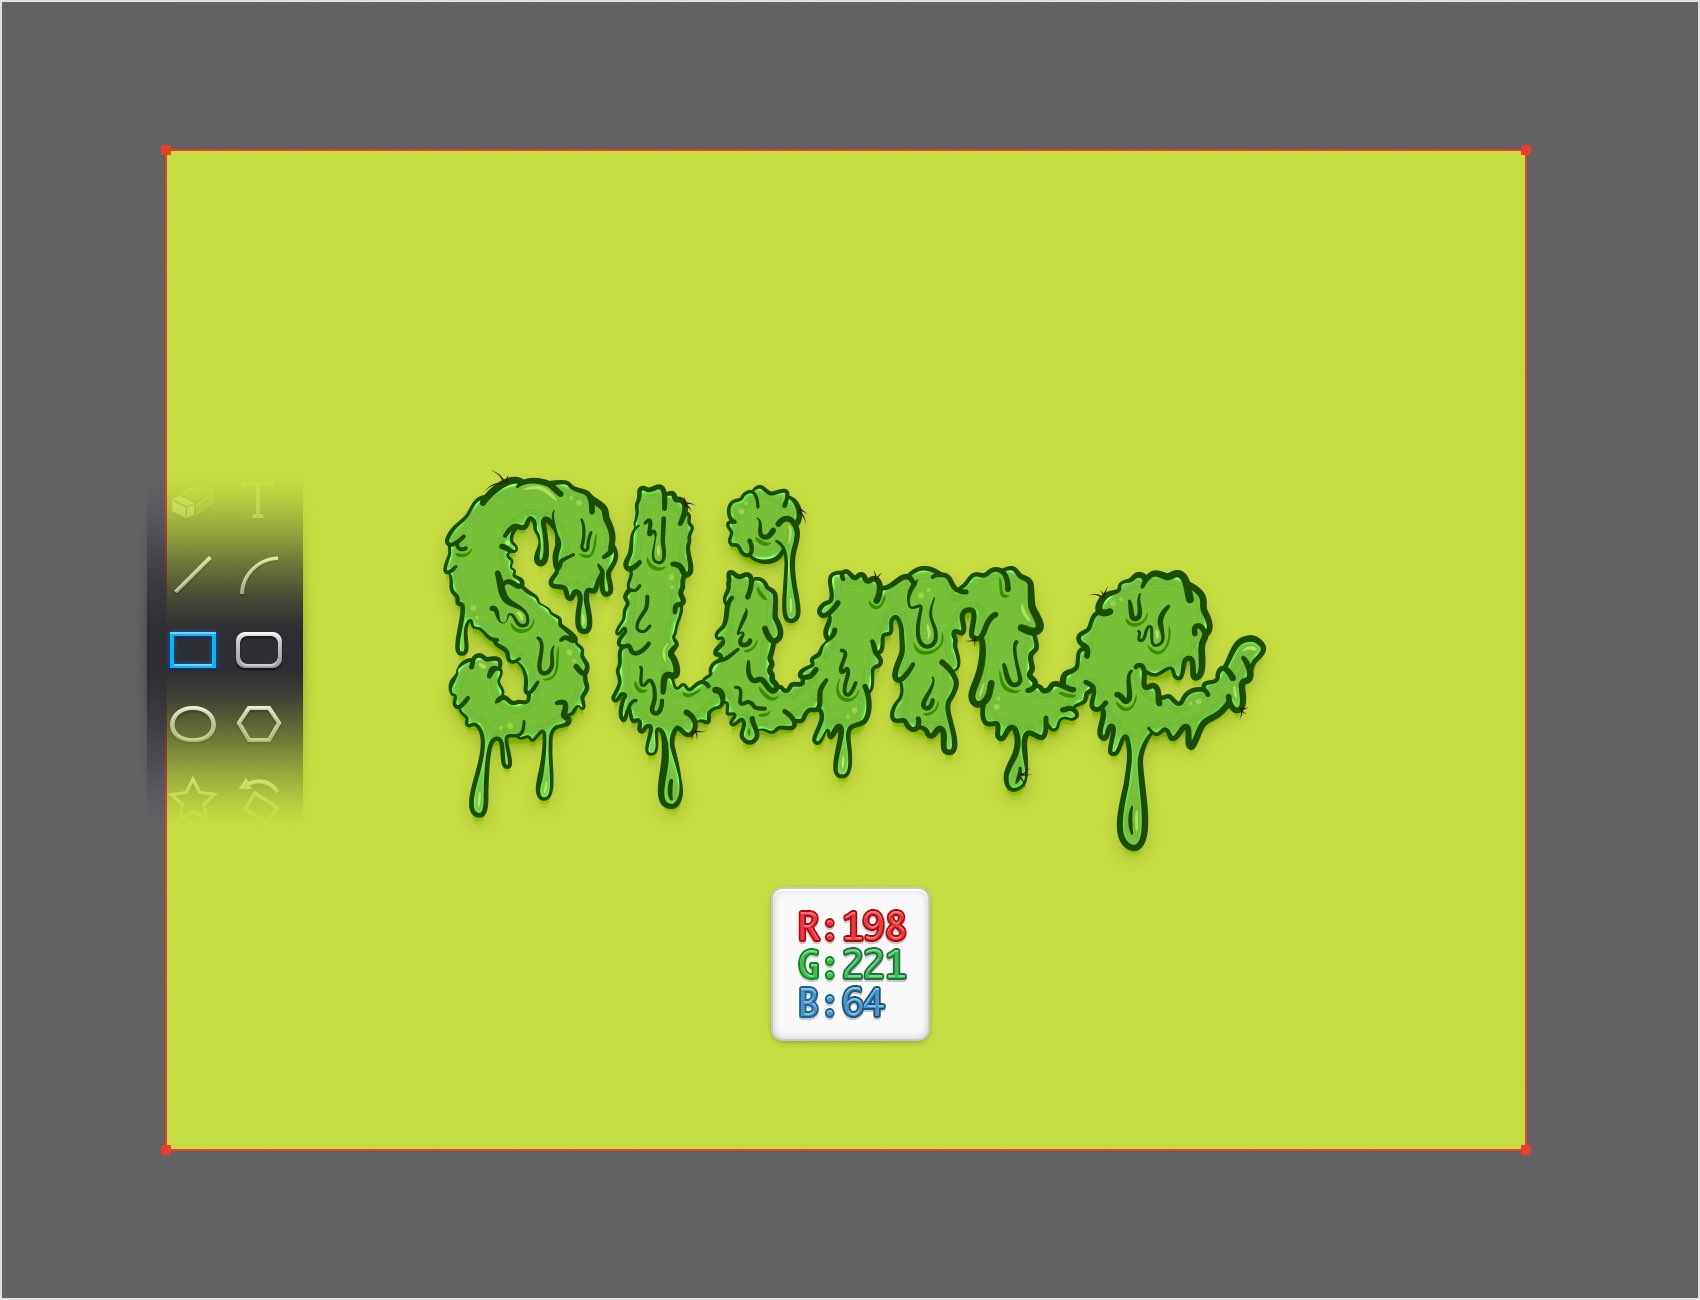
Finally, return to the Layers pane and add one last layer. Drag it in the bottom of the pane, name it "background" and make sure that it stays selected. Pick the Rectangle Tool (M), create a shape the size of your canvas and fill it with R=198 G=221 B=64.
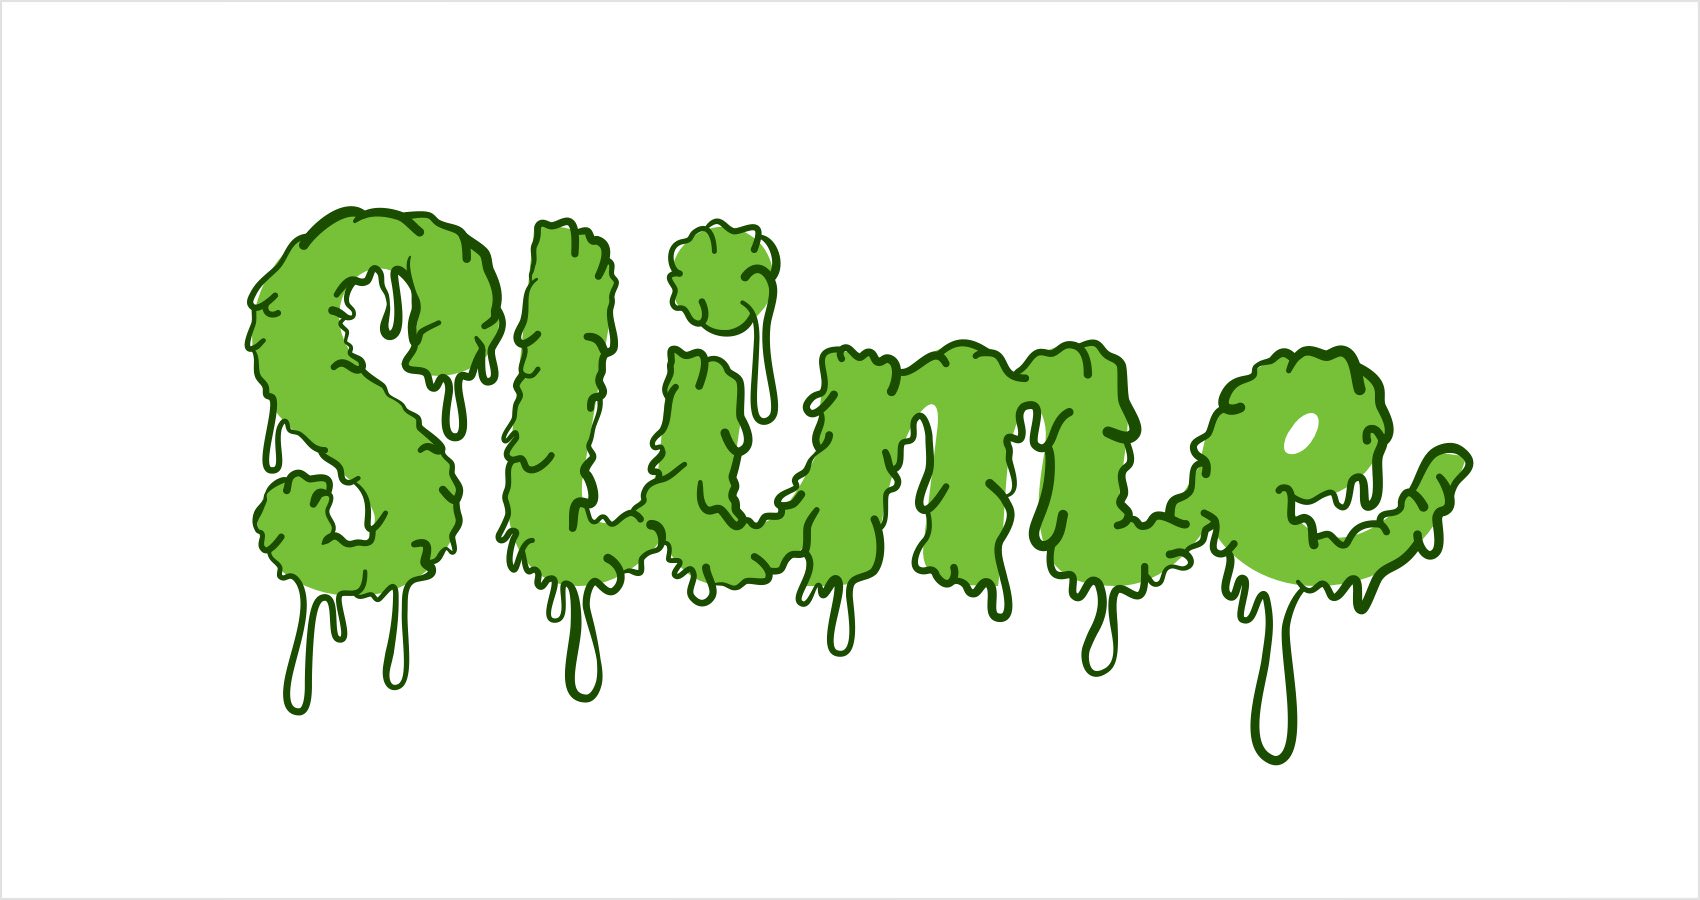
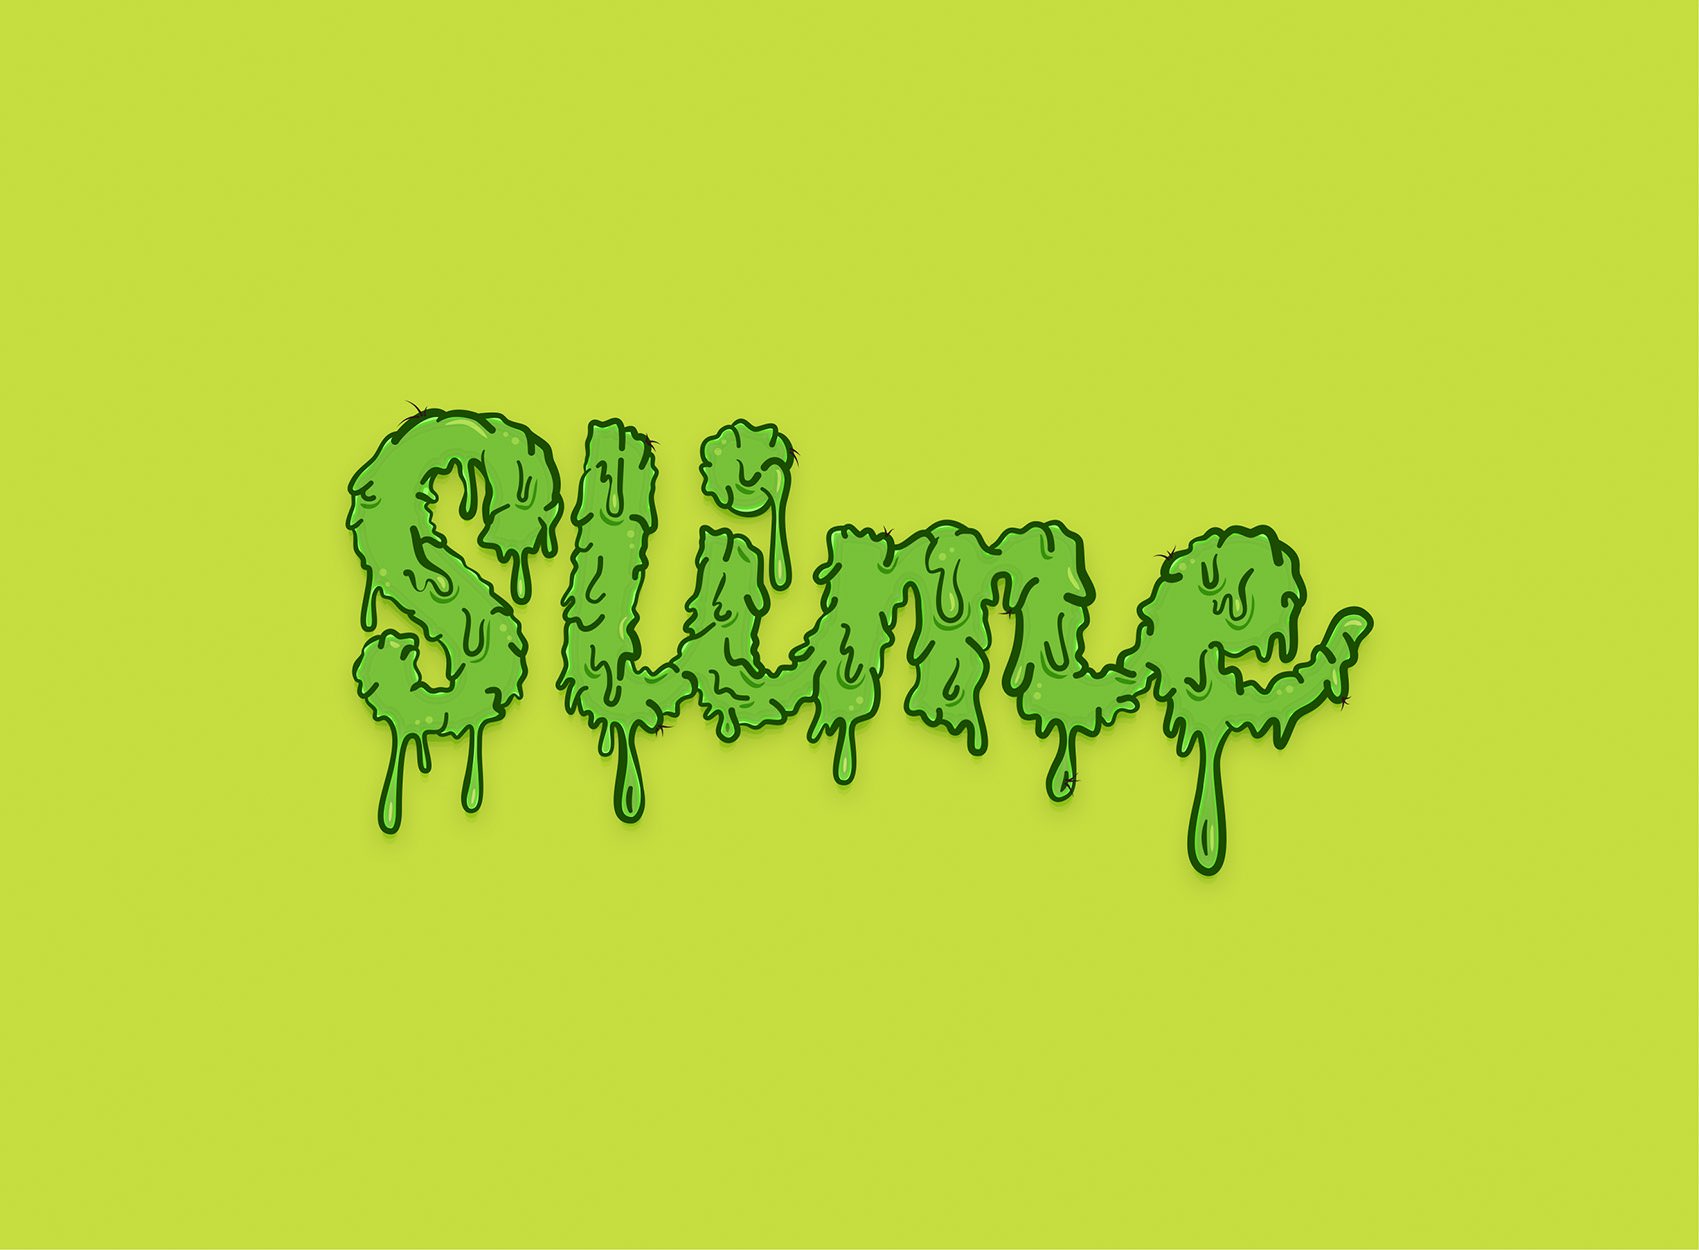
Finished Design
Congratulations, you've finished the tutorial!
Hope you've enjoyed learning some of the techniques and processes presented in these steps. As always, feel free to adjust the final design and make it your own.
Download Graphic File:
SlimeText.idraw